How to Use Ninja Form Widget in Happy Elementor Addons
You can now display various stylist forms using Ninja Form Widget with Happy Elementor Addons. You can also embed the form to add to the desired page where you want to show. The installation process is pretty much similar to the other. So install Ninja Form to your website now.
Adding Ninja Form Widget:
You can see the below video to get an insight into how you can use the Ninja Form Widget to create beautiful designs. Or you can follow the documentation whichever you find convenient.
Step 1:
Select Ninja Form Widget from the left sidebar and drag it to the empty area.
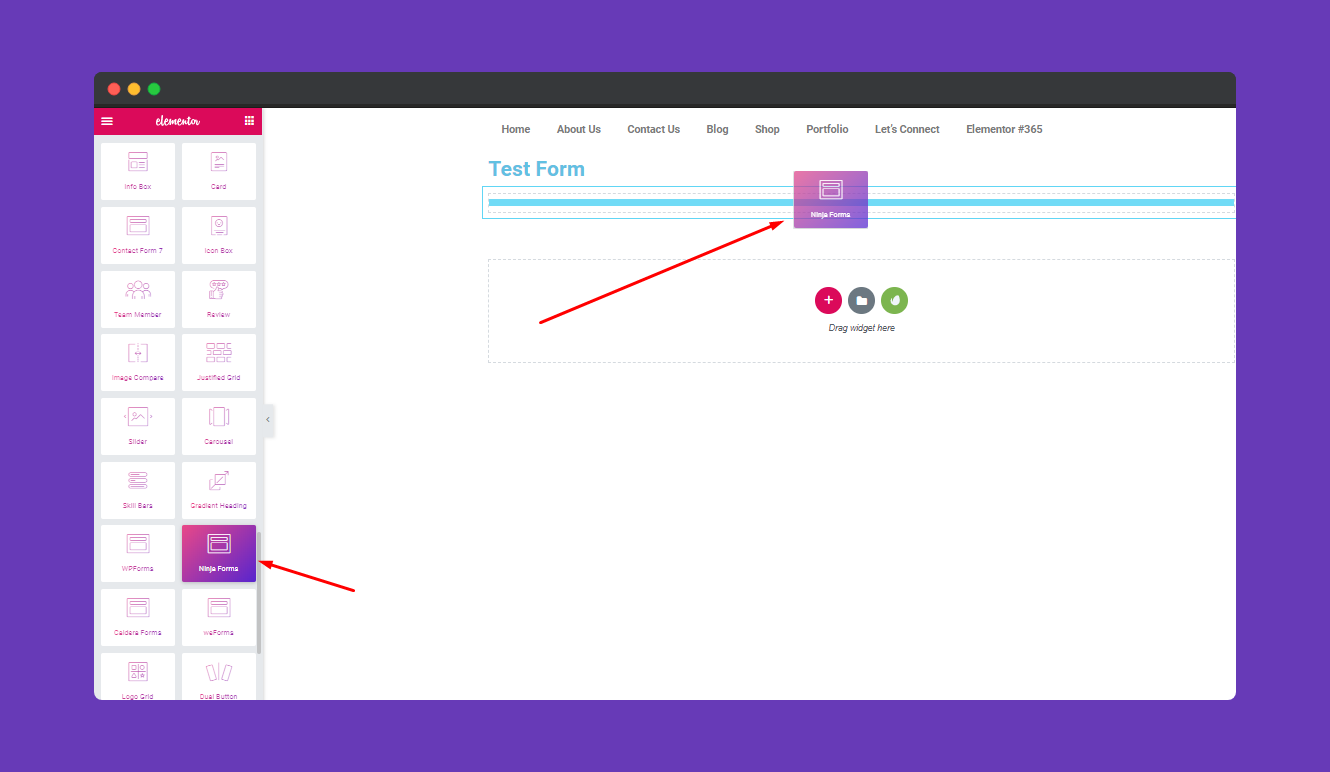
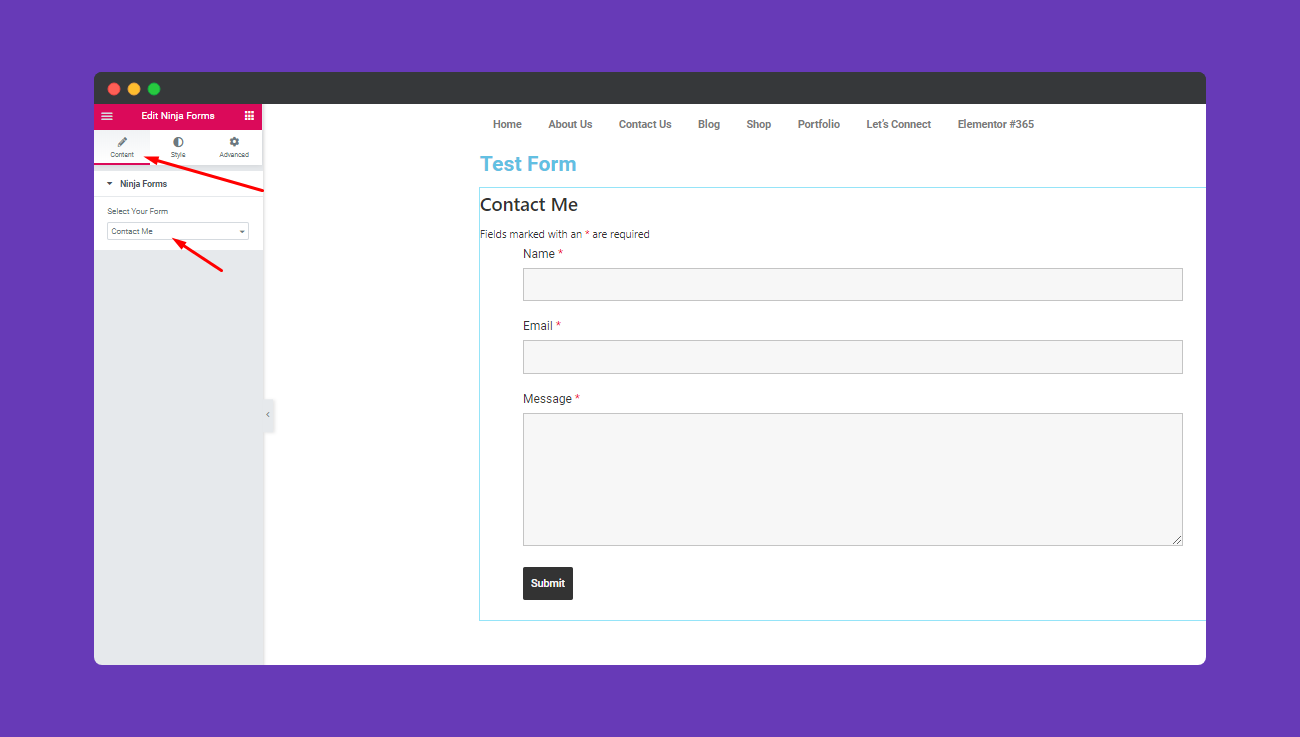
Next, select the form you created.
Step 2:
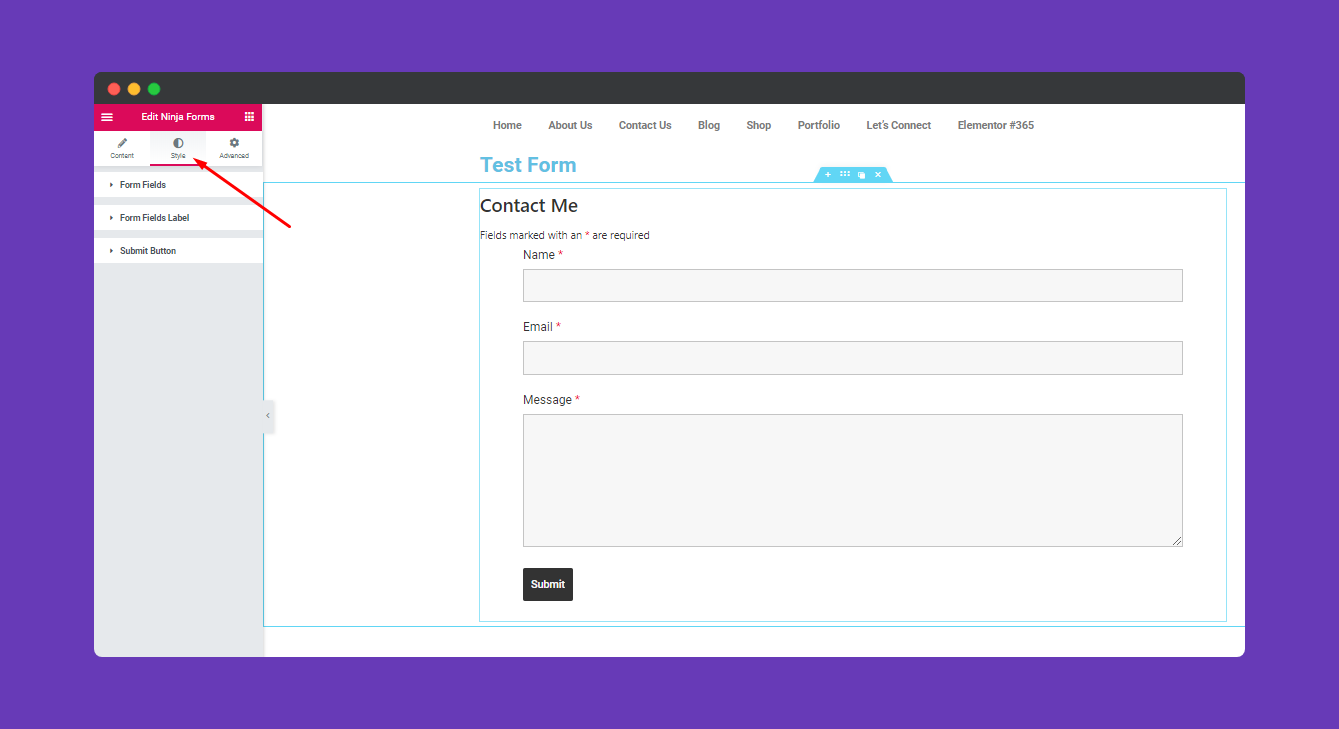
To design your form you can experience these settings. So select the “Style “. Then click on the “Forms Field” area.
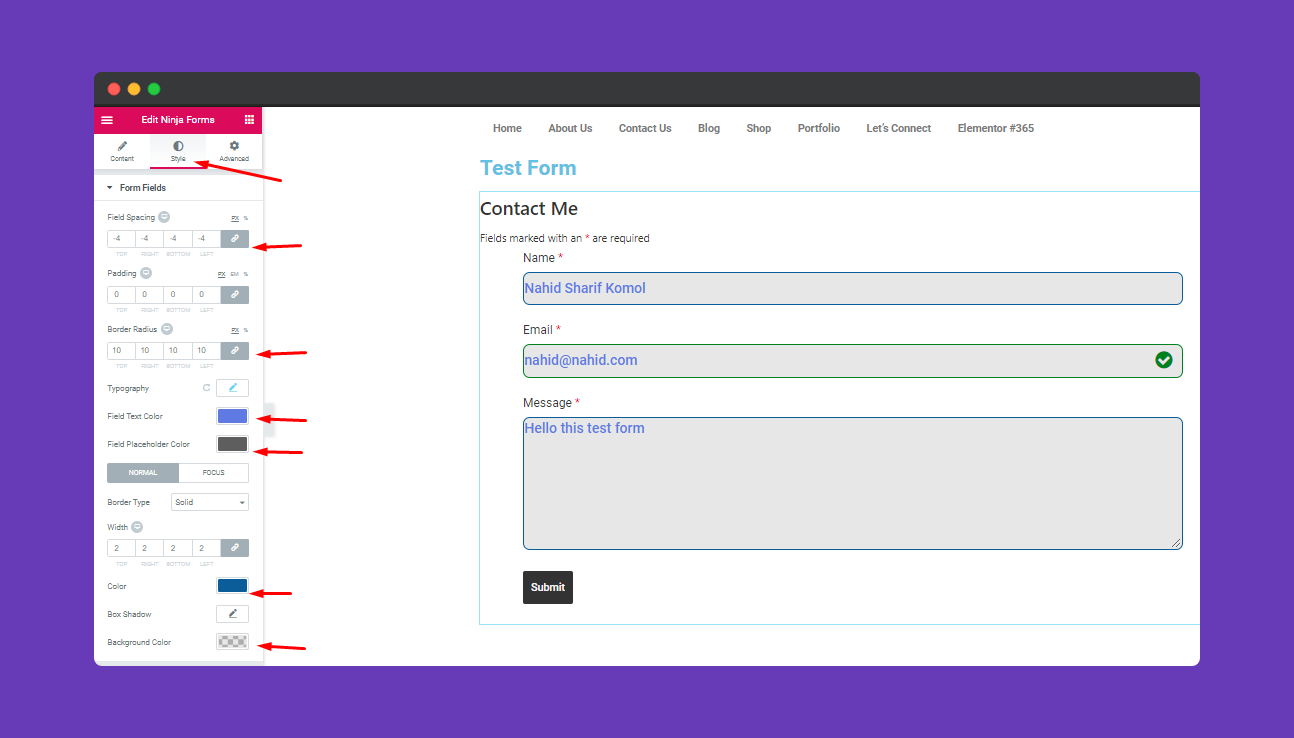
After clicking on the “Form Fields”, you’ll get more options to stylize your form. Like other sections here you’ll able to edit field spacing, padding, border-radius, typography, field text color, box-border, box-shadow, and background color, etc.
Step 3:
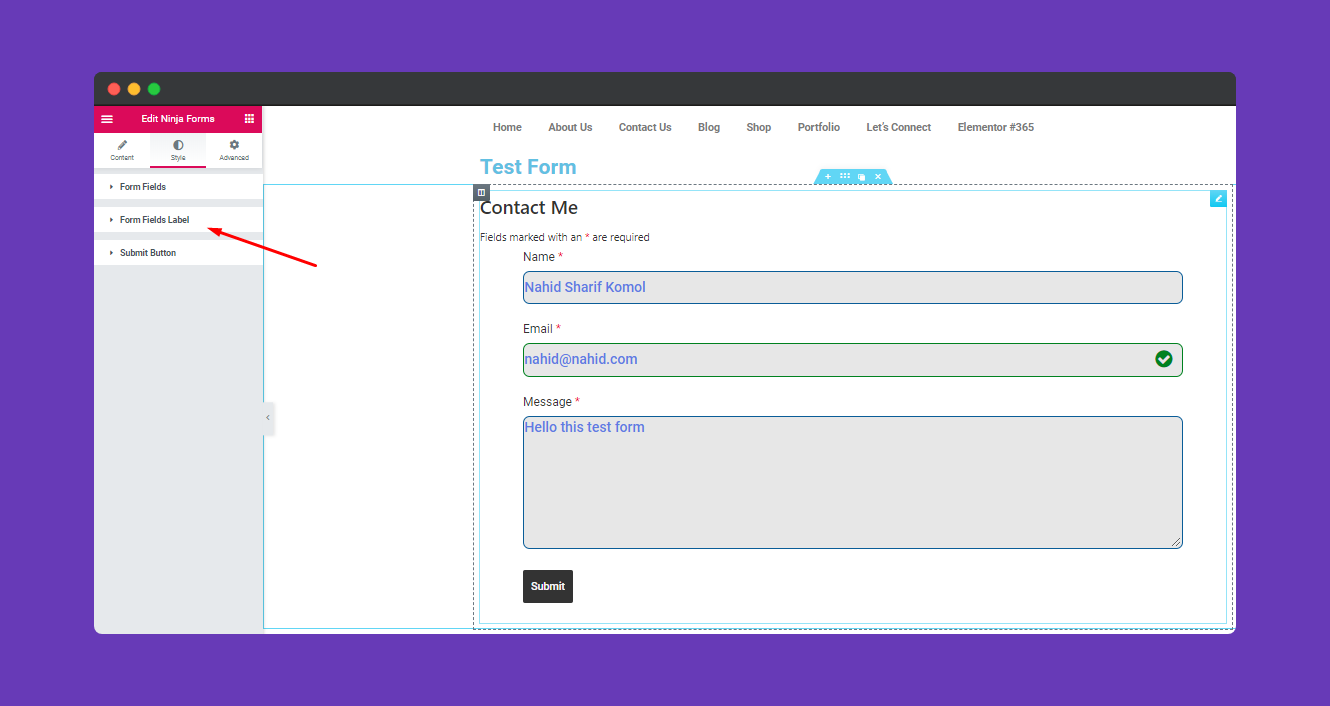
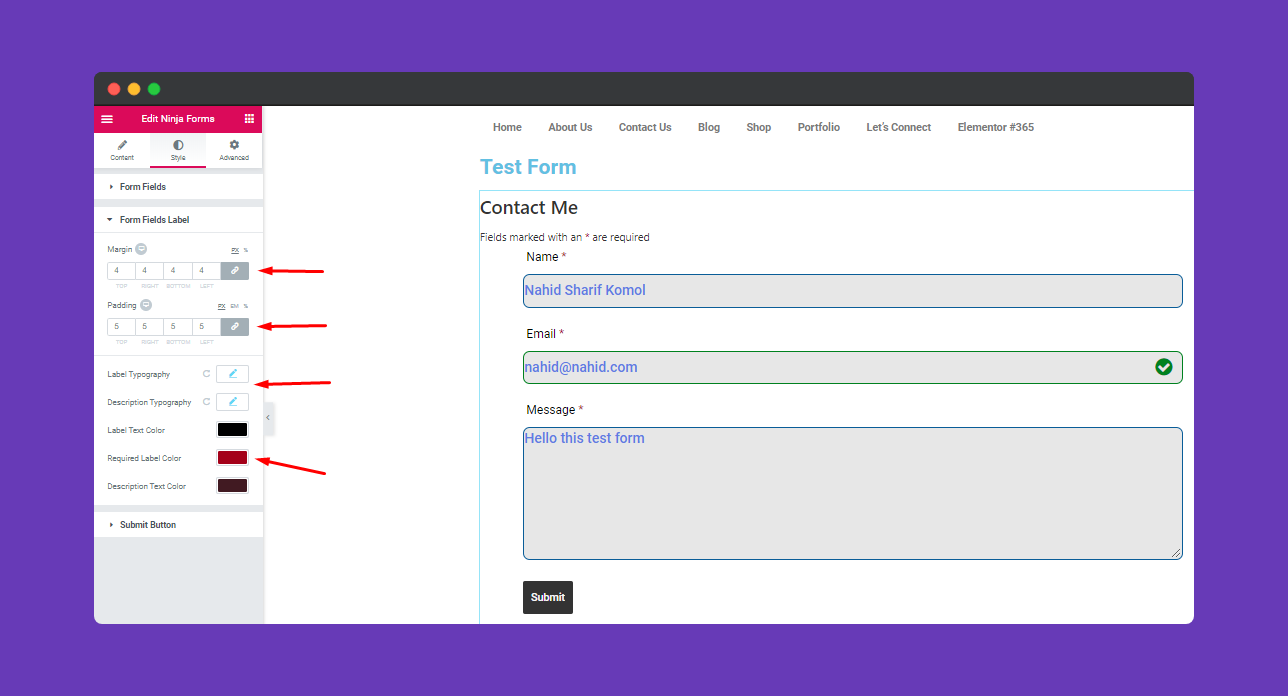
Next, you’ll get “Form Fields Label“. In this area, you can easily edit your form’s label
In this area, you can easily edit your form’s label. Now edit the way you want to keep your form. Here you’ll have margin, padding, label typography, label text, required text color, description text color, etc.
Step 4:
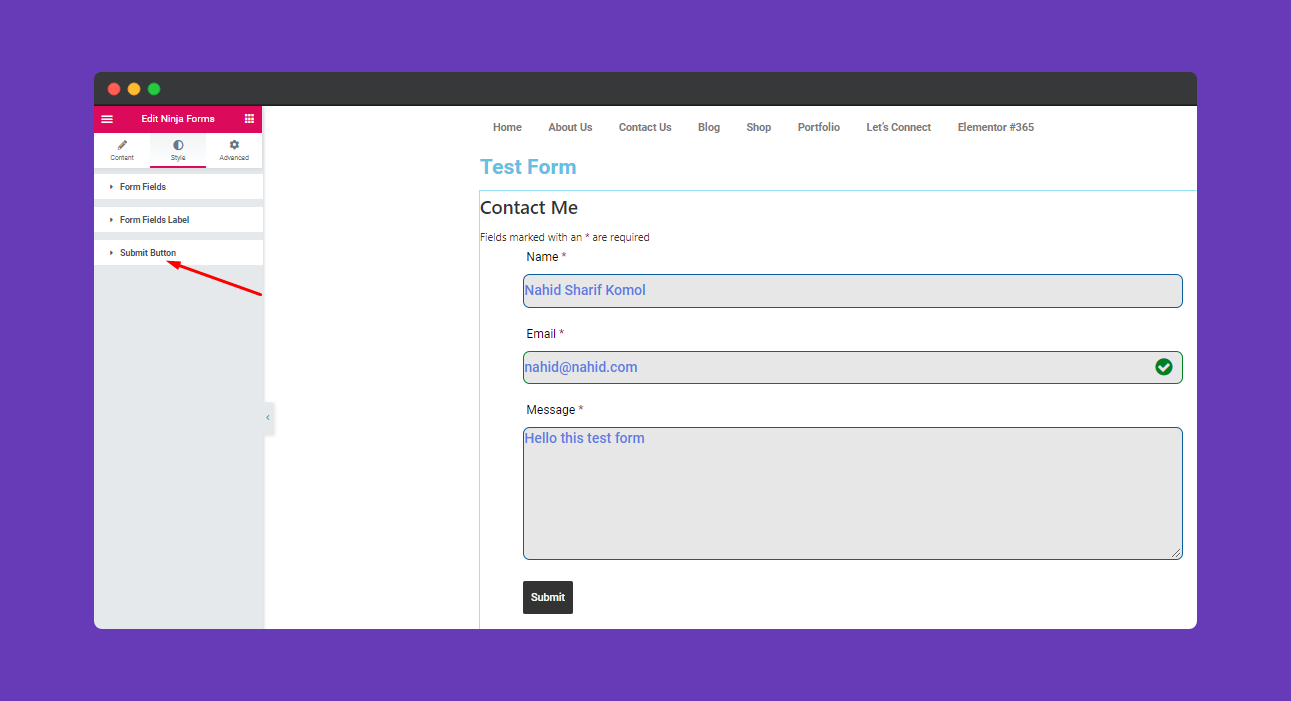
After that select the “submit button” to edit the “submit area”.
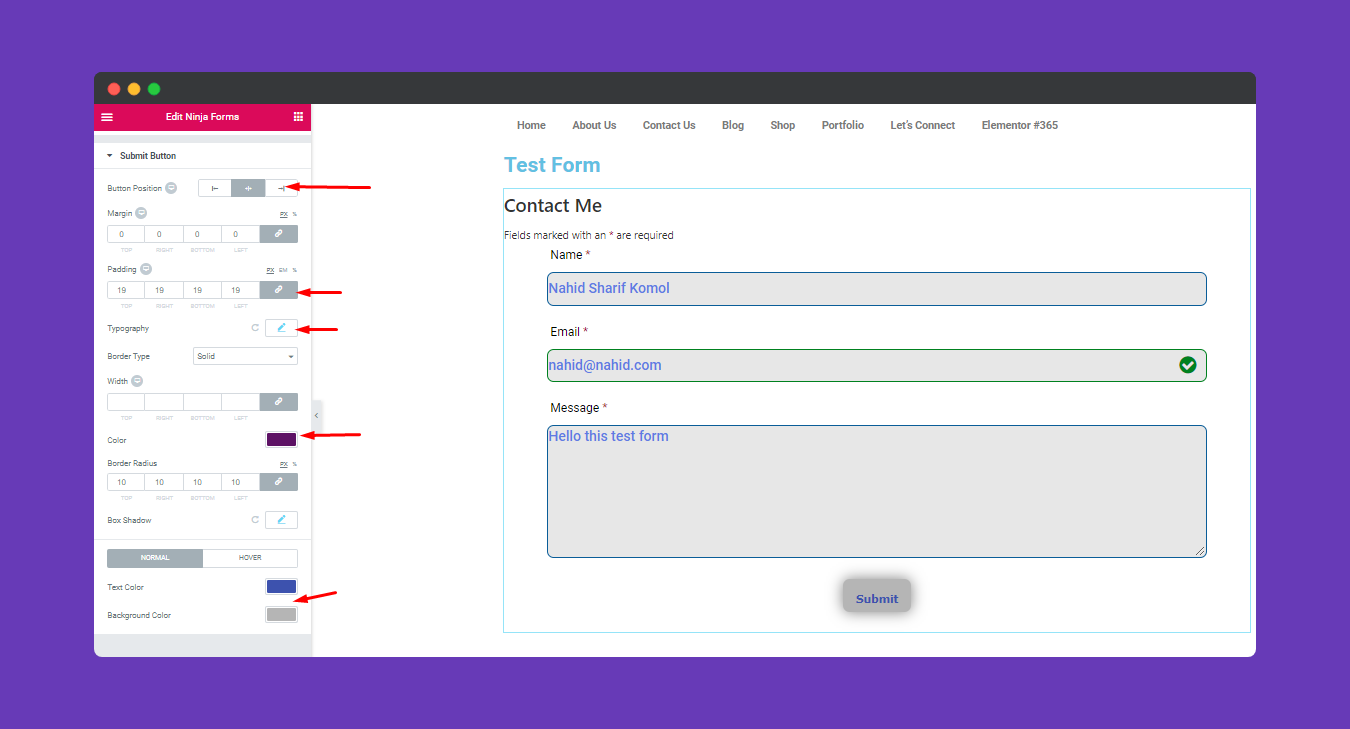
Like the other section, you’ll also see the same window for this section. You can change the position of your submit button. Then you’ll have margin, padding, typography, border type, border-radius, box-shadow, text color, and background color, etc.
Step 5:
If you want to add motion effects, happy effects, background or make the page responsive, click on ‘Advanced‘ to explore those options. the ‘Advanced’ is a default feature of Elementor. Give a read to this Document to know more about Advanced features and its uses.
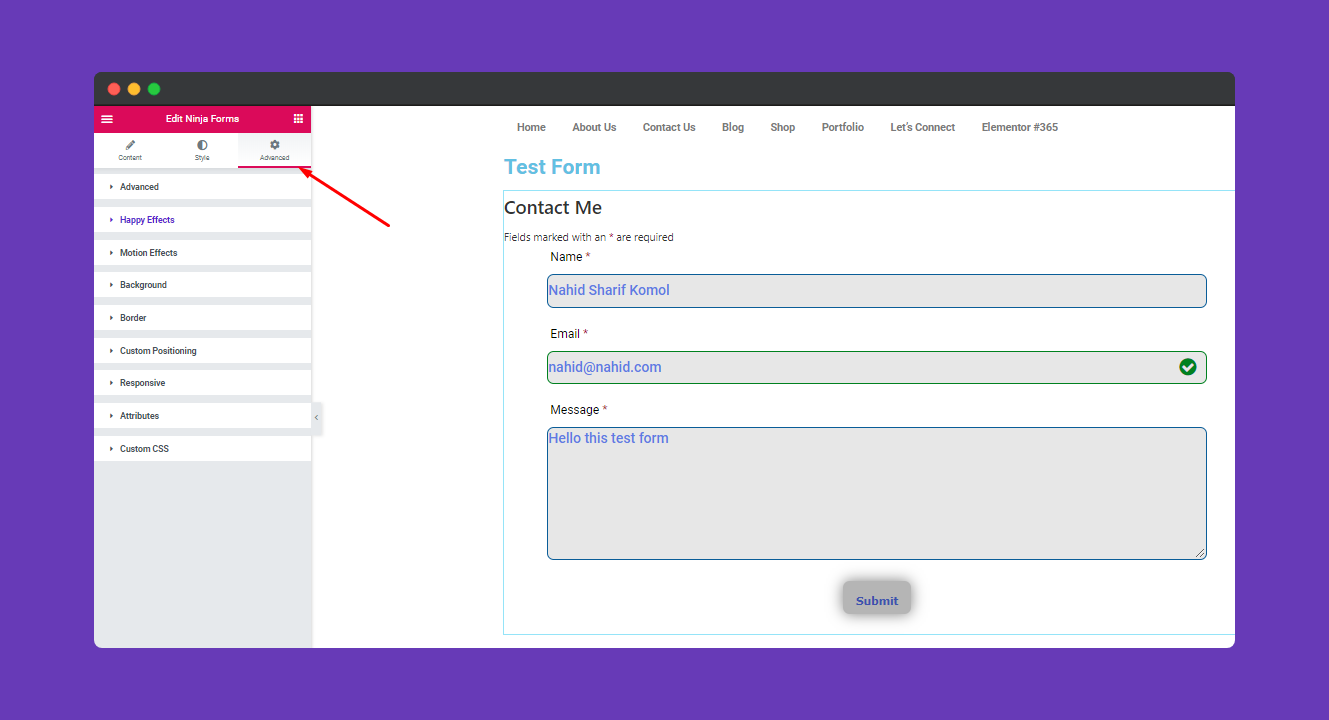
After editing your form just hit the”publish” button to make it visible to everyone.
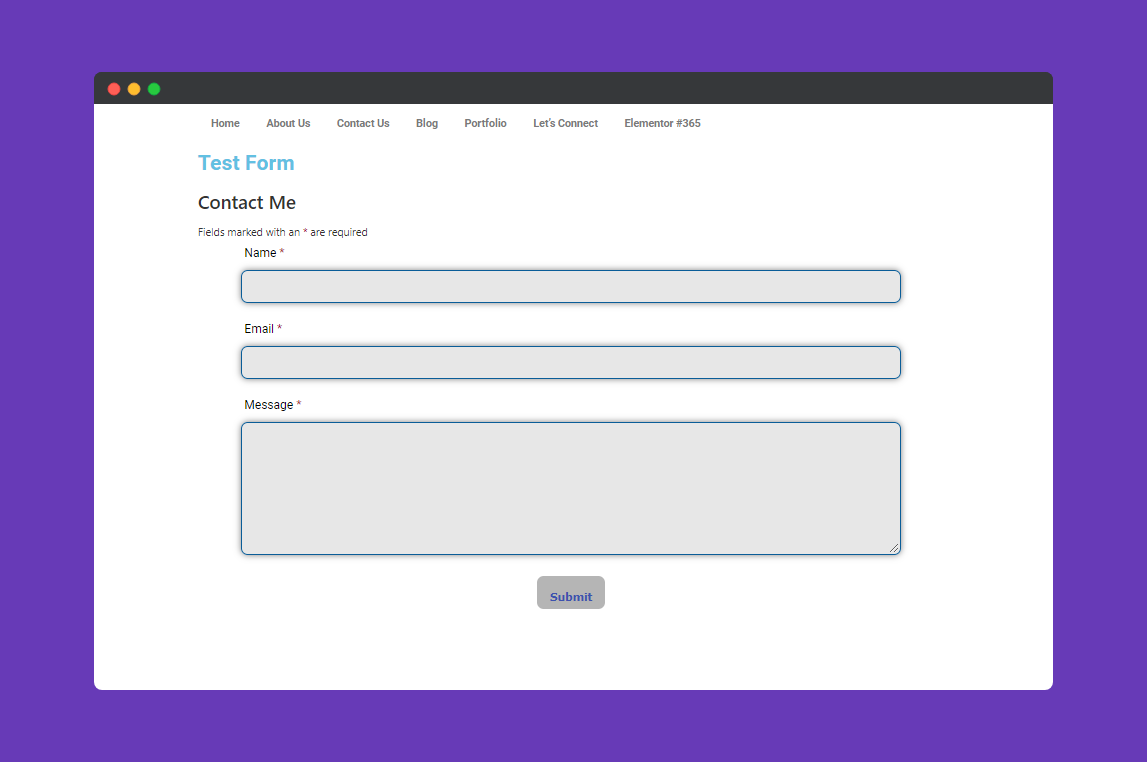
That’s it.
