How To Use Taxonomy List Widget of Happy Elementor Addons
This widget will help you to create a list of posts by sorting categories, tags, post formats.
So, let’s get started:
Step One:
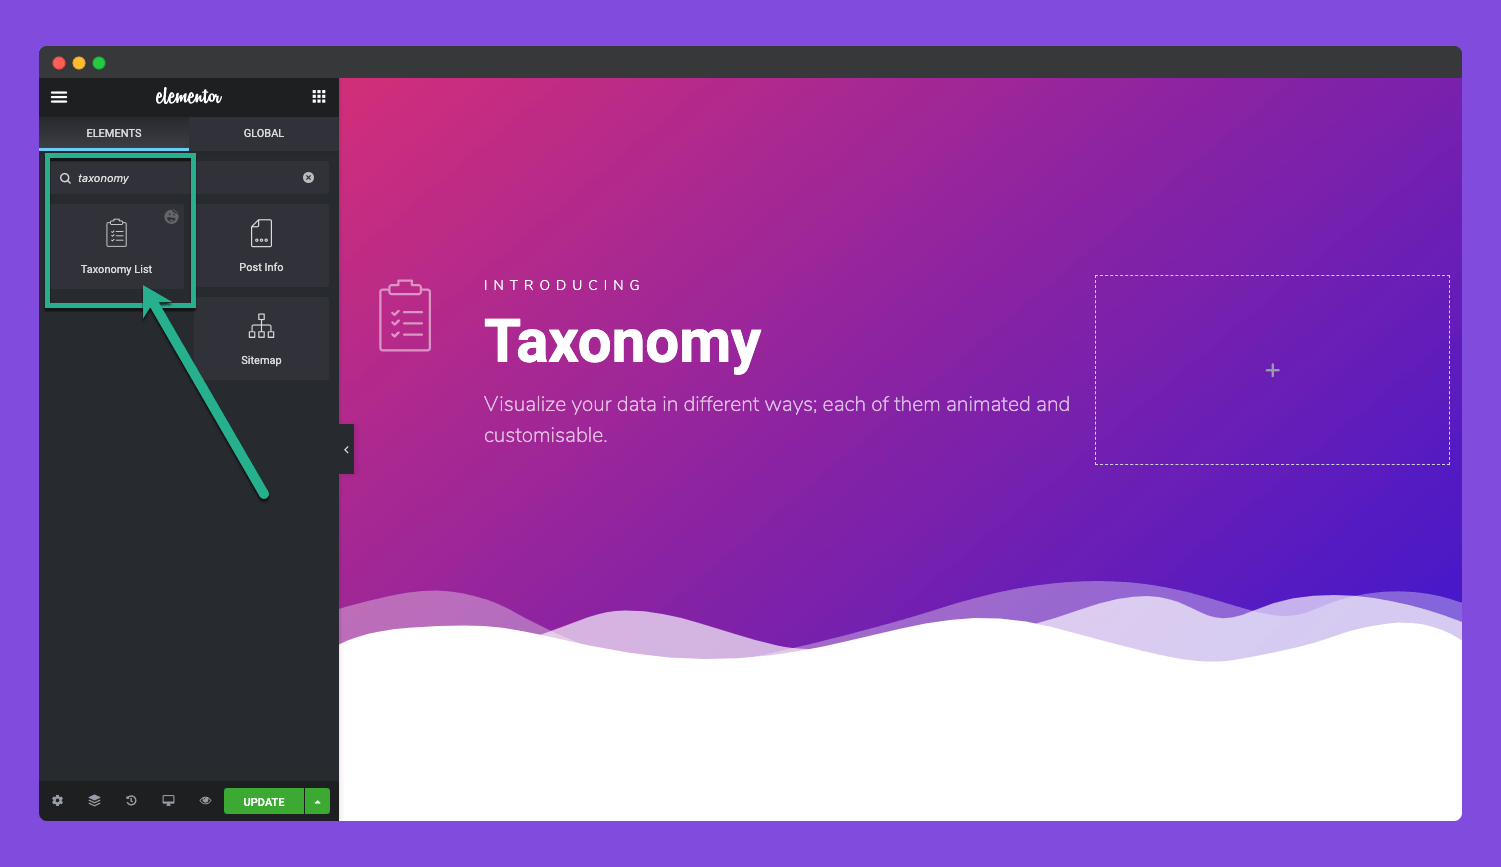
First, add the widget from the left sidebar of your Elementor page screen. Just select the widget and drag it to the marked area.
Step Two:
After dragging the widget you will get this interface,
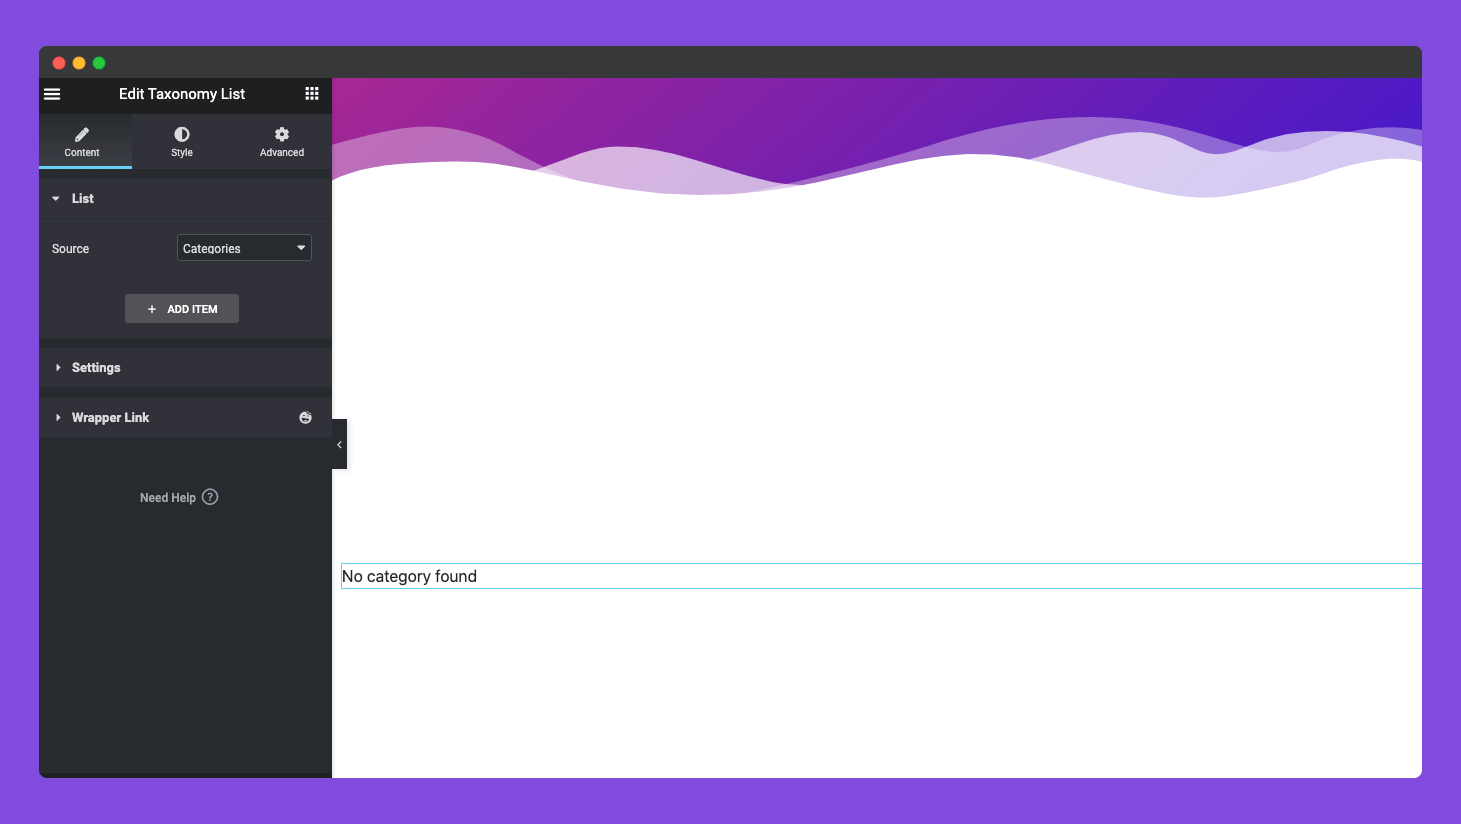
By default in the content tab’s List source will be selected the Category option. Don’t be afraid if you get no category found notice like the above screenshot. You have to click the add item button to select the categories one by one. This rule will also be applicable for the rest of the sources, Tag, Format.
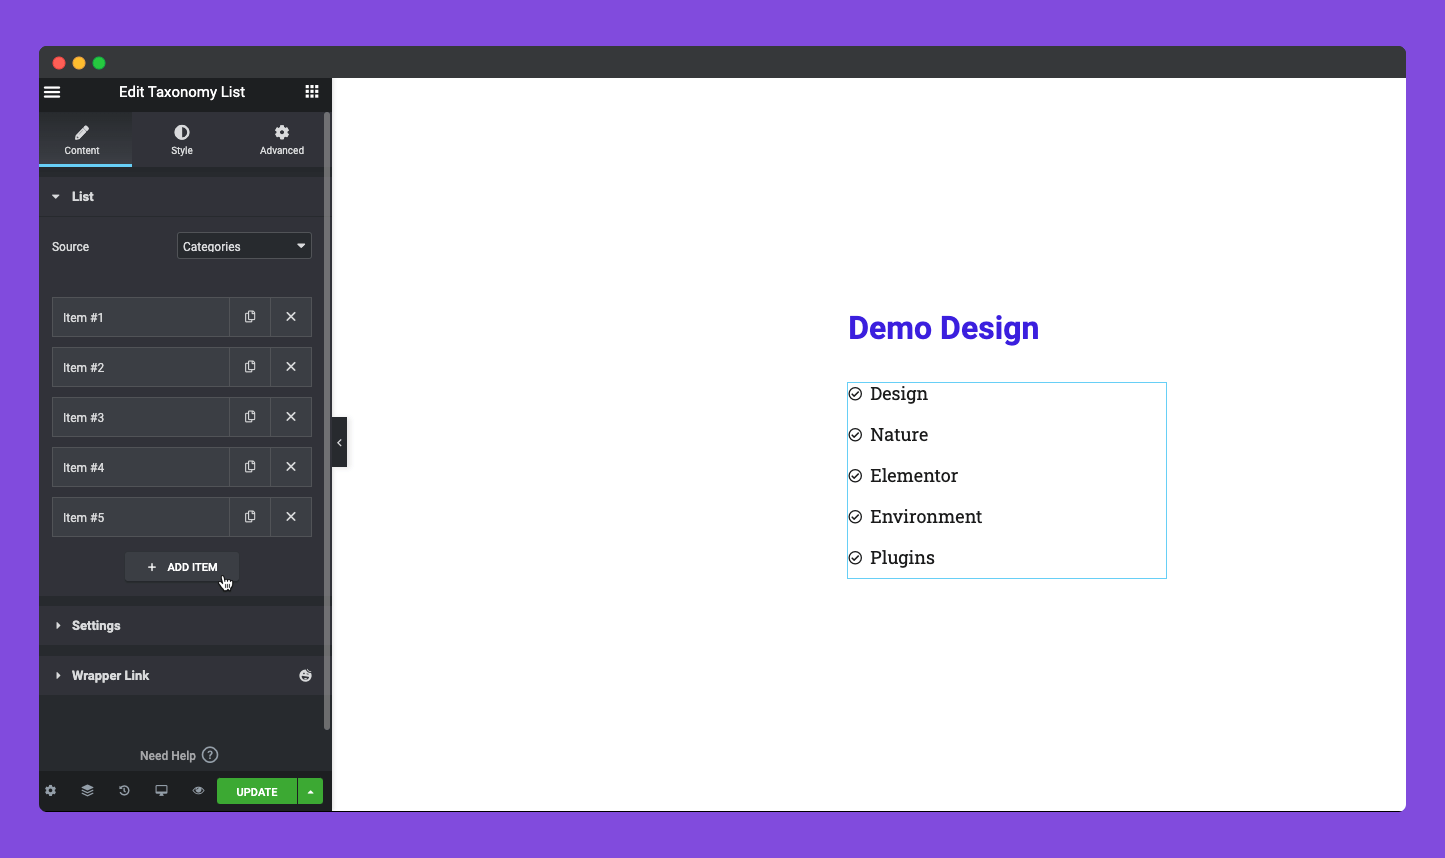
Every item can be customized in a different way. You can set your custom title, icon, or image. Also, you have the freedom to choose the same categories or you can set different-different categories in each item. You can find the categories by typing the letters on the select categories section.
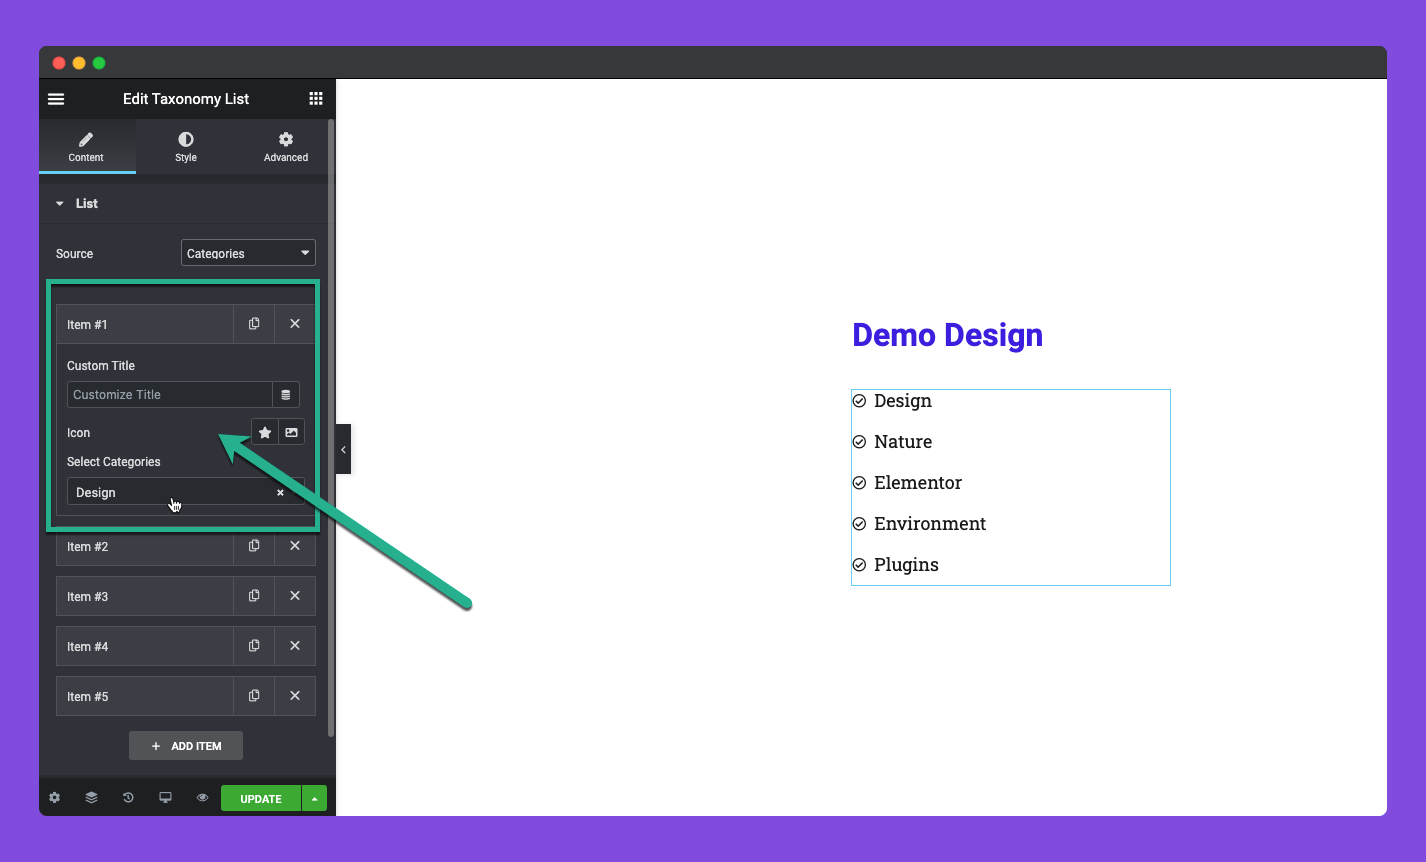
You can set the image or an icon from here,
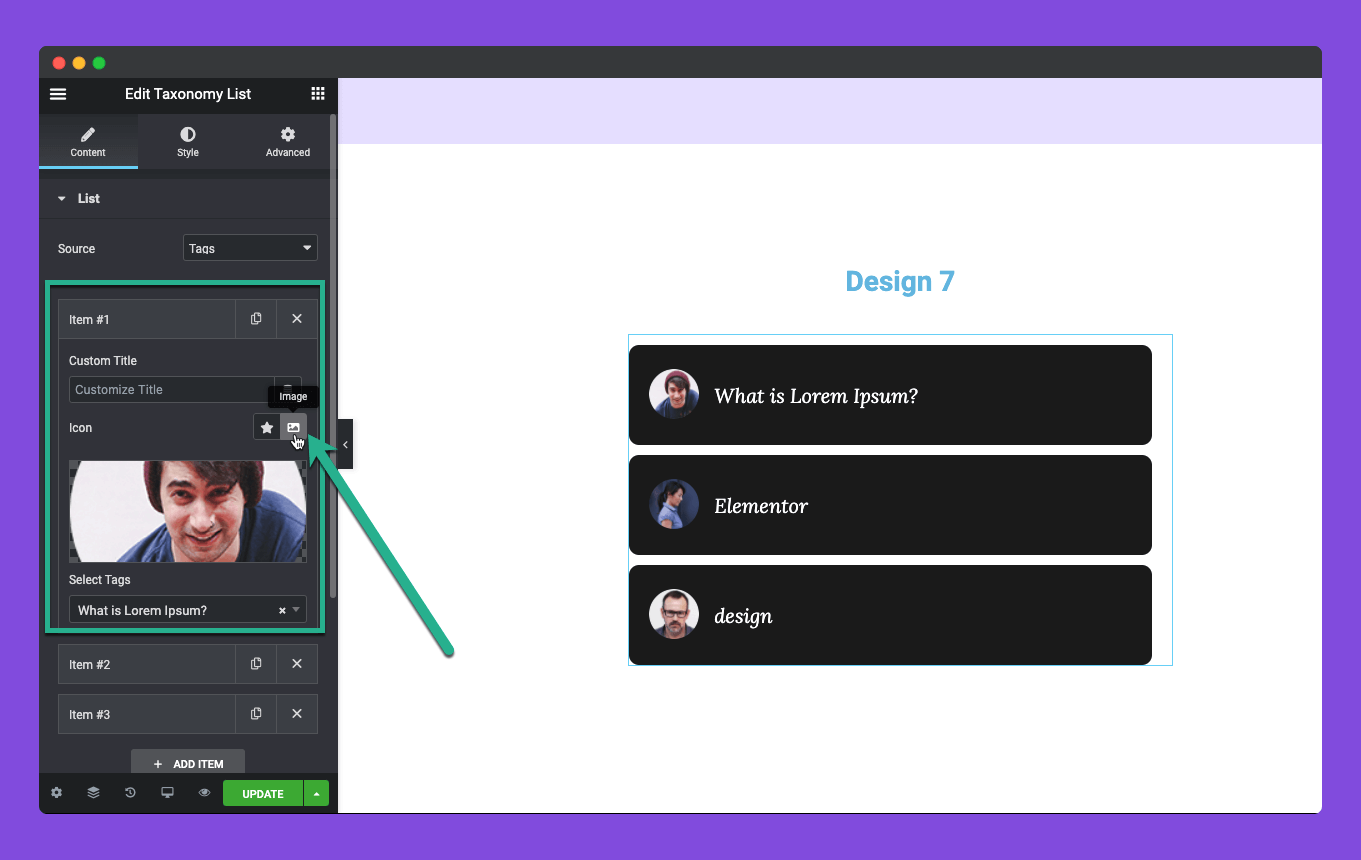
Note: If you want to set a different image or logo in your list item then you have to remove the icon from the global setting option right after the list option in the content tab.
Step Three:
Setting the global icon or images for the list items. This option will be available on the content tab of this widget immediately after the list option.
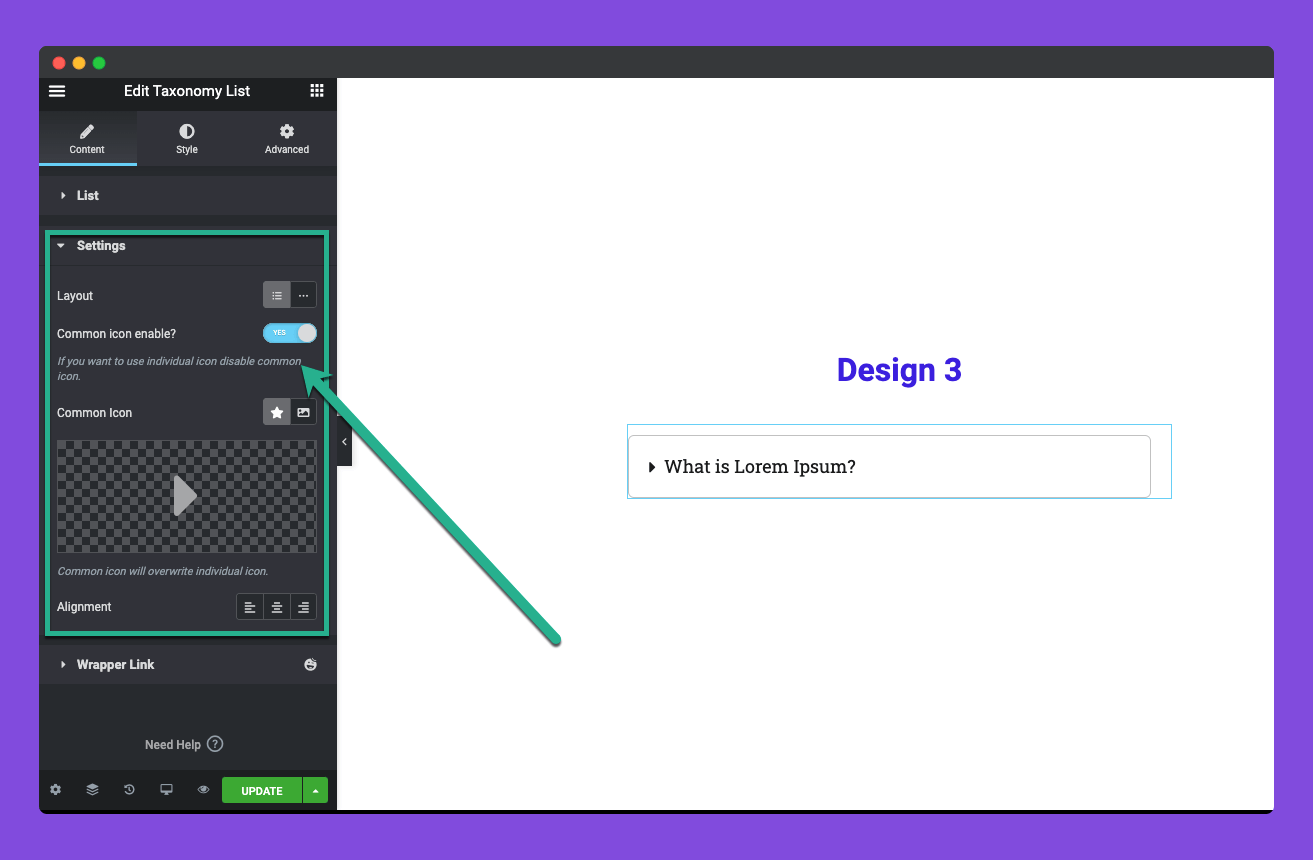
If you enable the button then you can set the common icon or image for your list items. Choose any icon from The Elementor icon set or from Happy Icons set.
layout Setting:
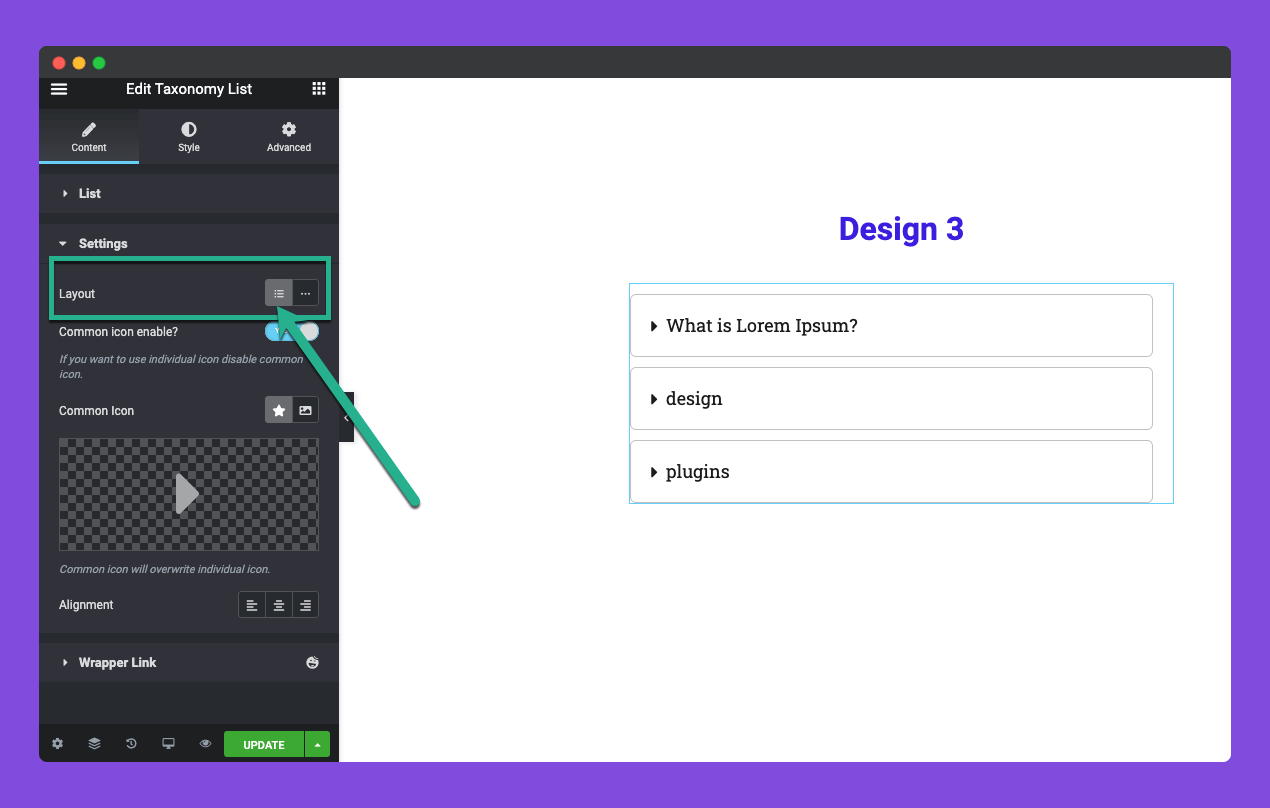
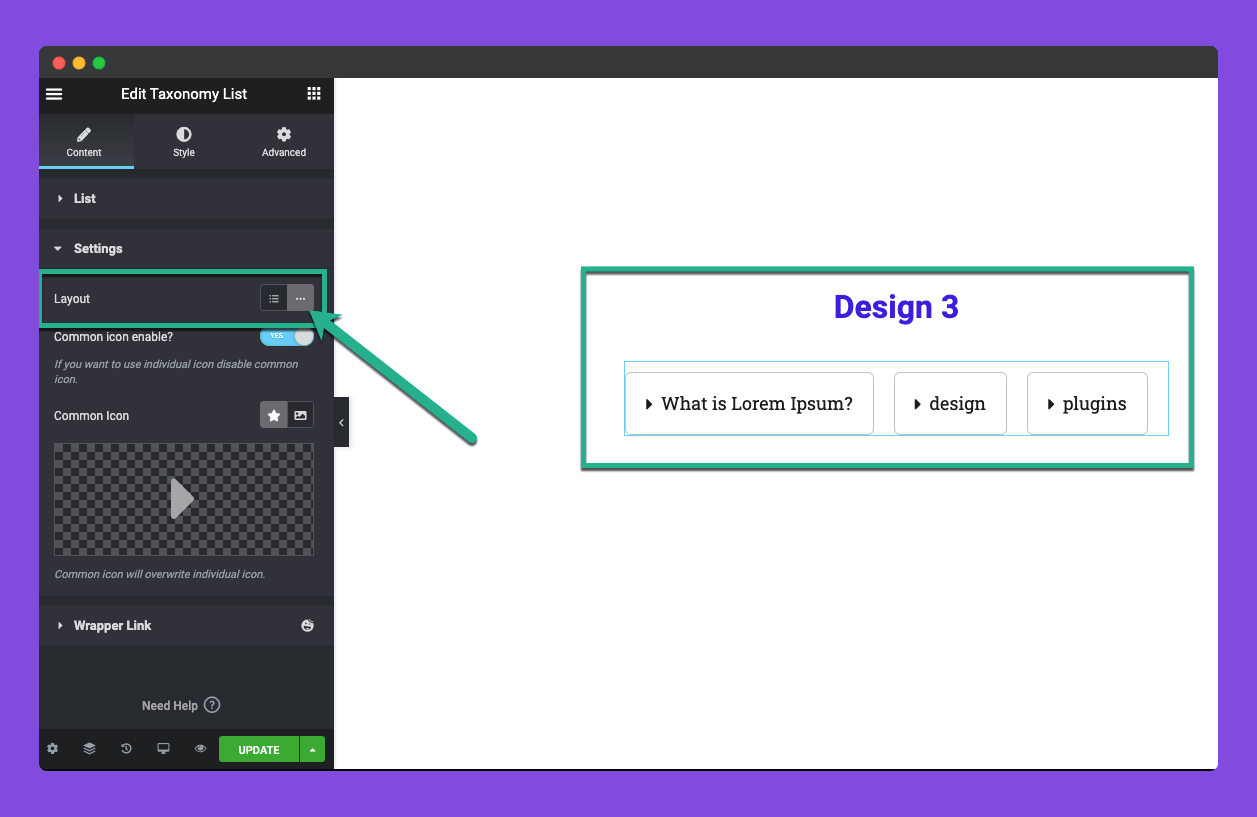
You have the flexibility to set the layout in list style or inline style. Here is the screenshot of the list items,
Inline items screenshot,
Step Four:
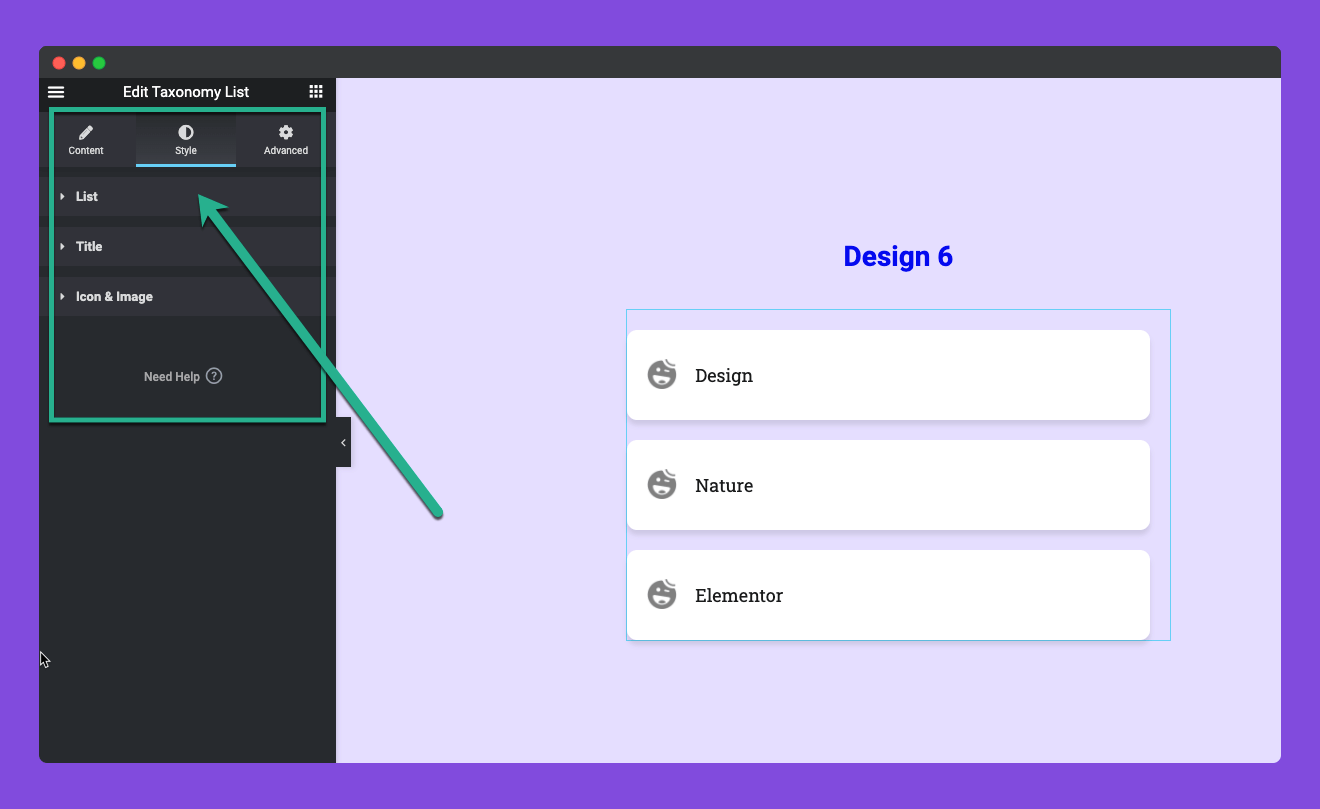
In the style tab of this widget, you will get three styling options, List, Title & Icon & Image.
List Styling:
In the list tab, you will get two types of customization facility, Common and Advance.
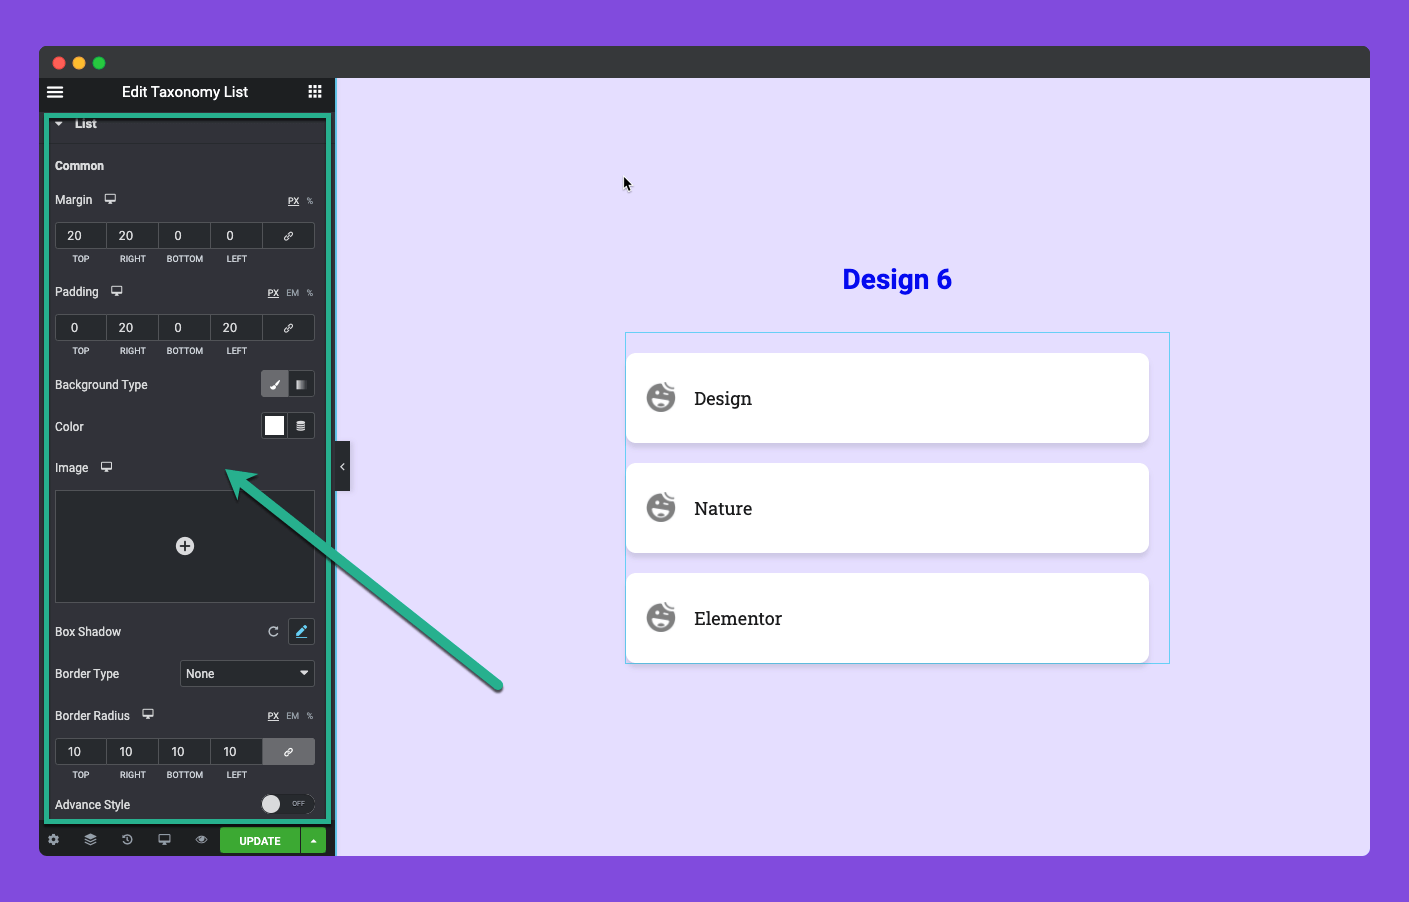
In the common styling option, you can add your own margin and padding for the list items. Have the facility to add background type, background image, box-shadow, border-radius. Style your list according to your need.
Advanced Style:
Generally, it will be switched off. You have to turn it on. Here is the screenshot of the Advance Style.
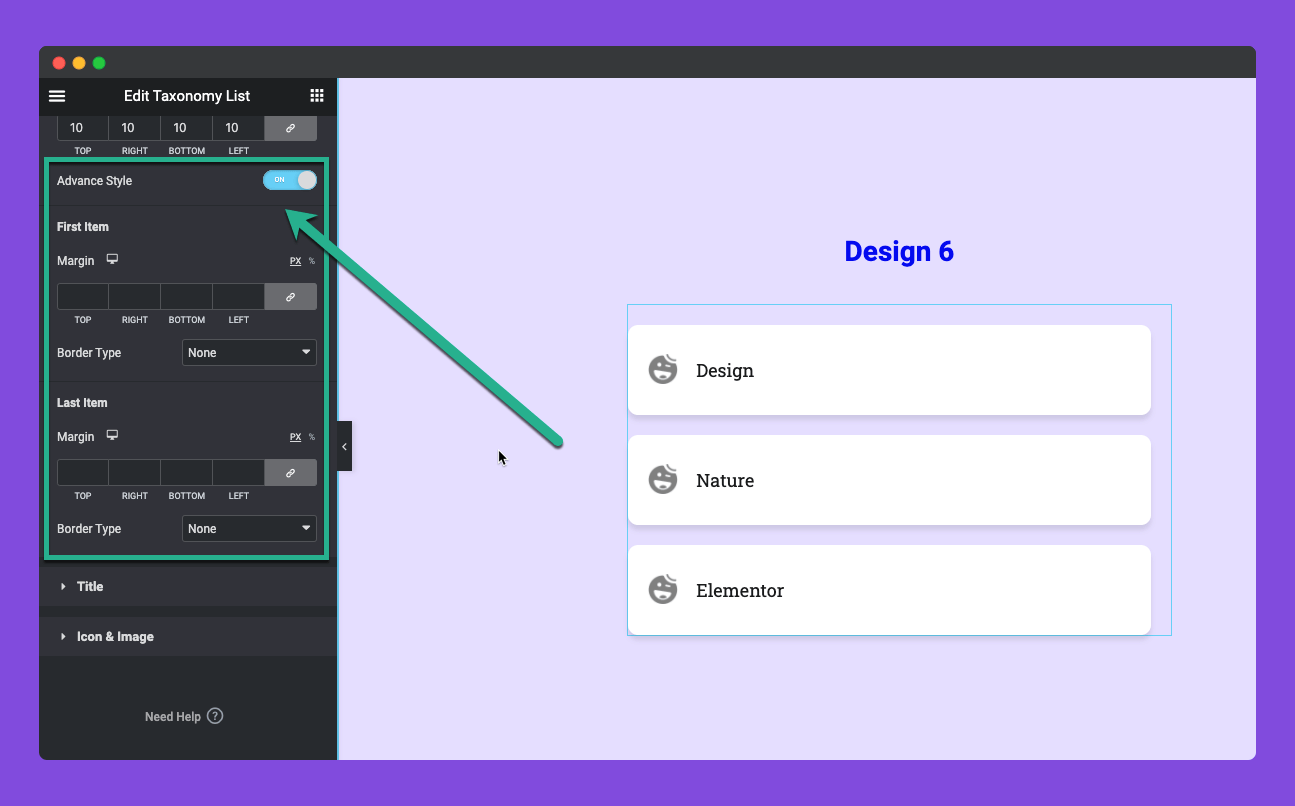
In this style, you will get the extra benefit to add extra margin only on the first item or on the last item. You can set different borders on those items.
Step Five:
Now comes the title styling option. You can style your titles of the items.
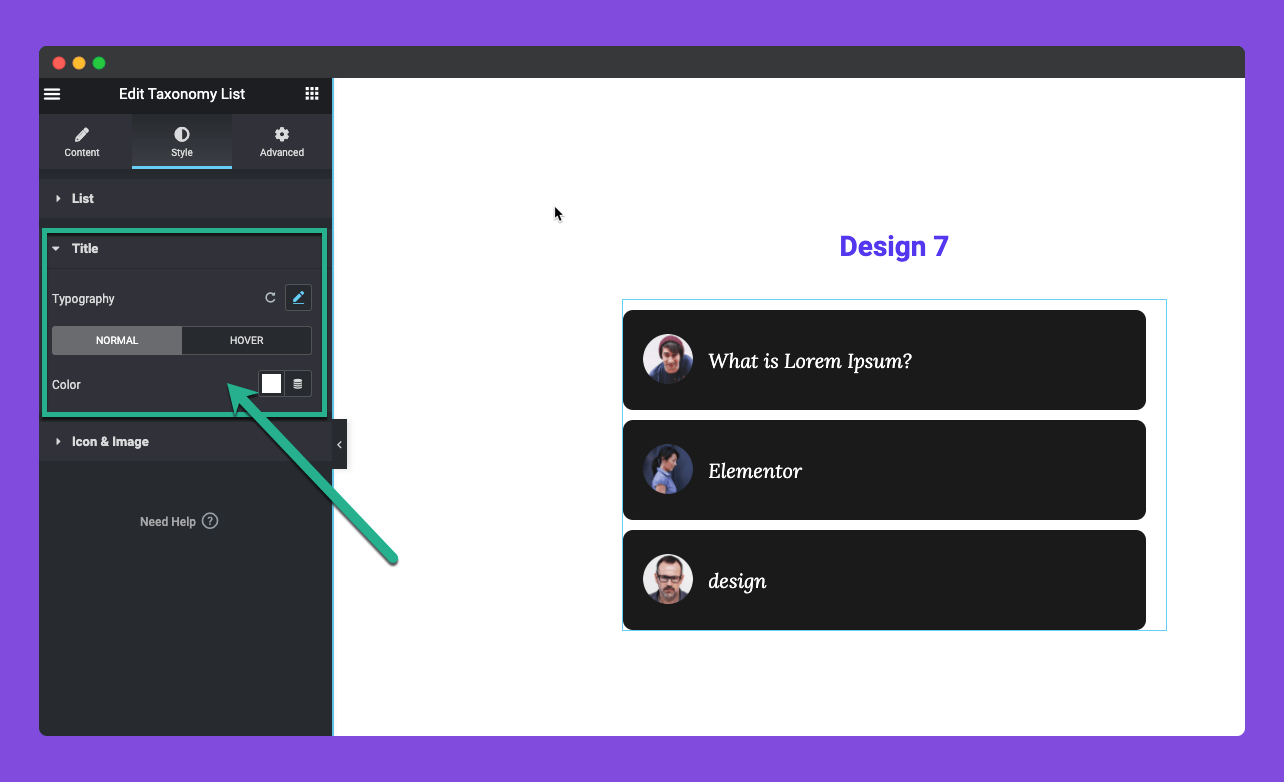
In this styling option you will get the typography styling feature and color customization option both in normal state and hover state of the titles.
Step Six:
Now comes the Icon & Image Styling option.
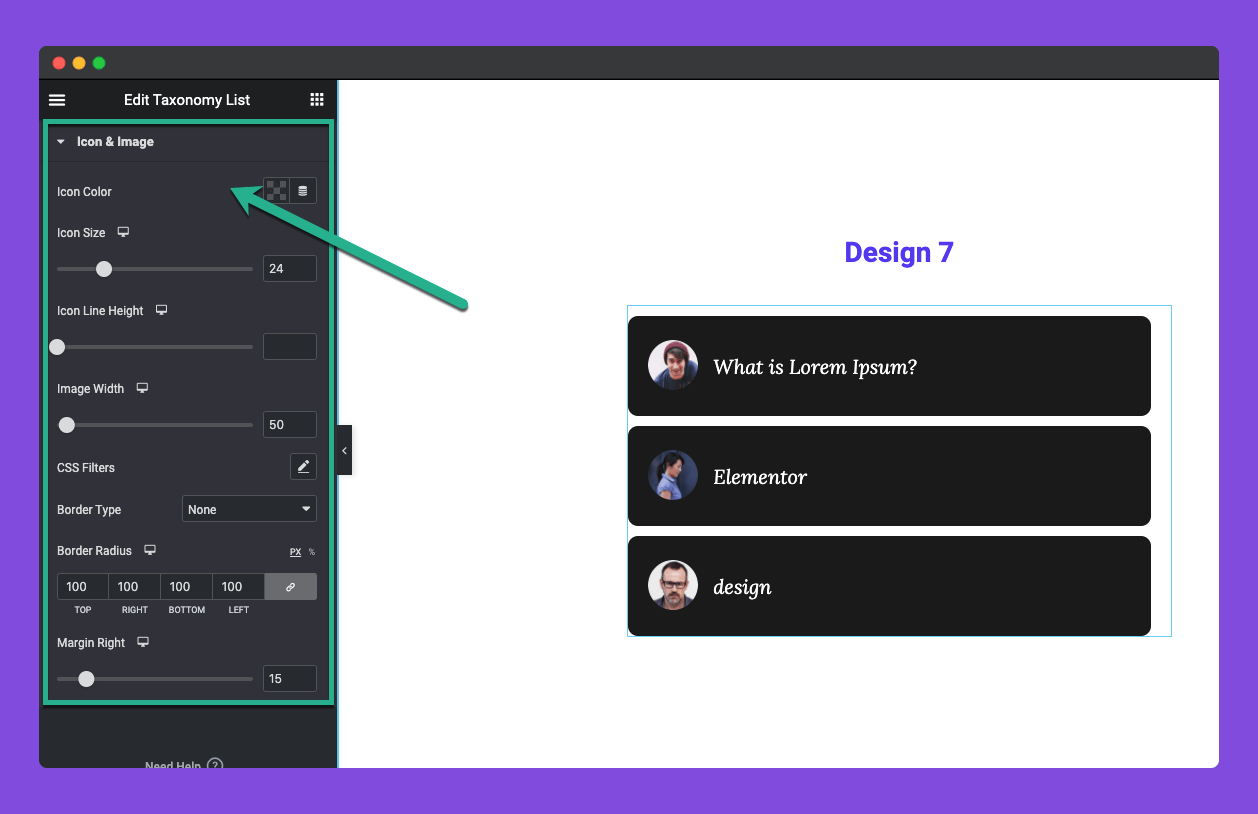
You can set the icon color, size, icon line hight. If you are using image then you can set the image width, CSS filters. Option to add a border, border-radius. Also, there is an option to set the right margin of an icon or image which will help you to set the distance between icon/image and title.
Step Seven:
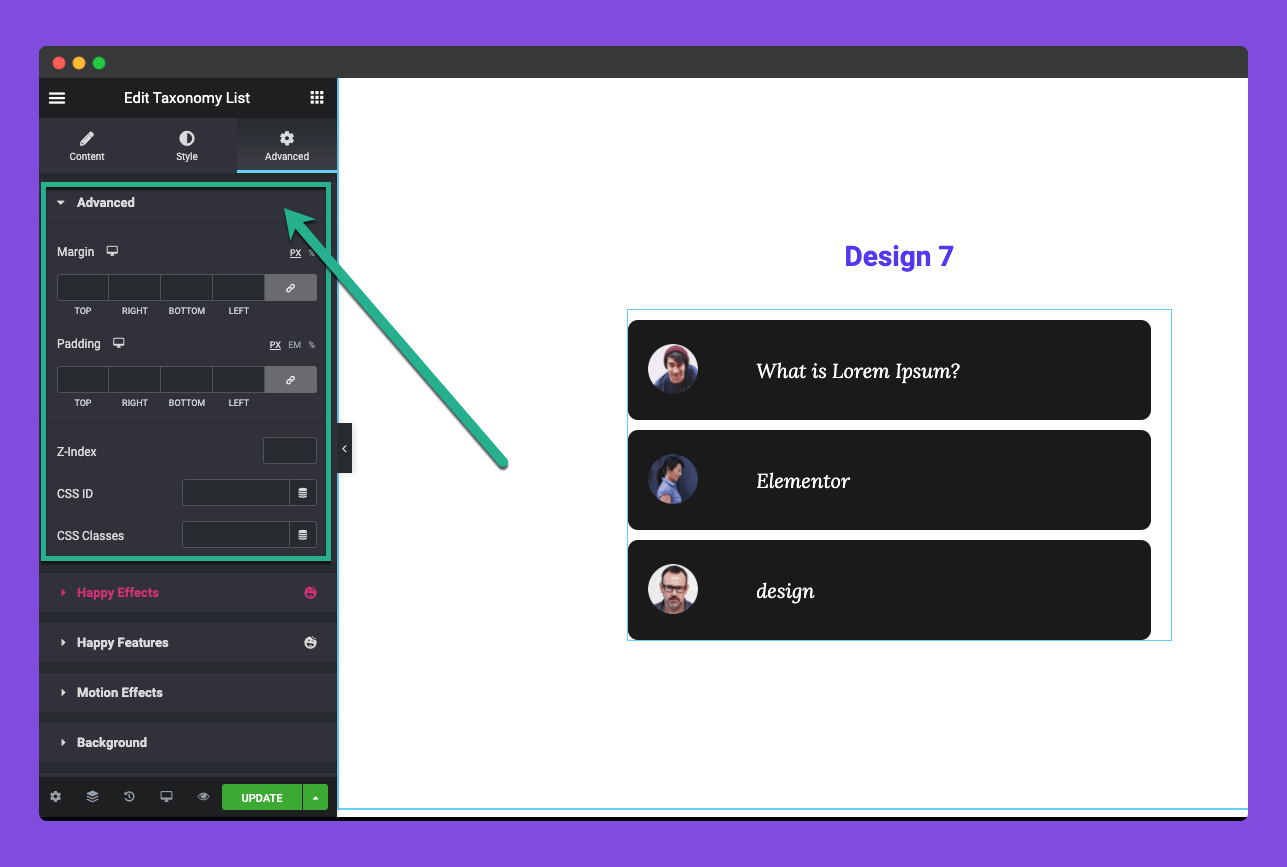
This widget also has the default advance tab features of Elementor widgets. Manage it as per your need.
That’s it. Enjoy this widget.


