How to Use the Count Down Widget of Happy Elementor Addons
Count Down widget is one of the best widgets in Happy Elementor Addons. Like other addons, it has also some extra facilities and features to make Happy Elementor Addons more effective.
We may often see this feature, especially in the eCommerce website when any product offer is running. So you can utilize it on your website to set a discount time, event time, product launching time, and any especial occasion using Count Down widget.
Step 1:
First, select the “Count Down” widget from the left sidebar. And drag it to the empty area.

Step 2:
Next, select the “Time” option.
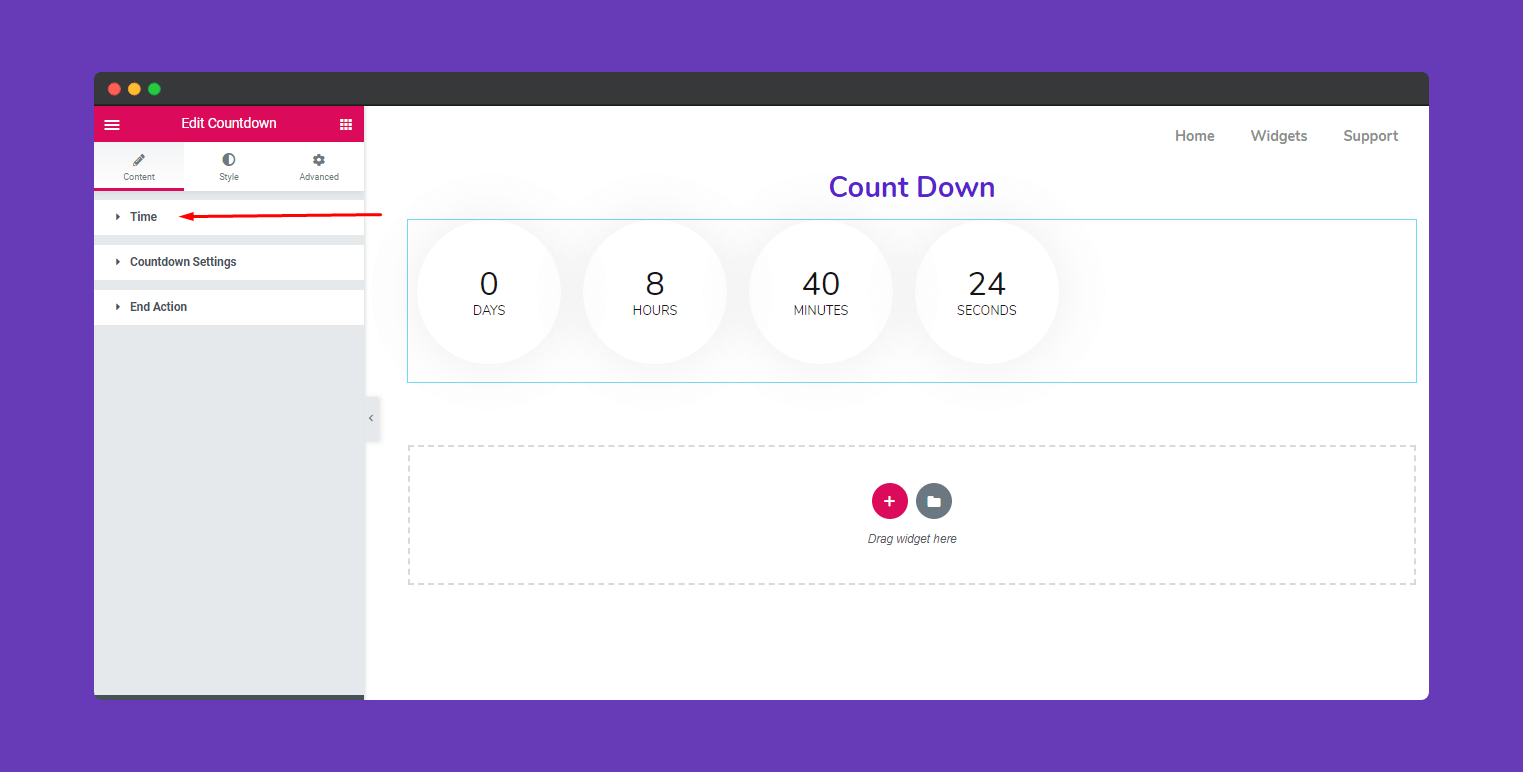
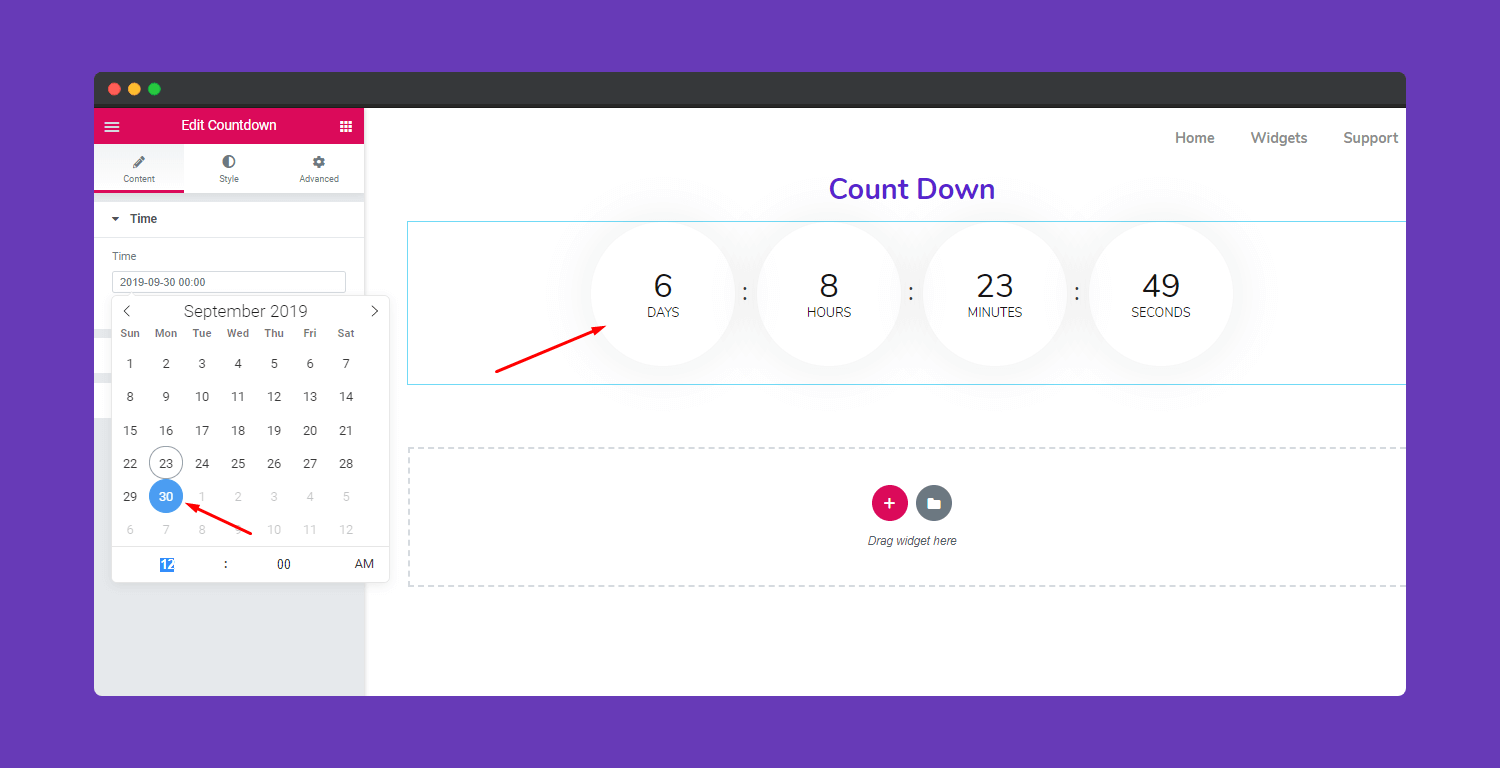
In this section, you can select the exact time and date to start the count down.
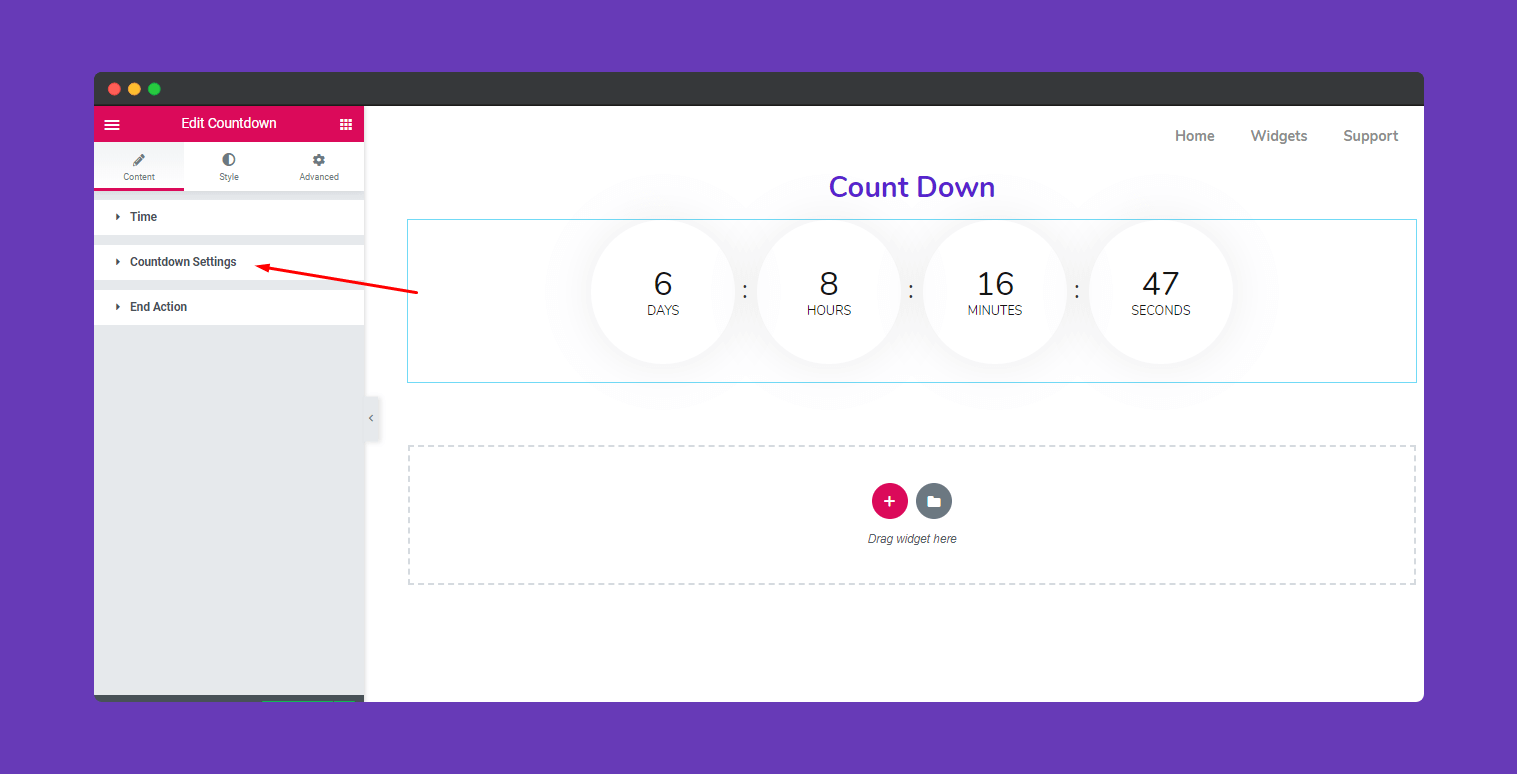
To edit ‘Count Down’ click on the ‘Count Down Settings’
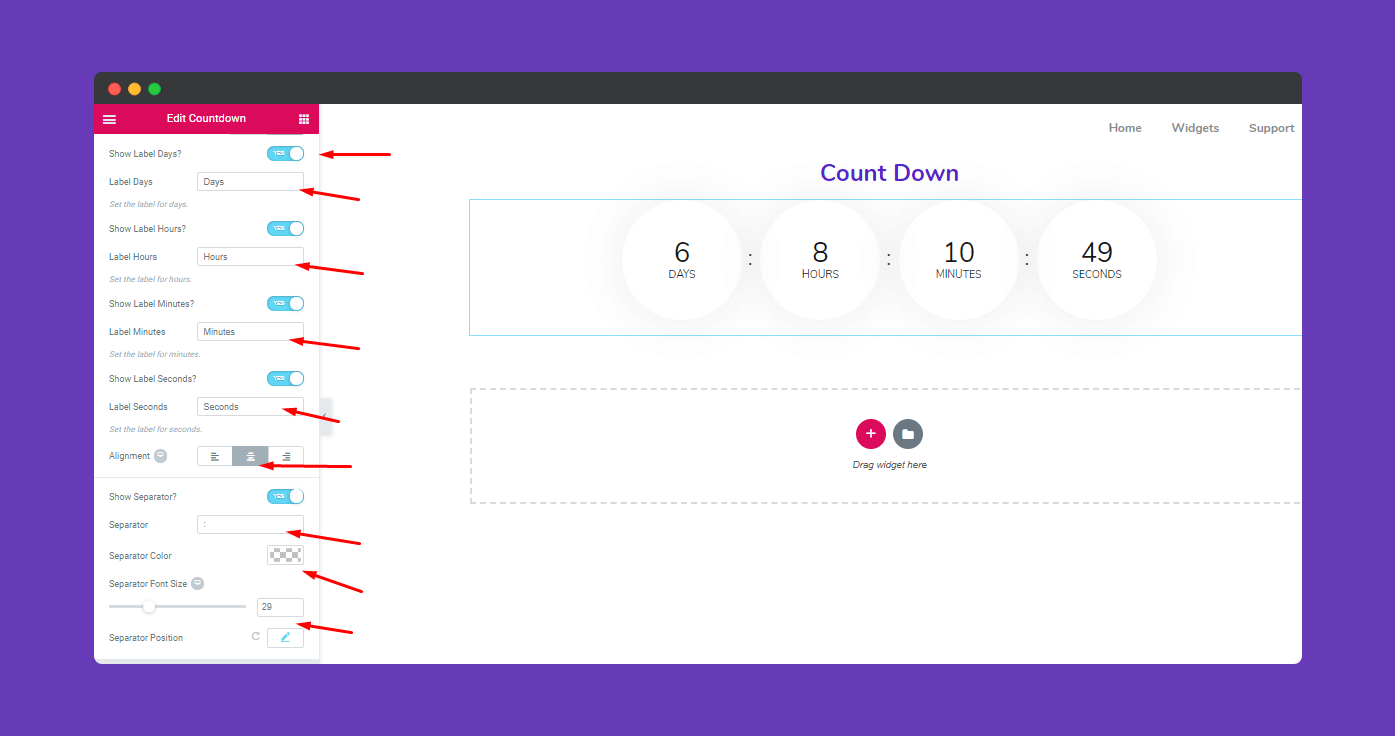
Here you can all the things to do. To synchronize the time you can edit Days, Hours, Minutes, Seconds individually. And also you’ll able to change the color of these sections and align them.
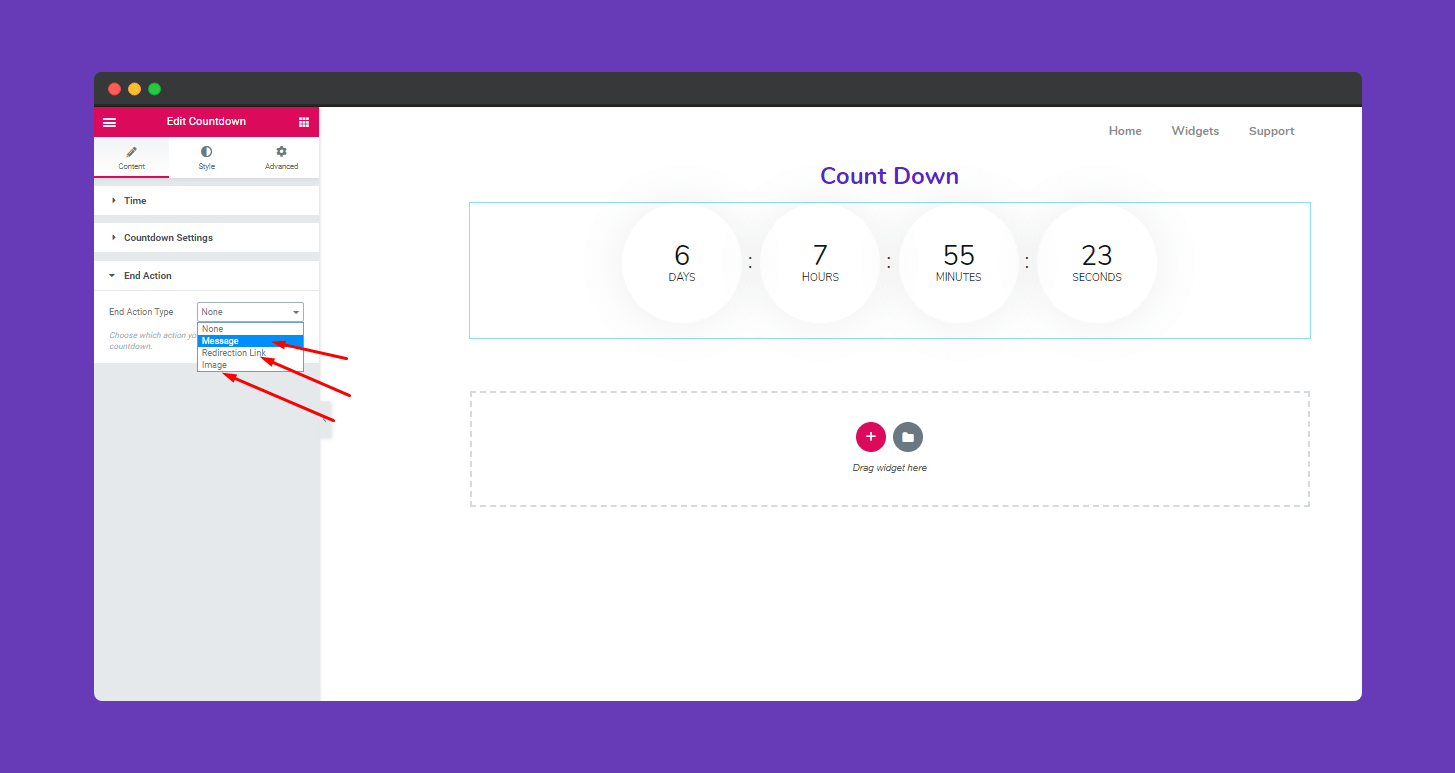
Here you’ll able to edit “End Action” in this option.
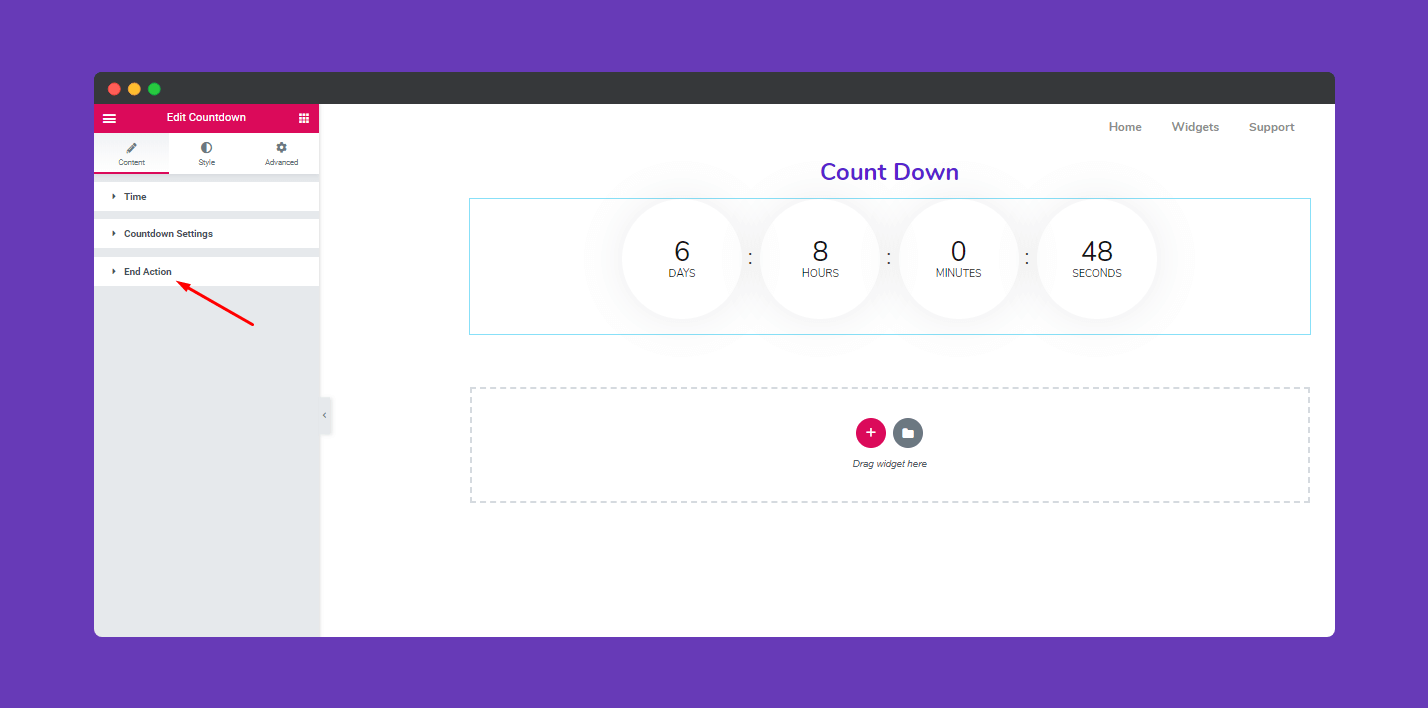
In this section, you’ll get some useful features. Like you can leave a message, provide a link or add an image when your event will finish.
Step 3:
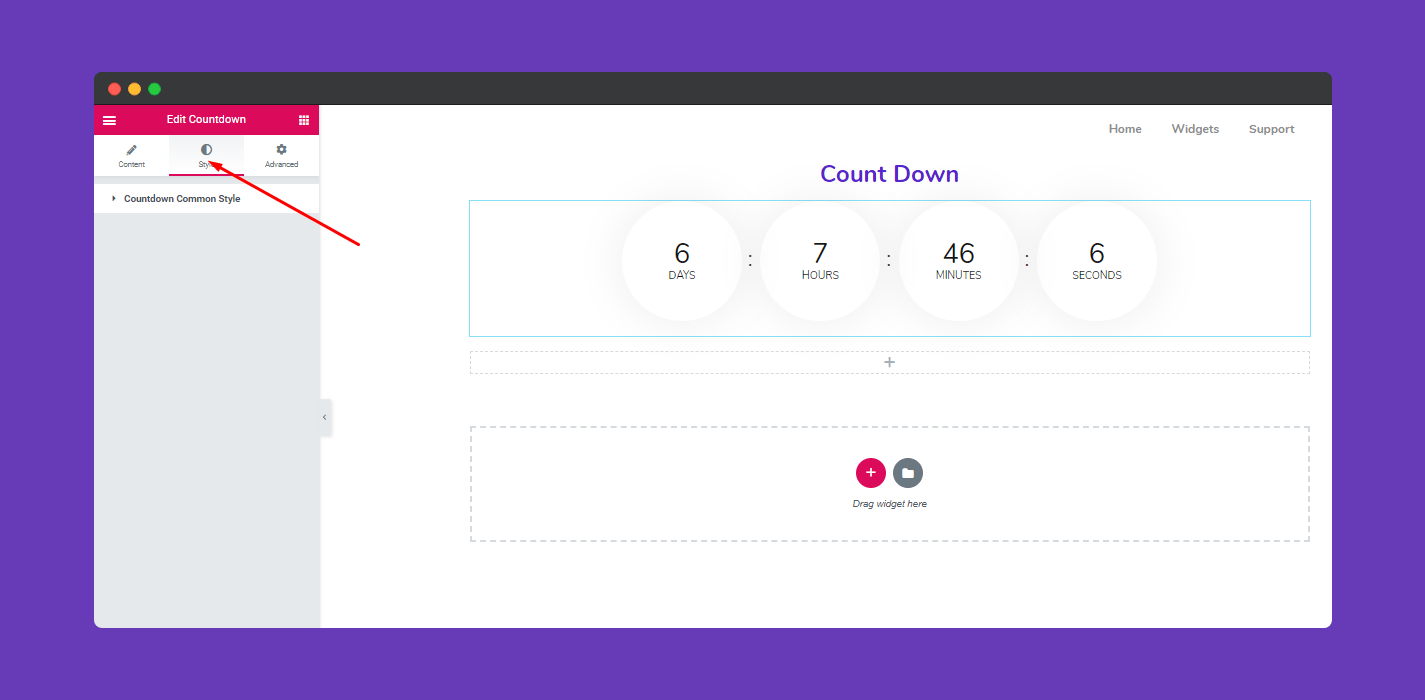
Next, to stylize your “Count Down” section select ‘Style’
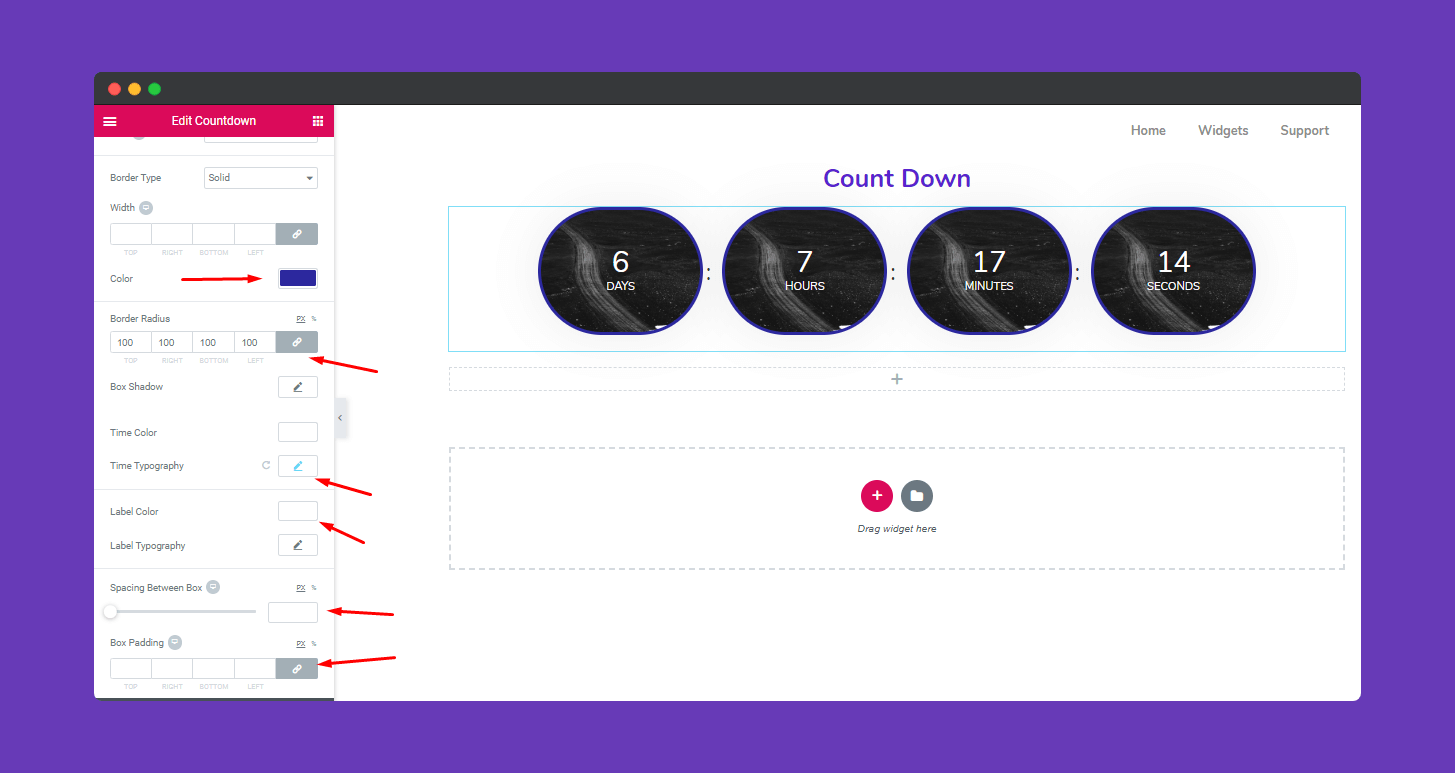
Here you’ll able to edit ‘Box Width’, ‘Box-Height’, and also able to provide a background.
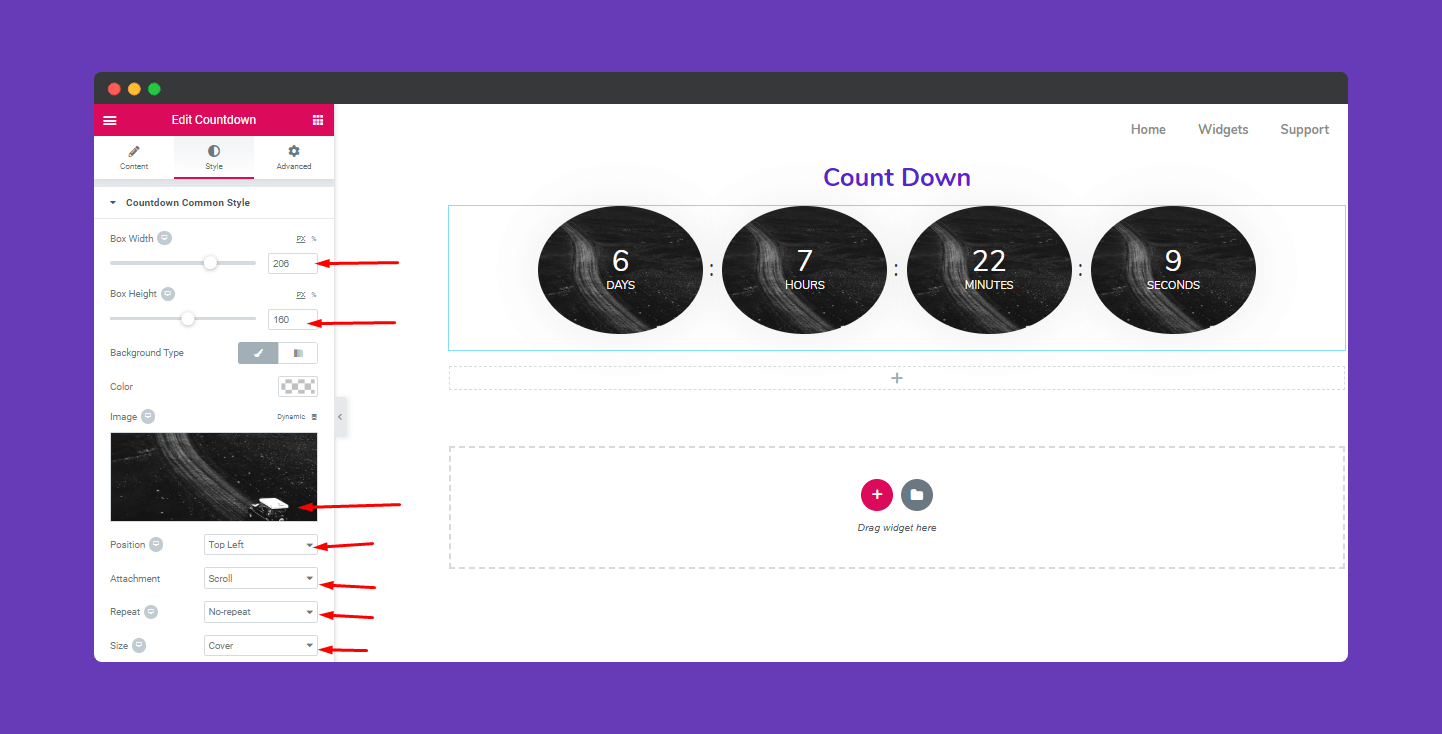
To give an extra effect and texture you can use ‘Box Radius’, ‘Time color’, ‘Time Typography’, ‘Label Typography’, ‘Space Between Box’, etc.
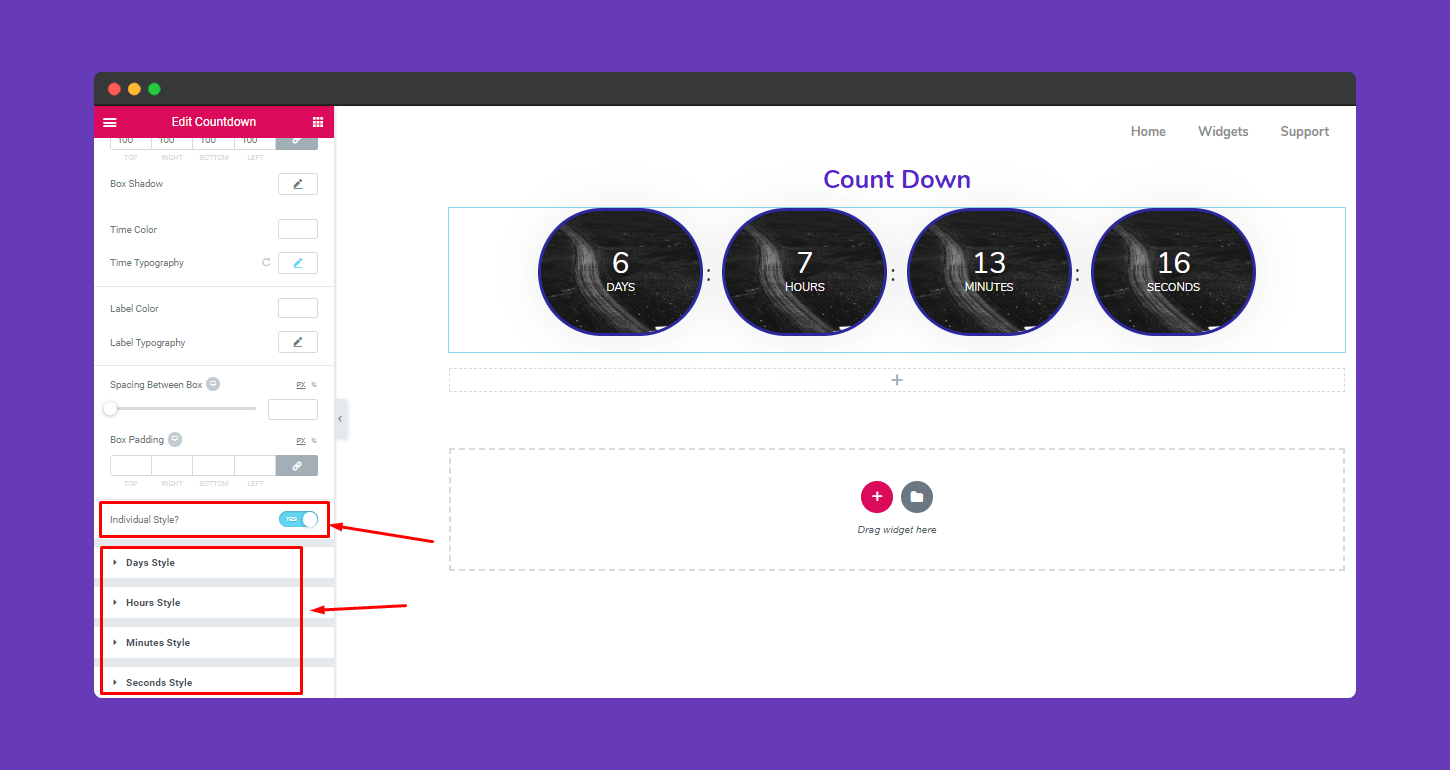
To give individual look, you can edit them separately. To enable this, activate “Individual Style”
Step 4:
If you want to add motion effects, Happy Effects, background or make the page responsive, click on ‘Advanced‘ to explore those options. the ‘Advanced’ is a default feature of Elementor. Give a read to this Document to know more about Advanced features and its uses.

You can click on the ‘Publish Button’ when you’re done.

That’s it.
