We are introducing the advanced grid builder for HappyAddons – Happy Loop Grid. Now can build your own grid items with this widget and place them anywhere you want. In this Happy Loop Grid documentation, we will show how you can use it.
Required Plugins
To have the Happy loop grid widget you will need these plugins,
- Elementor Free
- HappyAddons Free
- HappyAddons Pro
Here is the overview:
How to use the Happy Loop Grid Widget
To use the Happy Loop Grid Widget, find in your Elementor Editing widget panel search for our widget, and drag it to your desired place.
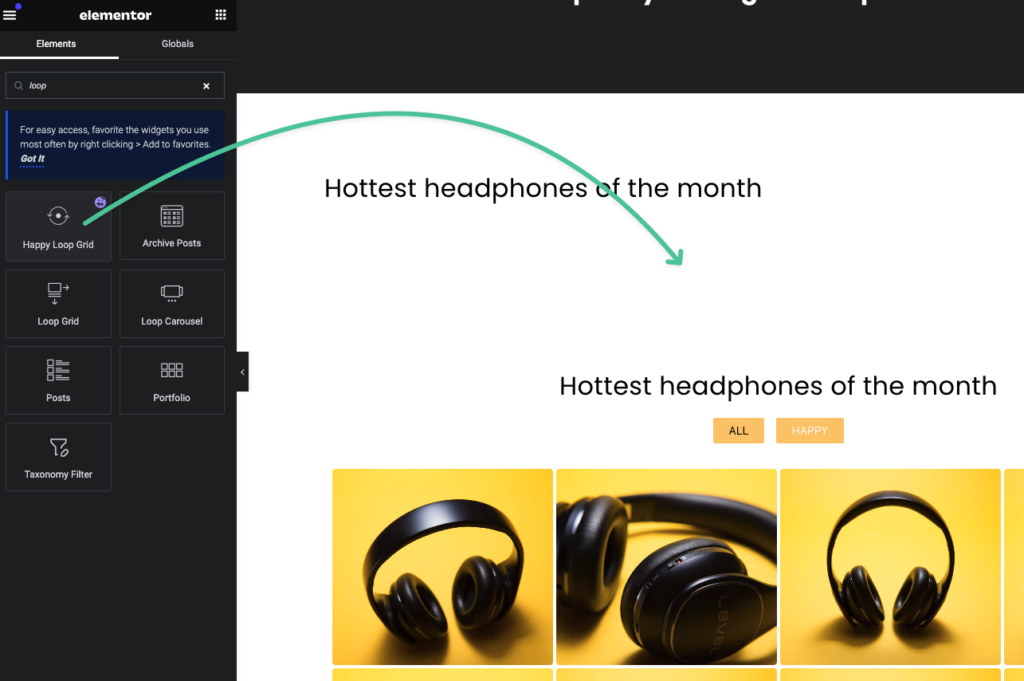
After dragging the widget you will get this default view.
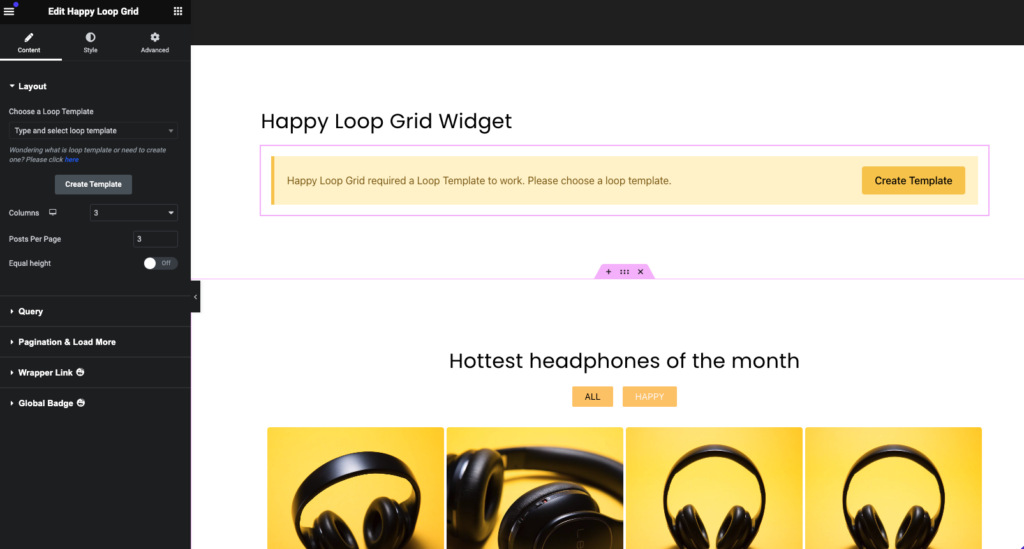
In the Loop Grid widget, you have to create your grid template. You can create a new template or if you have a premade one you can select the loop grid template from here.
For a fresh start, we will show the template-creating process and then we will show the choosing method.
How to create loop grid templates
For creating a new template you will get two buttons for accessing the editing panel. Click any button it will redirect you to the template Create page. Hit the add a new template, then give a name and create the template. Here is the process:
PS: The editing panel screen size is optimized for creating an item for the loop grid. So don’t worry about the spacing. It’s for betterment. Another thing, the widget-wise customization has to be done from here.
Filling the grid item with necessary elements
Now we will add the necessary elements for the grid items. Here is the process –
Choosing the premade Happy Loop Grid Template
To choose the template go back to the page and from the left sidebar’s layout tab choose the templates. Here is the process –
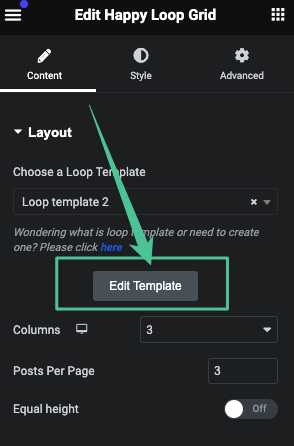
If you want to edit the template you have to select the edit template button. It will open the selected loop template.
Customizing the Loop Grid Widget:
Now we will show how you can utilize the features of the Loop Grid Widget. From the widget editing panel, you can choose the column size and posts per page. Here is the process –
How to Set the Equal Height for The Grid Items:
We have an amazing feature to set the equal height for the grid items. It’s a very essential item to fix the height issues for the various length items. To have it just toggle on the equal height feature.
How to Manage the Queries of The Happy Loop Grid Widget:
We have added a query method to pull the best-fitted items. Here is the setting overview –
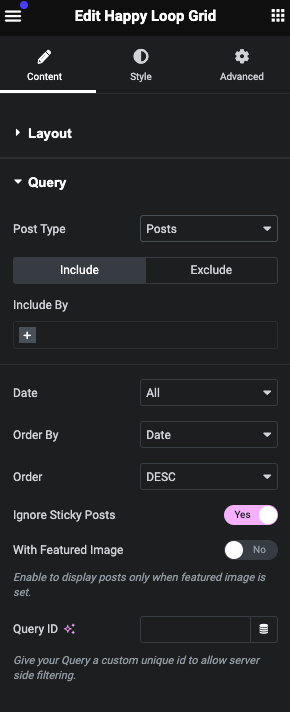
Supported Post types and Selection Processes
In our Loop Grid widget, we are supporting these post types,
- Posts – all the posts will be added by default
- Pages – All the pages will be added
- Manual Selection – You can select manually from your posts and pages.
Selecting the post methods
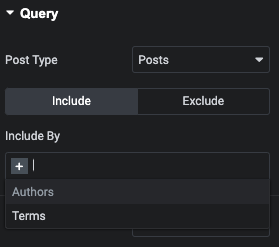
You can create a query for the Including or Excluding methods. If you select the include method you will get another option to select posts from specific authors or specific terms.
Excluding Method:
If you want to exclude any specific post or pages you have to select the exclude tab and then choose the options or types like any authors all posts, or current posts, or manual selections to remove any specific posts or by terms.
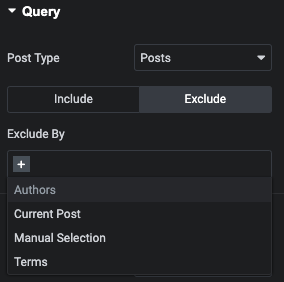
Here is the overview:
Filtering and sorting the query items:
We have added options to filter and sort the posts by date, order by and order, also option to ignore the sticky post, and also option to filter out the posts without featured images. Also you can set customer query ide for server side query.
Here is the process –
Enabling The Pagination Or Load More Button
We have added pagination support for the loop grid widget. You can easily add a post pagination or a Load More button to load multiple posts.
Options of The Pagination:
We have these styles for paginations for the loop grid widget.
- Numbers
- Previous/Next
- Numbers + Previous/Next
Also, you can set the alignment position of the pagination. Here is the process,
You can set the page limit and shorten the page number list. Also, if you want to add customized text for your previous and next button you can set that without any hassle.
Setting the load more button
To enable the load more button just toggle on the button. And set the button text and alignment position and that’s it. So simple to add it.
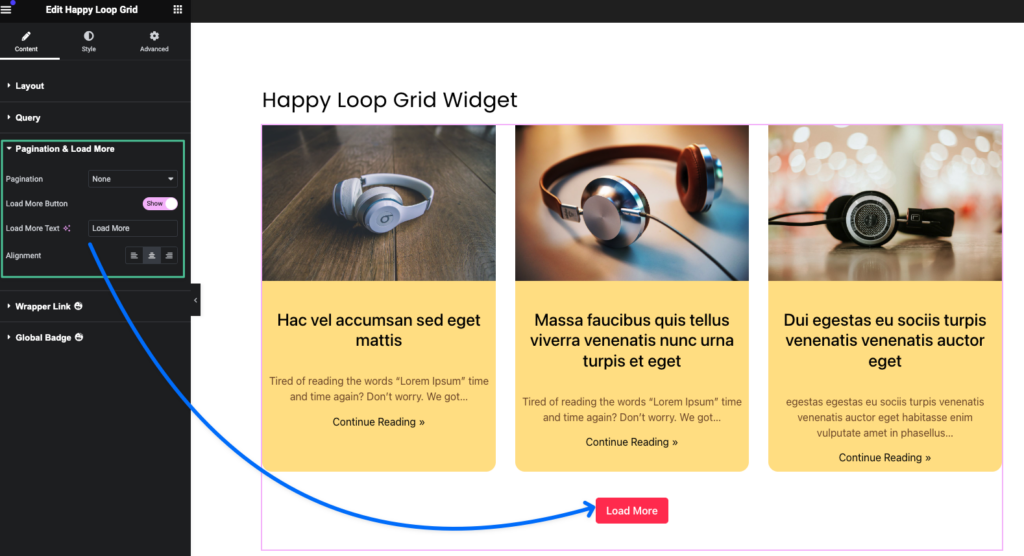
Ps: If you have selected the number pagination first then you have to select the none option after that you will get the load more button setting.
Styling the Happy Loop Grid Widget
Now we will show how you can stylize the Happy Loop Grid Widget.
Layout Styling
We have two controls for layout styling. You can set the column and row gap for the layout.
Item Box Styling
For styling the items of the gird items we have added support for padding, background color, box shadow, border type selection, and border-radius control for the item box.
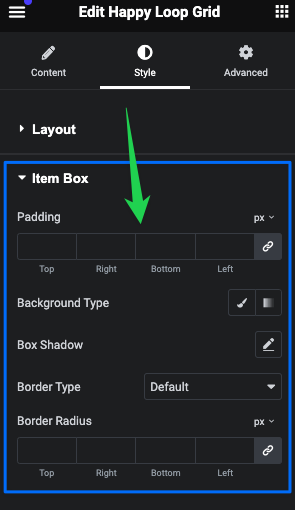
Pagination Styling
As we have two types of pagination for our Happy Loop Grid, Number and Laod More Button, so there is minor changes in the styling of the pagination wise.
Here is the SS of the Number with Next and Previous Text pagination:
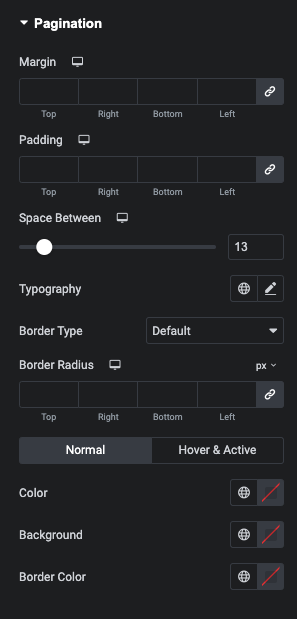
Here you are getting the padding margin, typography control, border type, and radius setting, and color customization options like text color, background color, and border color for the Normal State and Hover & Active state for the pagination.
Here is the SS of the Load More pagination:
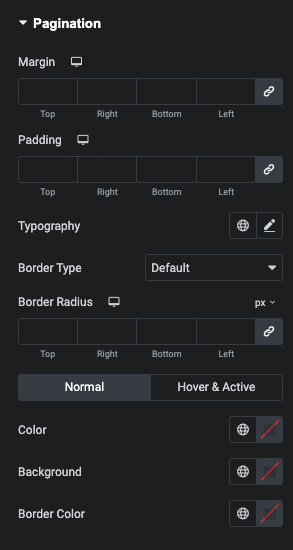
You are getting all the same settings as the Number Pagination except the space control as it’s not needed here.
That’s it.
