Want to display your cart option in the tidiest way and make it more helpful to customers with the new Happy Addons Pro Mini Cart widget.
Using this advanced cart widget, you can easily implement the cart feature in your online store and help your customer to add or remove their products in their cart whenever they want.
Let’s see how to set it up.
Pre-requisites
- WooCommerce
- Happy Addons
- Happy Addons Pro
How To Use Mini Cart Widget of Happy Addons Pro
Step 1:
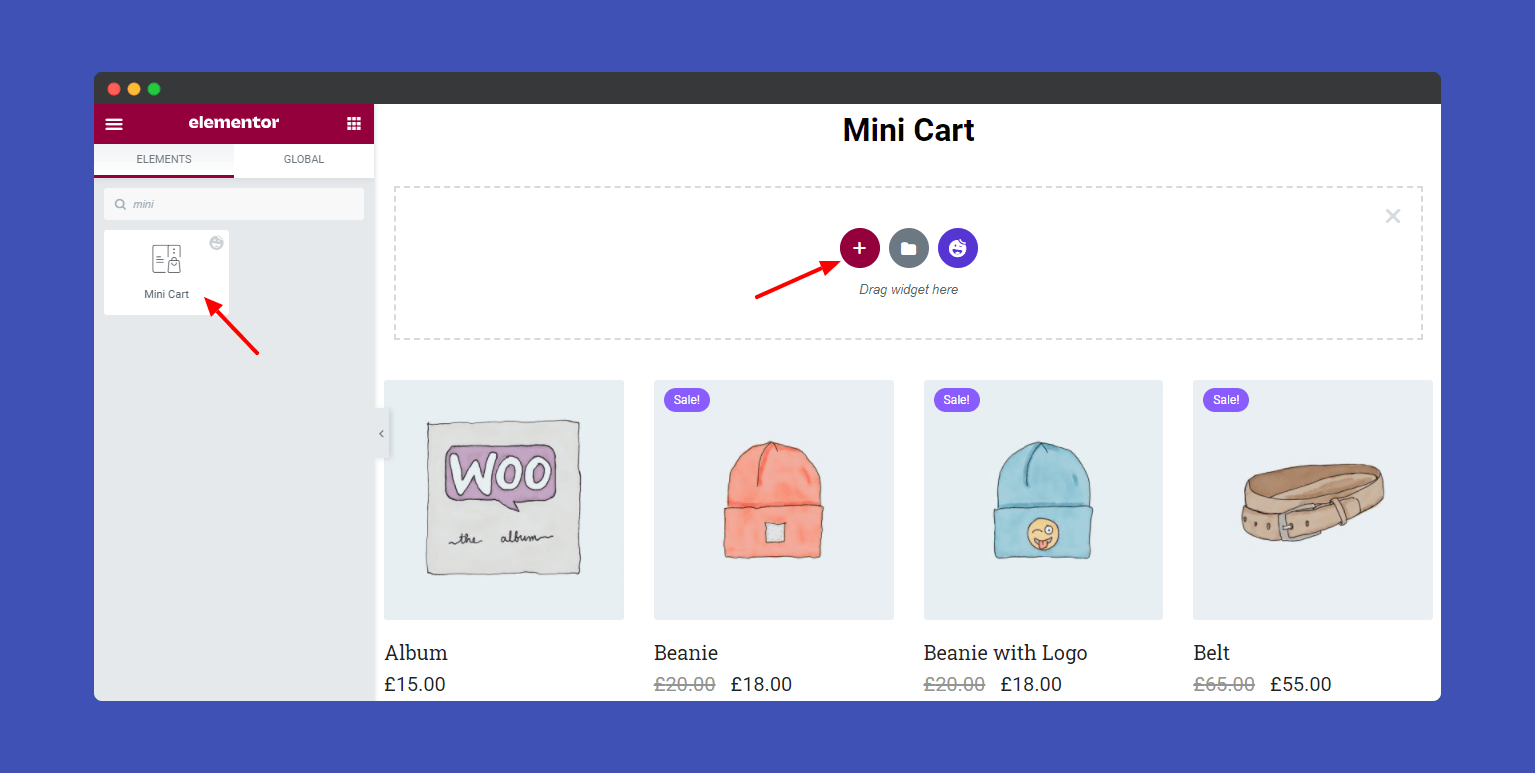
First, find the mini cart widget in the search bar and select the widget from the left side menu. Then drag and drop it onto the selected area.
Step 2:
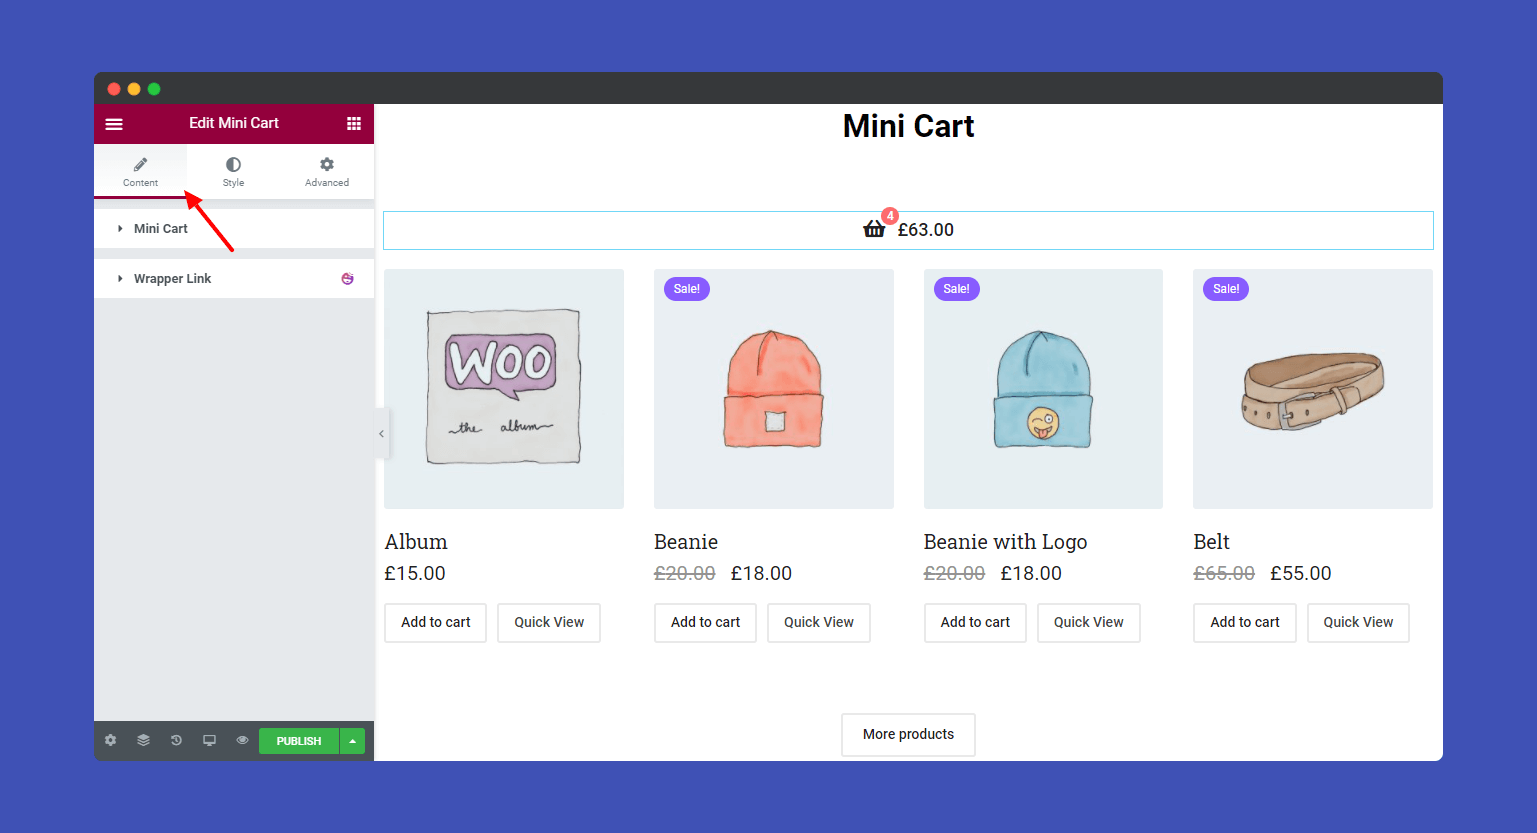
In the “Content” section, you will find the “Mini Cart” and “Wrapper Link” edit options.
By clicking on the “Mini Cart” drop-down menu, you will find various options to change your Cart Icon, select Cart Popup, show & hide Subtotal, set up Subtotal Position, and change Alignment.
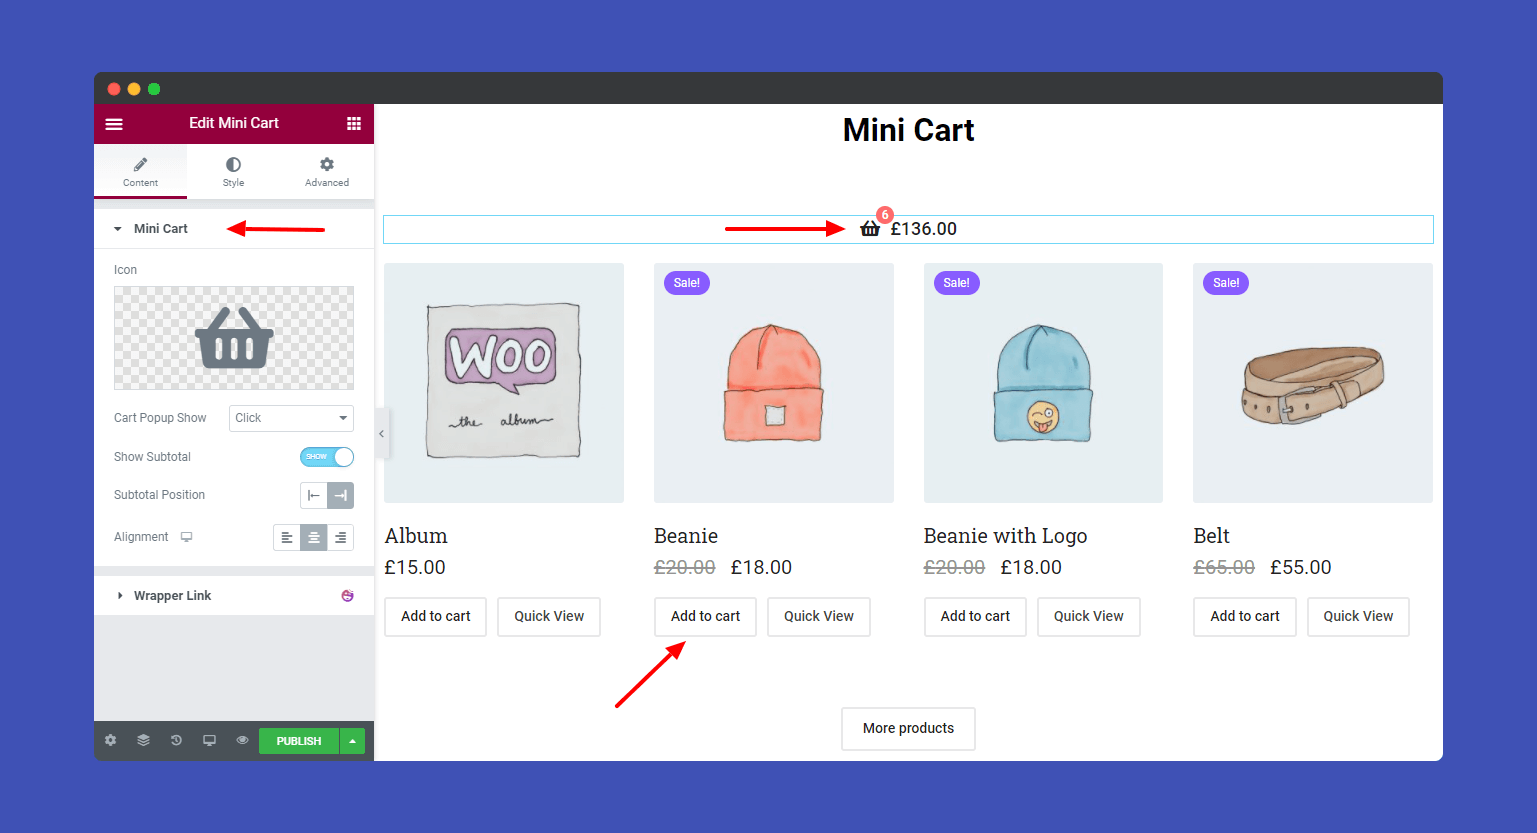
Note: If you add more products to your cart, it will show the updated cart products with the price each time. Even you can easily remove your product from the cart and add more according to your need.
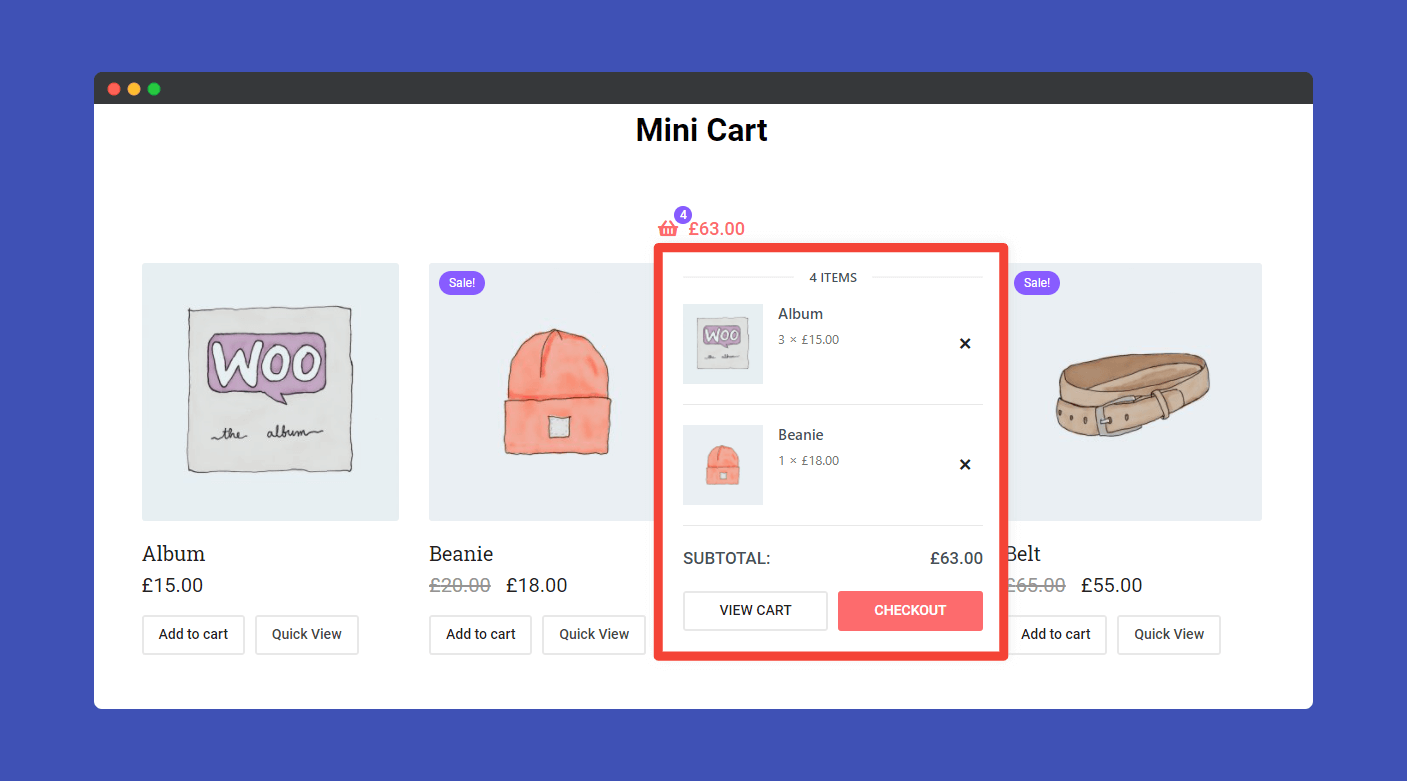
You can change your popup showing opting to click on the ”Cart Popup Show” drop-down menu. Here you find three options None, Click, and Hover to set your popup display.
Let’s change it and select the Hover.
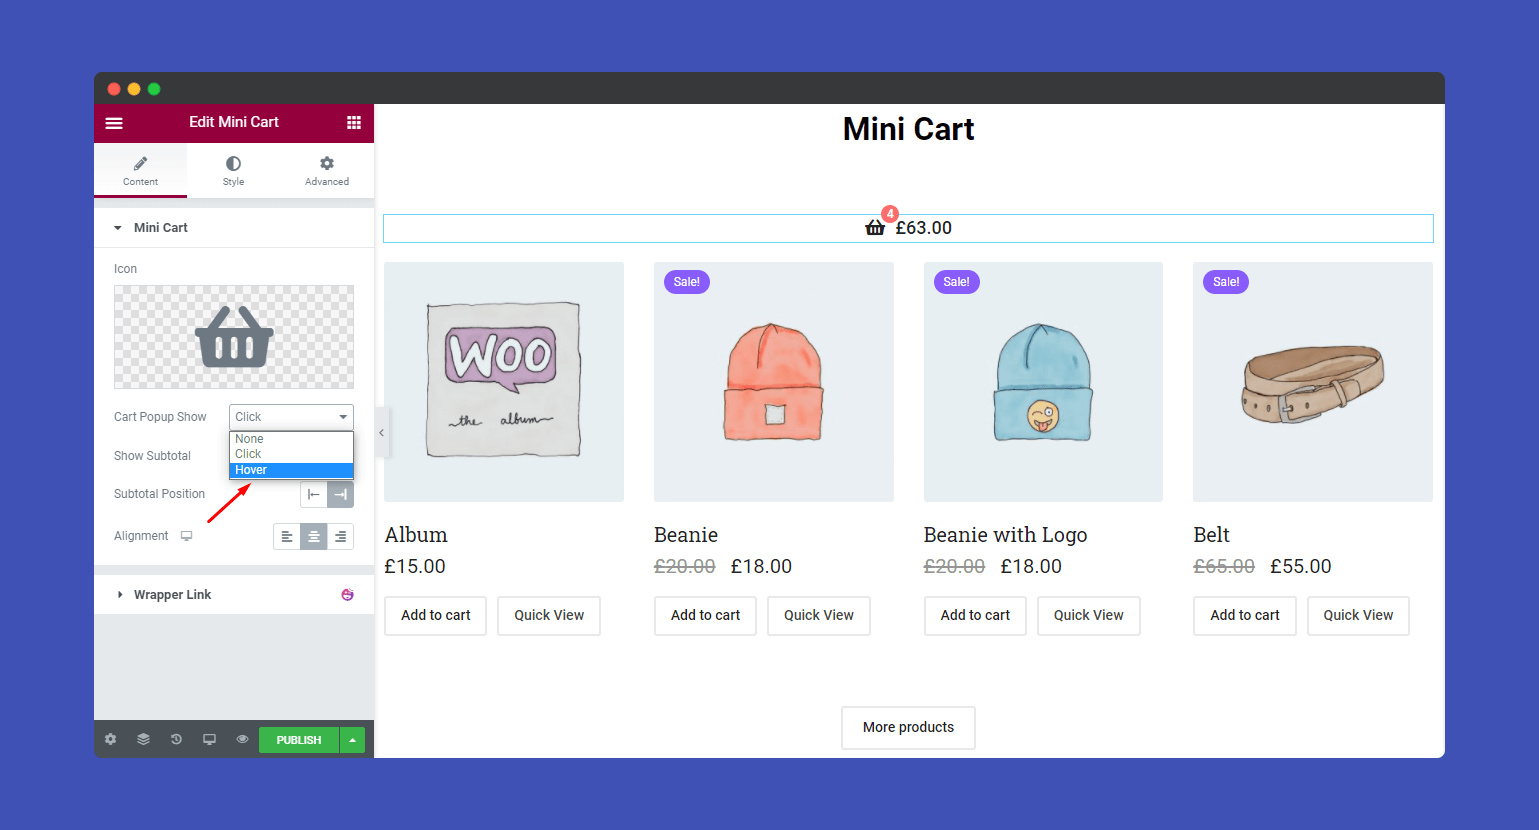
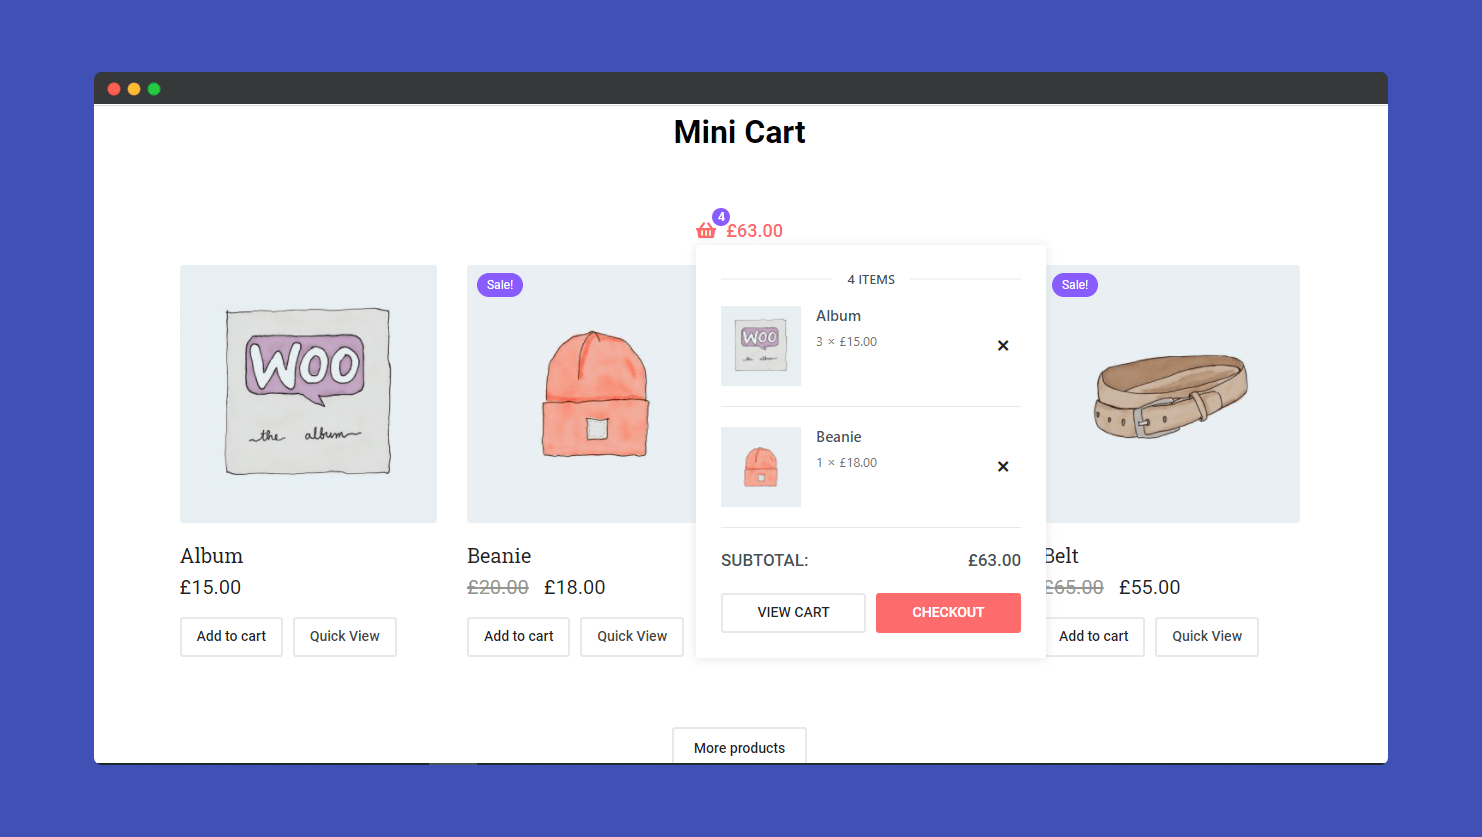
After setting the Hover Cart Popup, now you see the popup when you hover over the cart.
Step 3:
In the “Style” section, you will find six style options to design your cart. Here are the lists.
- Mini Cart
- Popup:- Body
- Popup:- Header
- Popup:- Item
- Popup:- Subtotal
- Popup:- Button
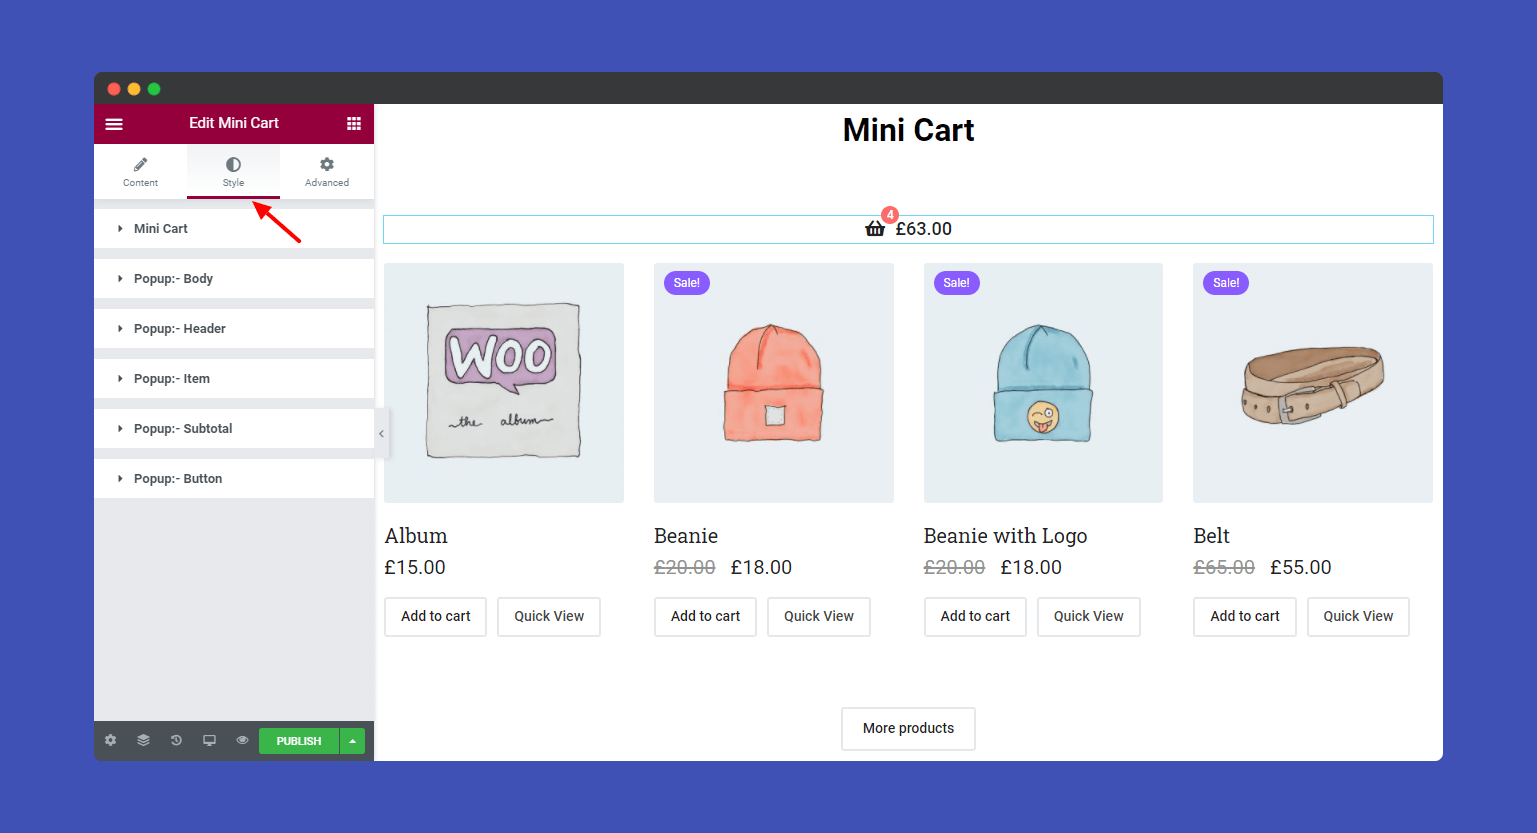
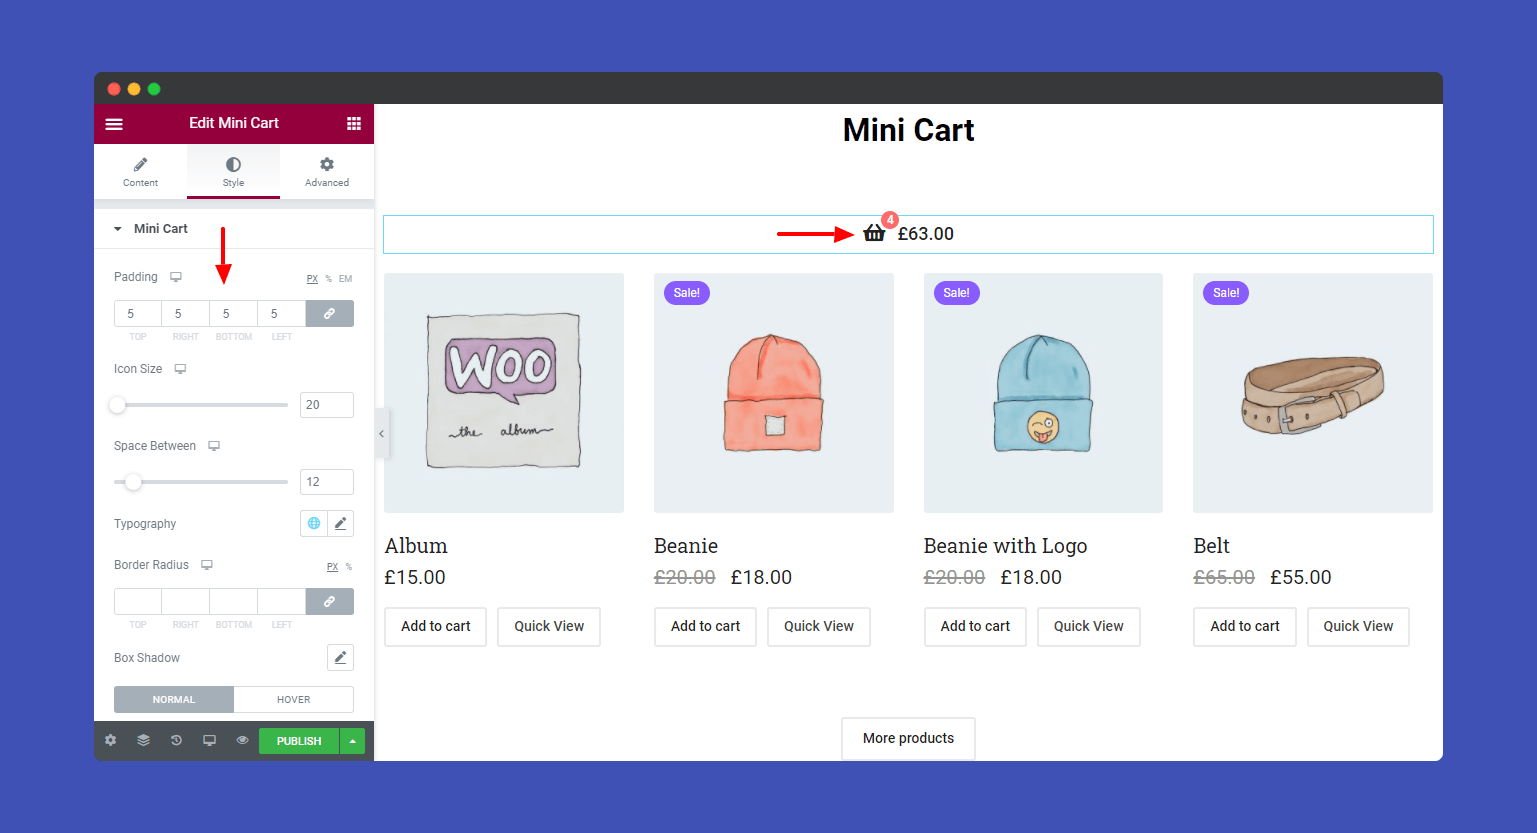
Click on the Style–>Mini Cart for redesigning your cart section. You can resize icon size, change text Color, Background Color, Border, Typography, and more. You also edit the count Height, Width, Position, Color, Font-size, and other necessary things.
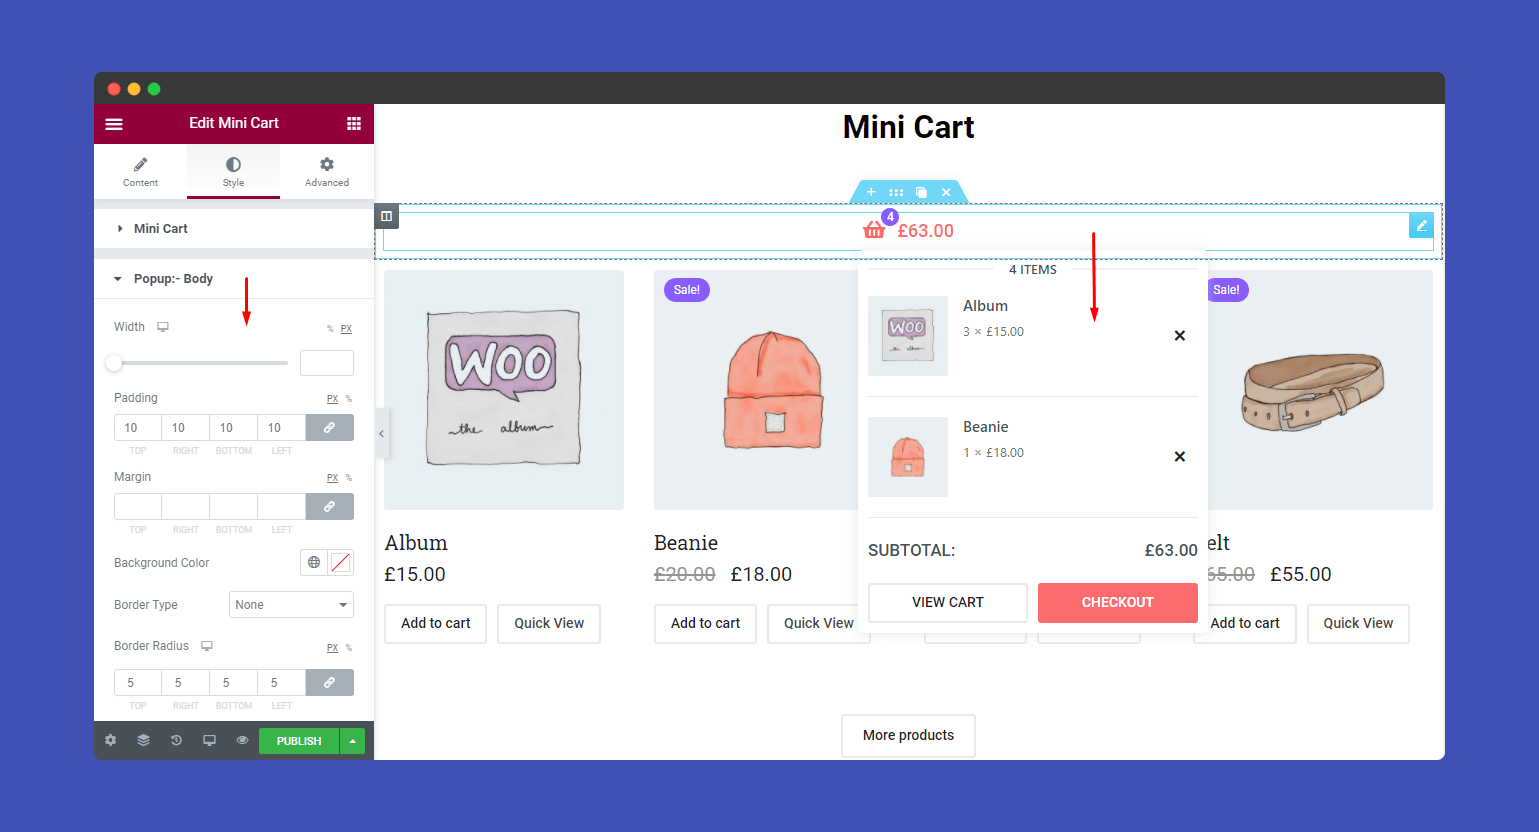
If you want to change the default style of the popup body, you can do it by going to Style–>Popup Body. Here, you can change the Margin, Padding, Width, Border Type, Box Shadow, and Background Color of the Popup Body.
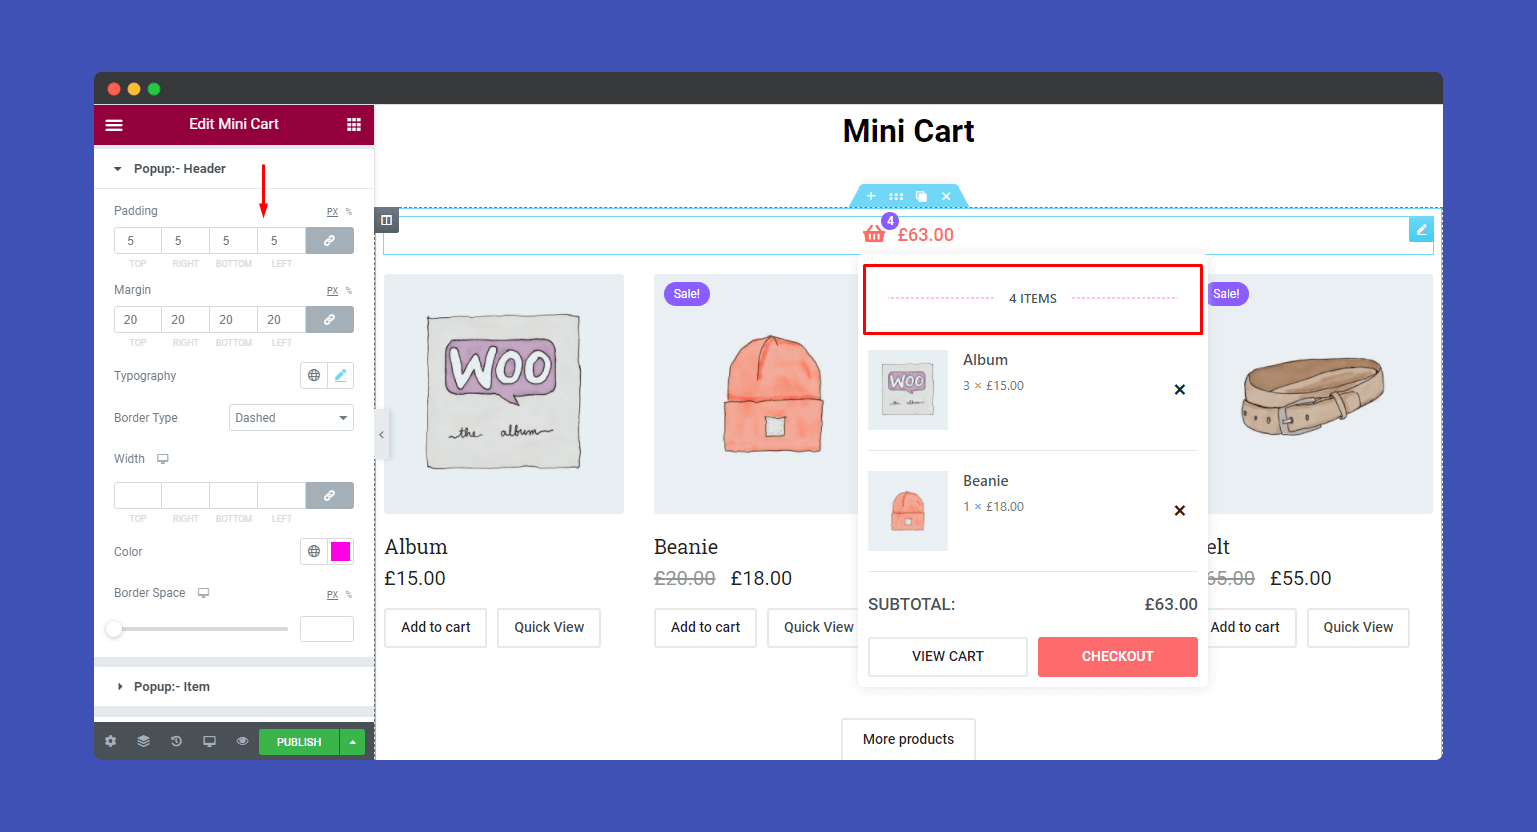
Well, you can also give an impressive look to your popup header. Just visit Style–> Popup Header and you will find various style options to configure your layout. Again, you can change the color, font, add padding, margin, and border space to the Popup Header.
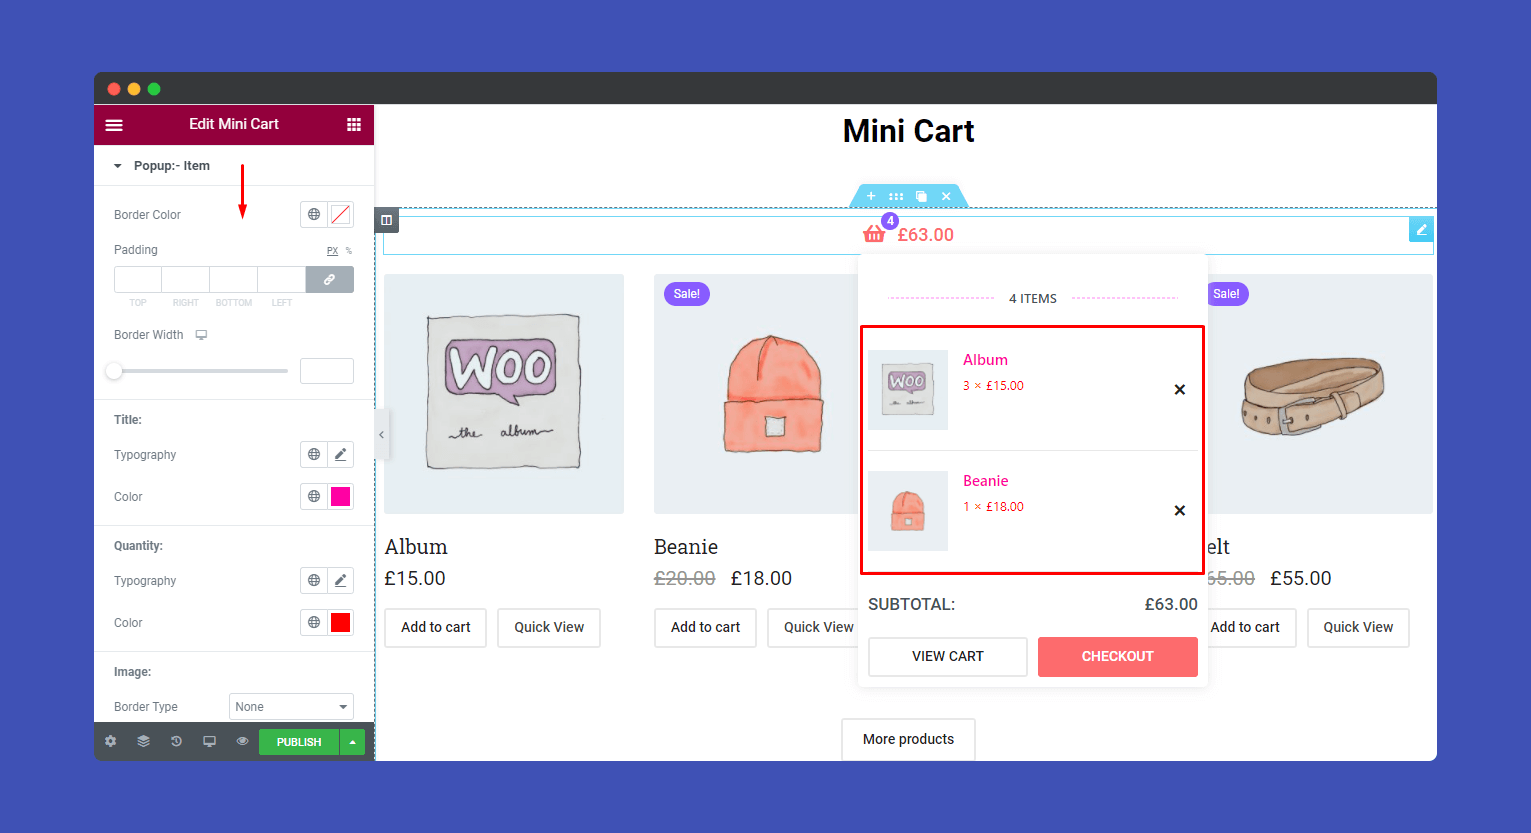
If you need to edit any design to your Popup Item, you can do it by clicking Style–>Popup Item. Here, we allow you to change the cart item’s Title, Quantity, Image, and Remove styles.
Popup Subtotal also will change here. Just go to Style–>Popup Subtotal. Then you can find all controls to change the Subtotal Title & Price Typography, Color, etc.
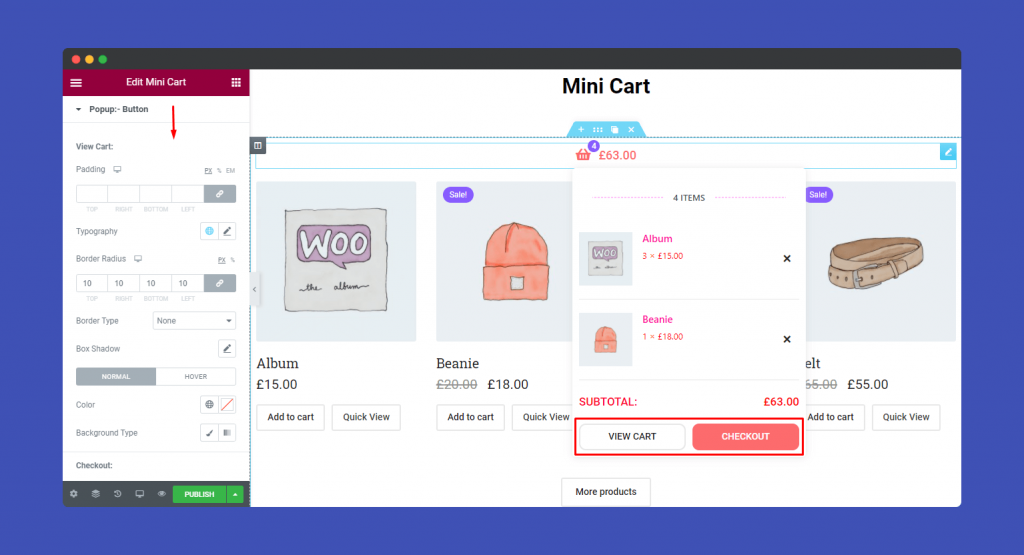
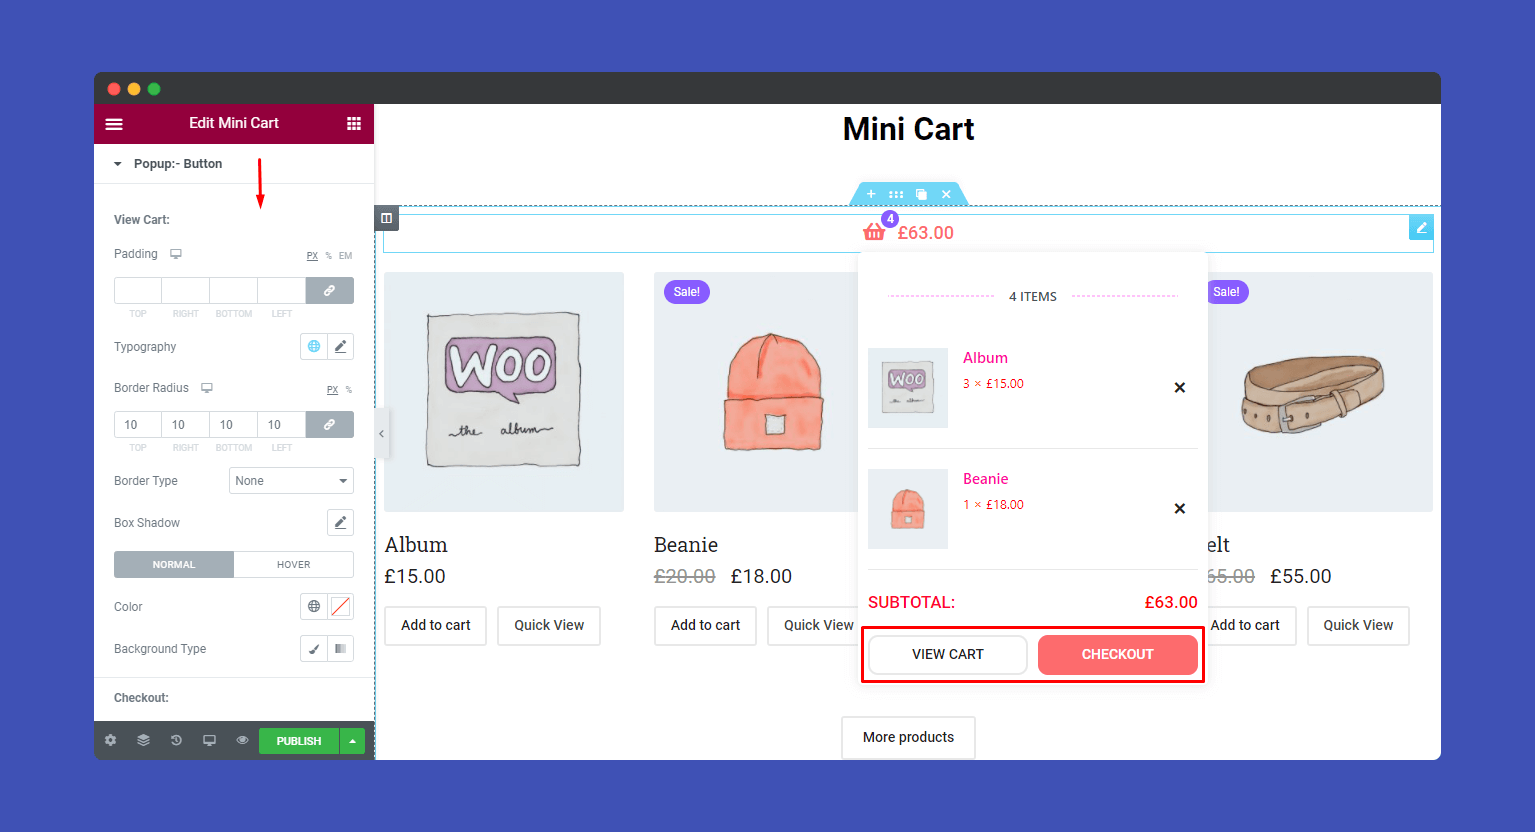
Finally, you also able to edit your cart Popup Button. Here, you can simply set your View Cart and Checkout Color, Typography, Background Type, and reset the margin and Padding.
Step 4:
If you want to add motion effects, happy effects, background, or make it responsive and more intriguing, click on ‘Advanced‘ to explore those options. the ‘Advanced‘ is a default feature of Elementor.
Give a read to this Document to know more about advanced features & functions.
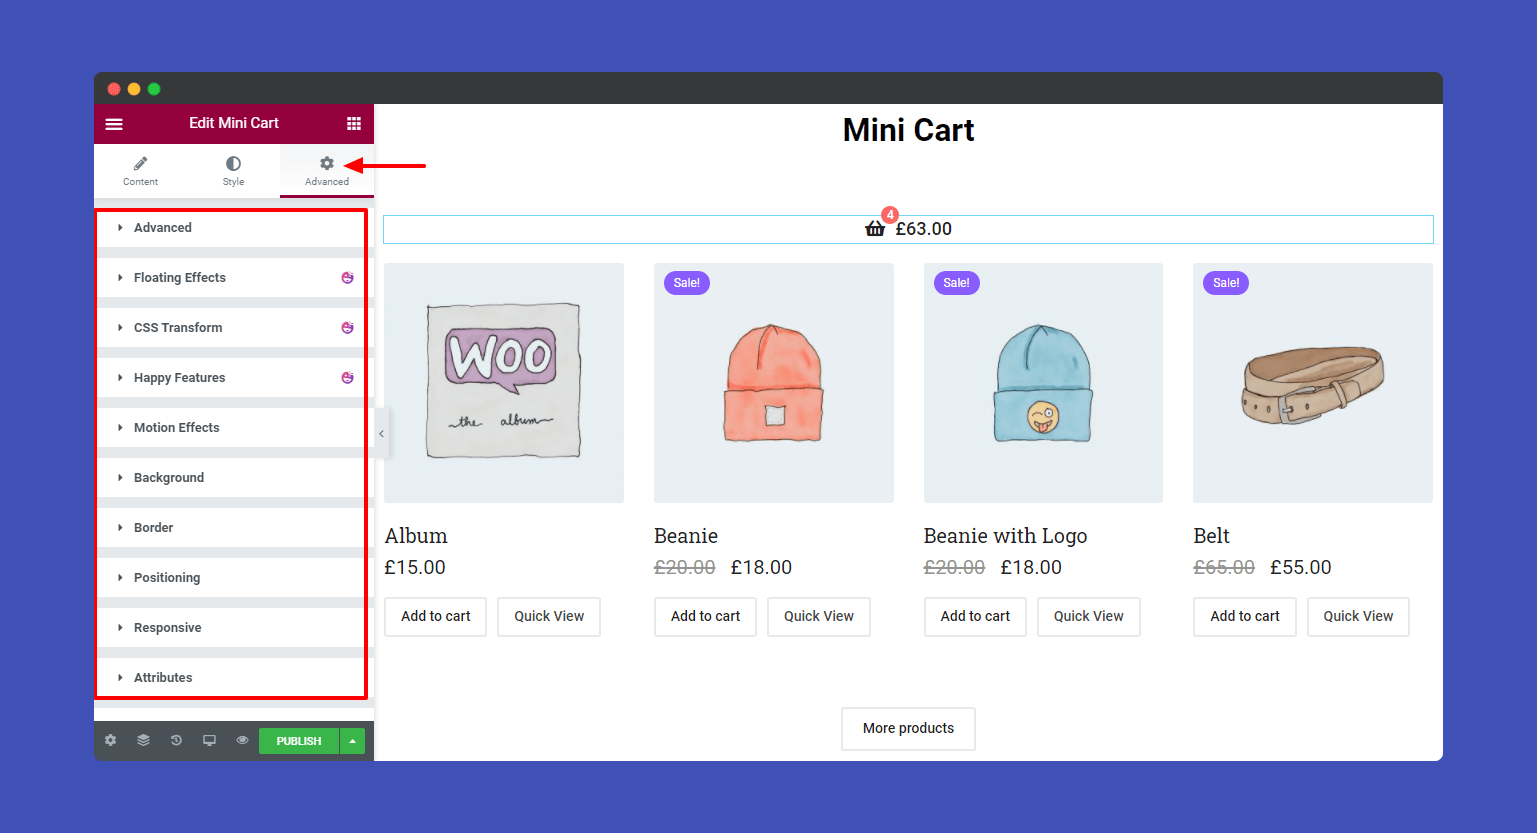
Let’s see the final usage of the Happy Addons Mini Cart widget.
That’s it.
