Happy Elementor Addons Pro recently released the Post Carousel widget. With this widget, you can easily display your post on the carousel and make your blog posts look more professional.
How to Use The Post Carousel Widget of Happy Elementor Addons Pro
Let’s practically use the post carousel.
Step 1:
Select Post Carousel from the left side menu bar, then drag and drop the widget onto the selected area.
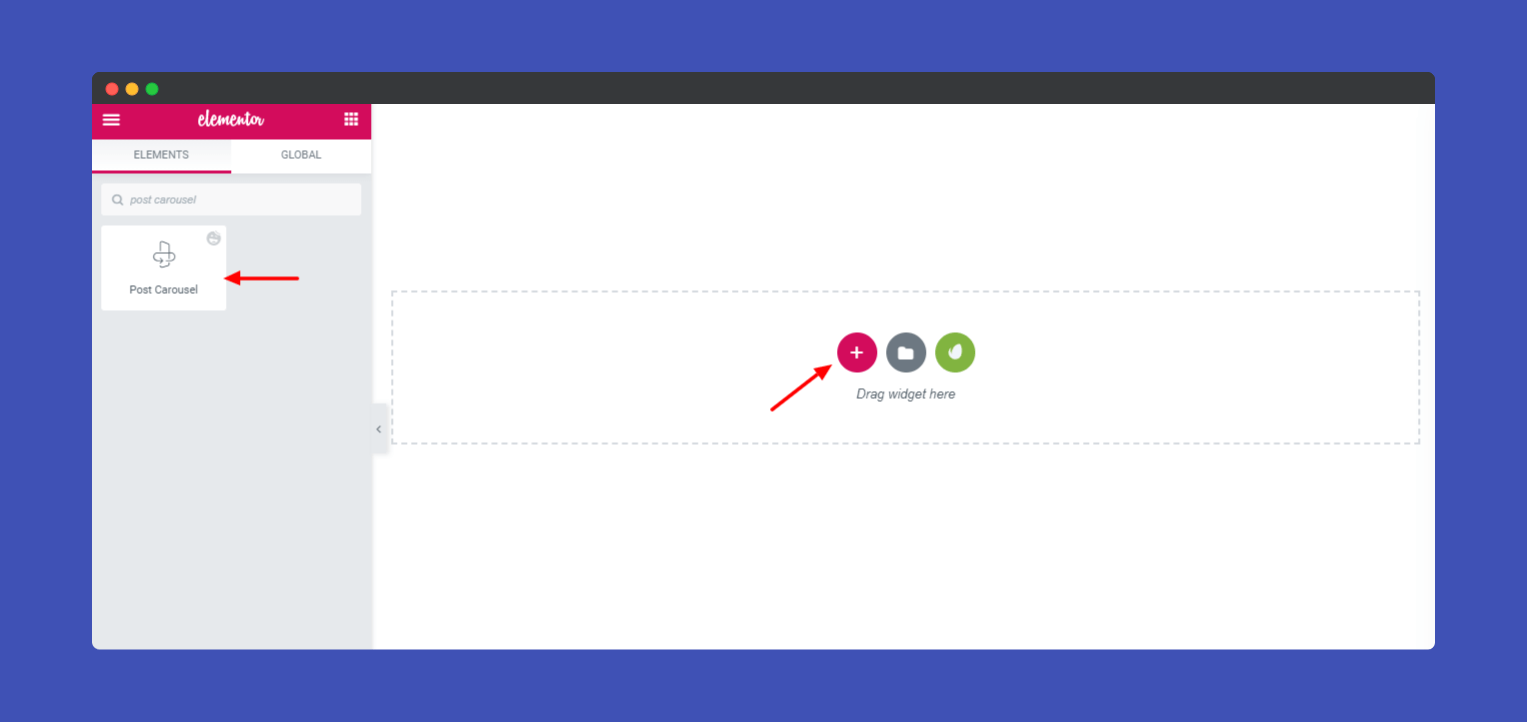
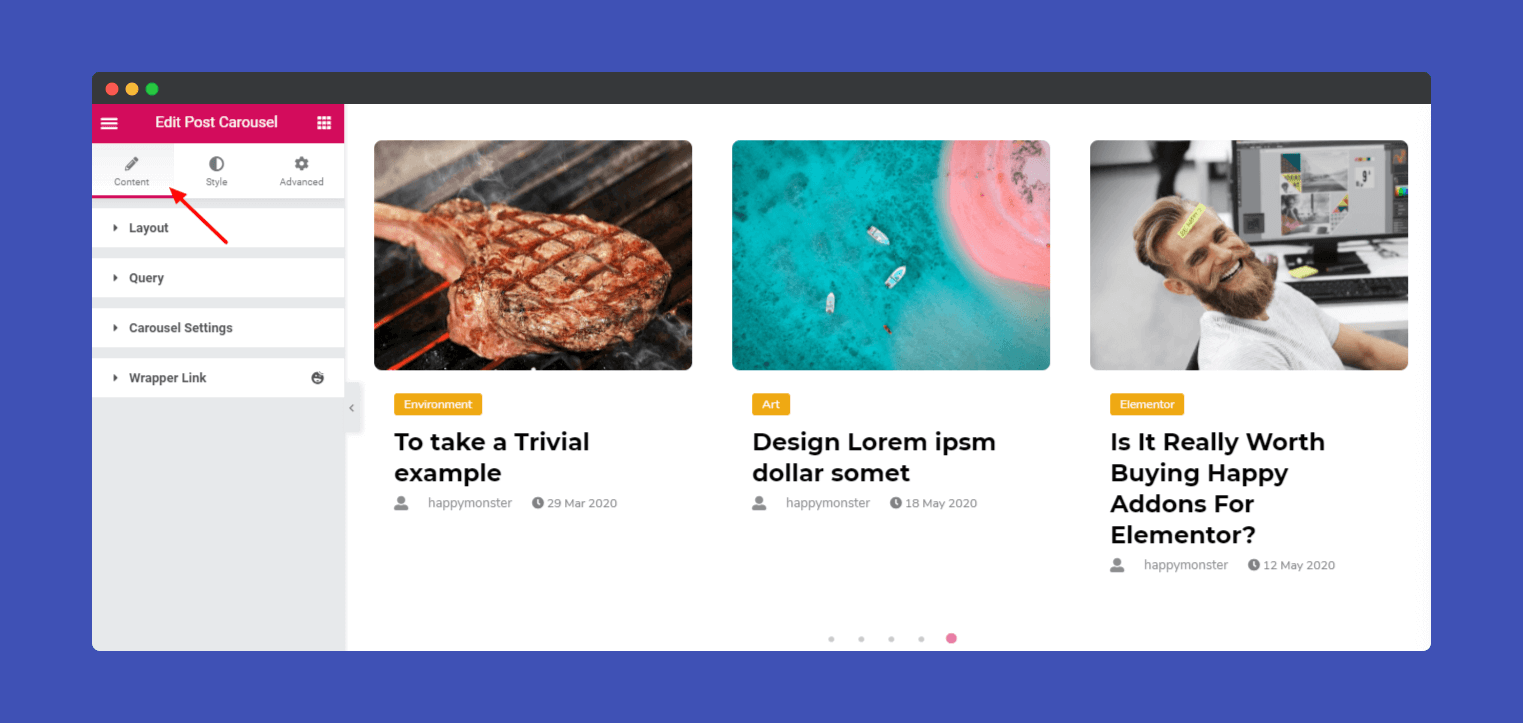
Step 2:
In the Content section, you will find the options to edit ‘Layout‘, ‘Query‘, ‘Carousel Settings‘, and ‘Wrapper Links‘.
Here in ‘Layout‘, you can change Image Size, Show Badge, Show Excerpt, Excerpt Length, Active Meta, AuthorDate, Author Avatar, Author Name, and many more.
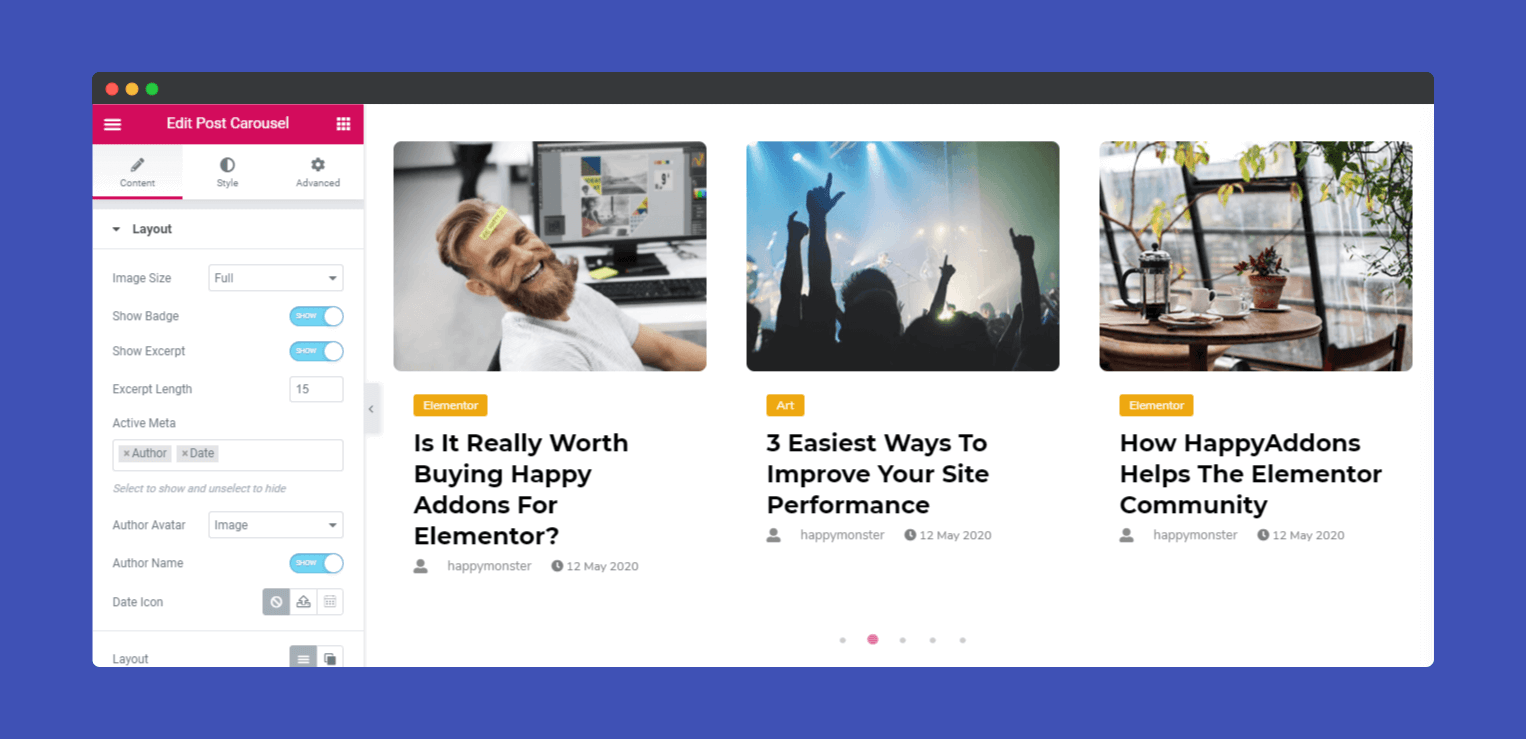
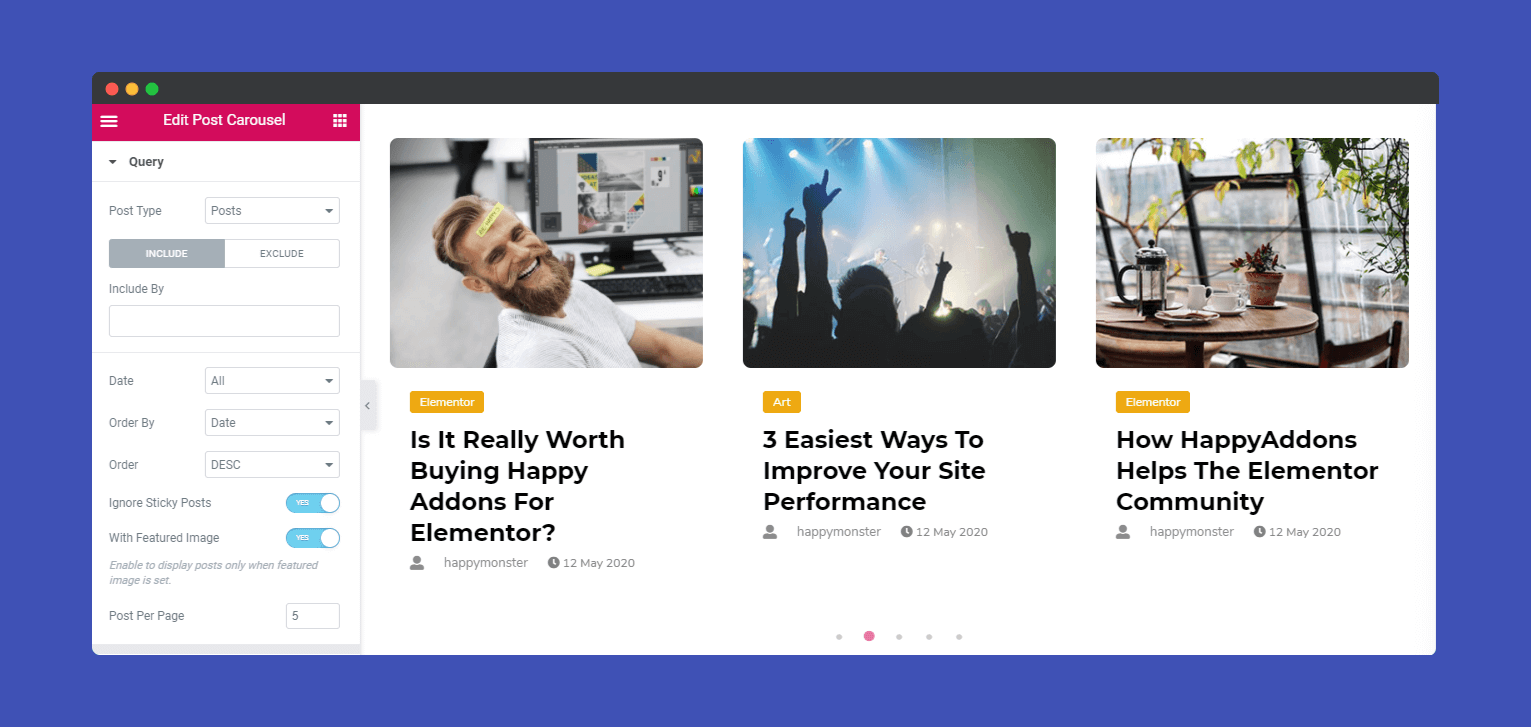
Note: When you work on the post image layout. Make sure that Query -> With Featured Image is enabled.
In the ‘Query‘ section, you can change to Post Type, Include By, Date, Order By, Order, Ignore Sticky Posts, With Featured Image, and more.
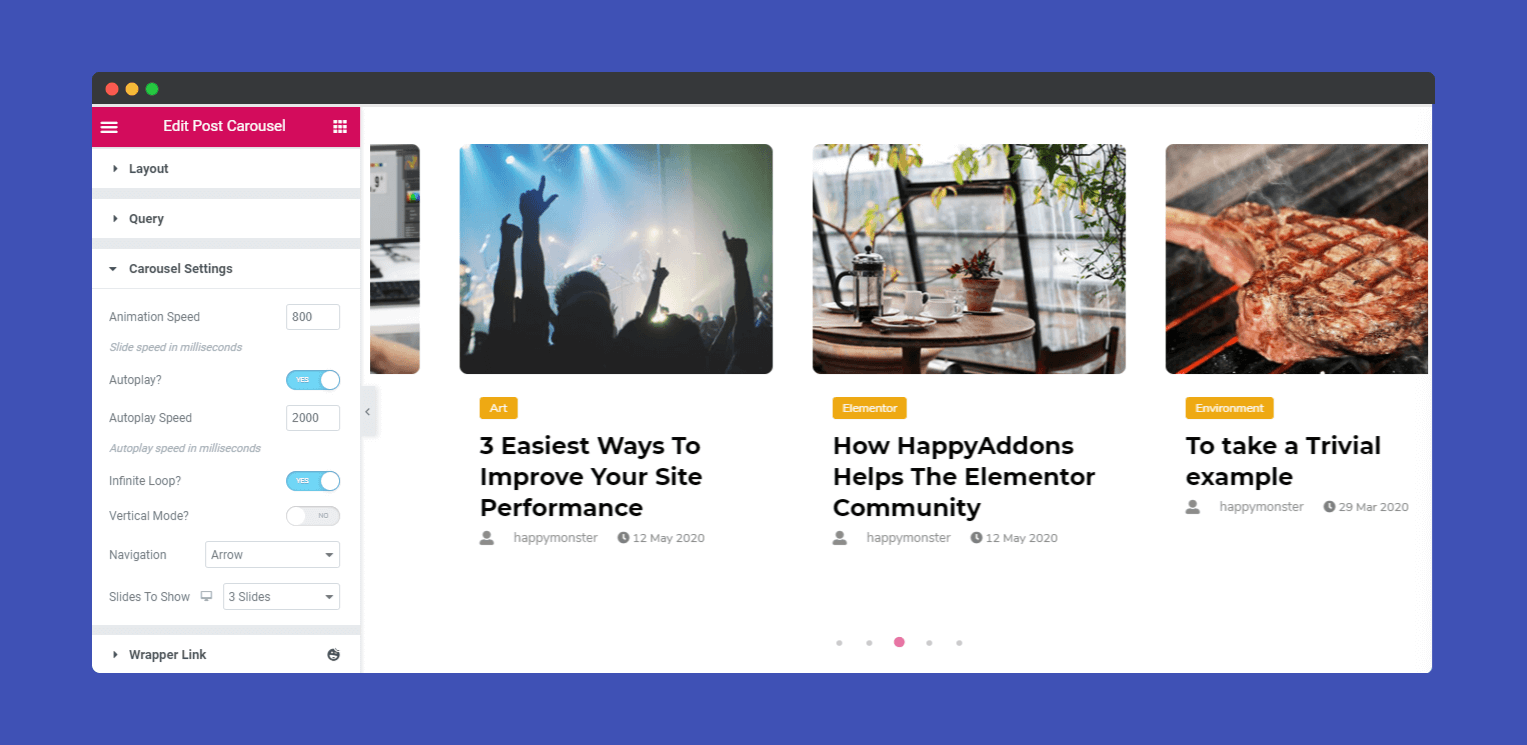
In ‘Carousel Settings‘, you can easily edit your Animation Speed, Autoplay, Autoplay Speed, Infinite Loop, Navigation, and more.
Step 3:
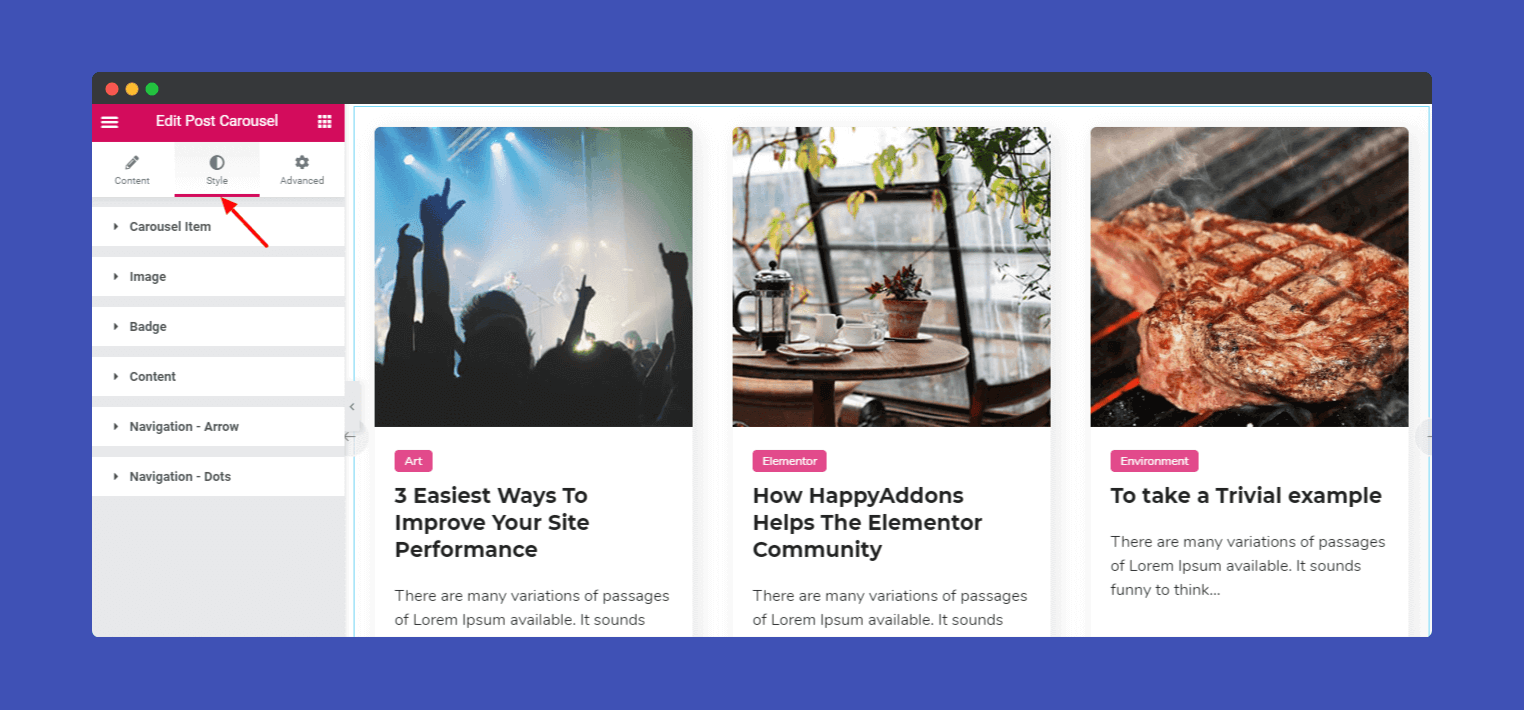
In the ‘Style‘ section, you will have options to design ‘ Carousel Items,’ ‘ Image,’ ‘ Badge,’ ‘ Content,’ Navigation-Arrow’, and ‘ Navigation-Dots’.
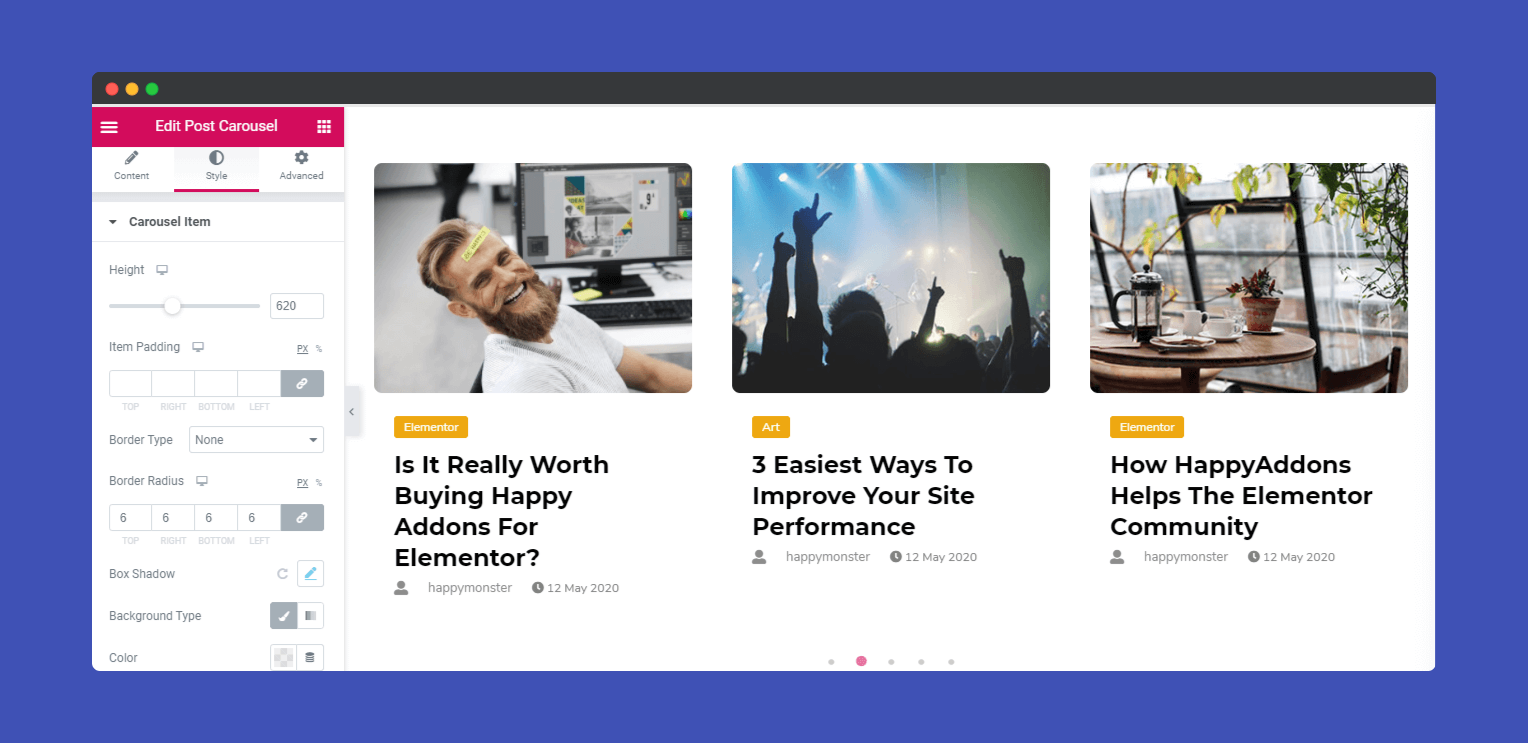
Now in ‘Carousel Items‘, you can add height, item padding, border-type, border-radius, box-shadow, background type, and color.
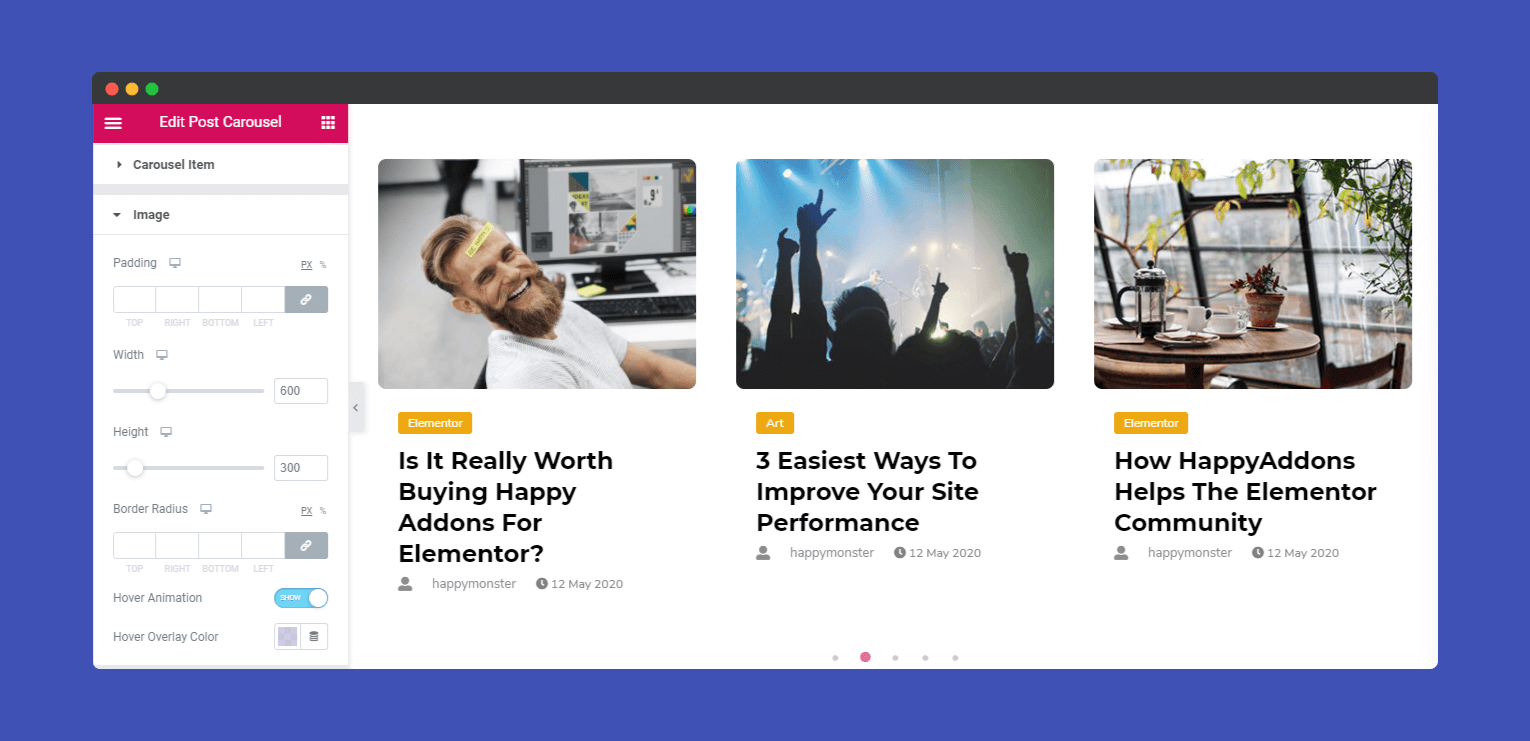
In ‘Image‘, you can change image padding, width, height, border-radius, hover-animation, and hover overlay color.
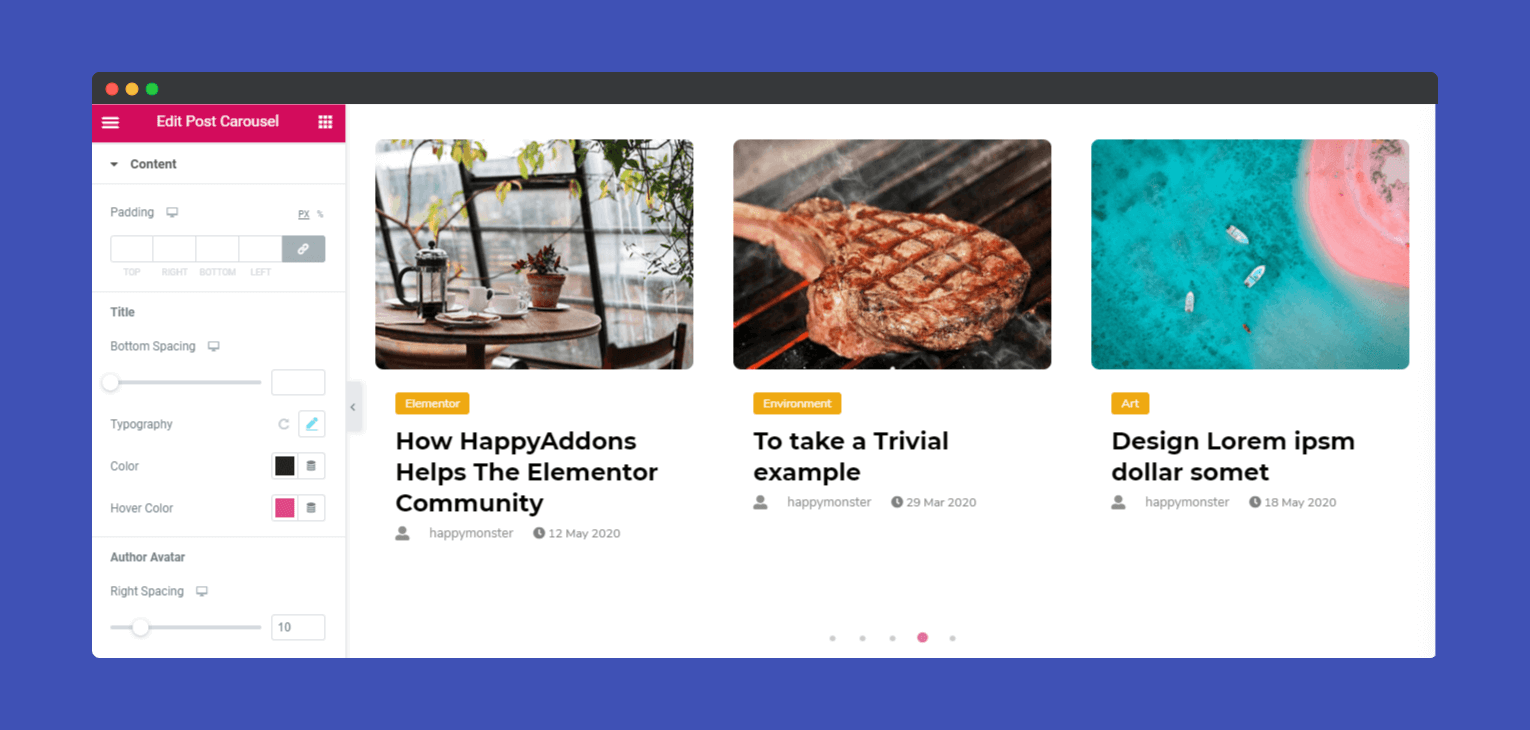
In ‘Content‘, you can edit Title (Bottom Spacing, Typography, Color, Hover Color), Author Avatar (Right Spacing, Icon/Image Size).
Step 4:
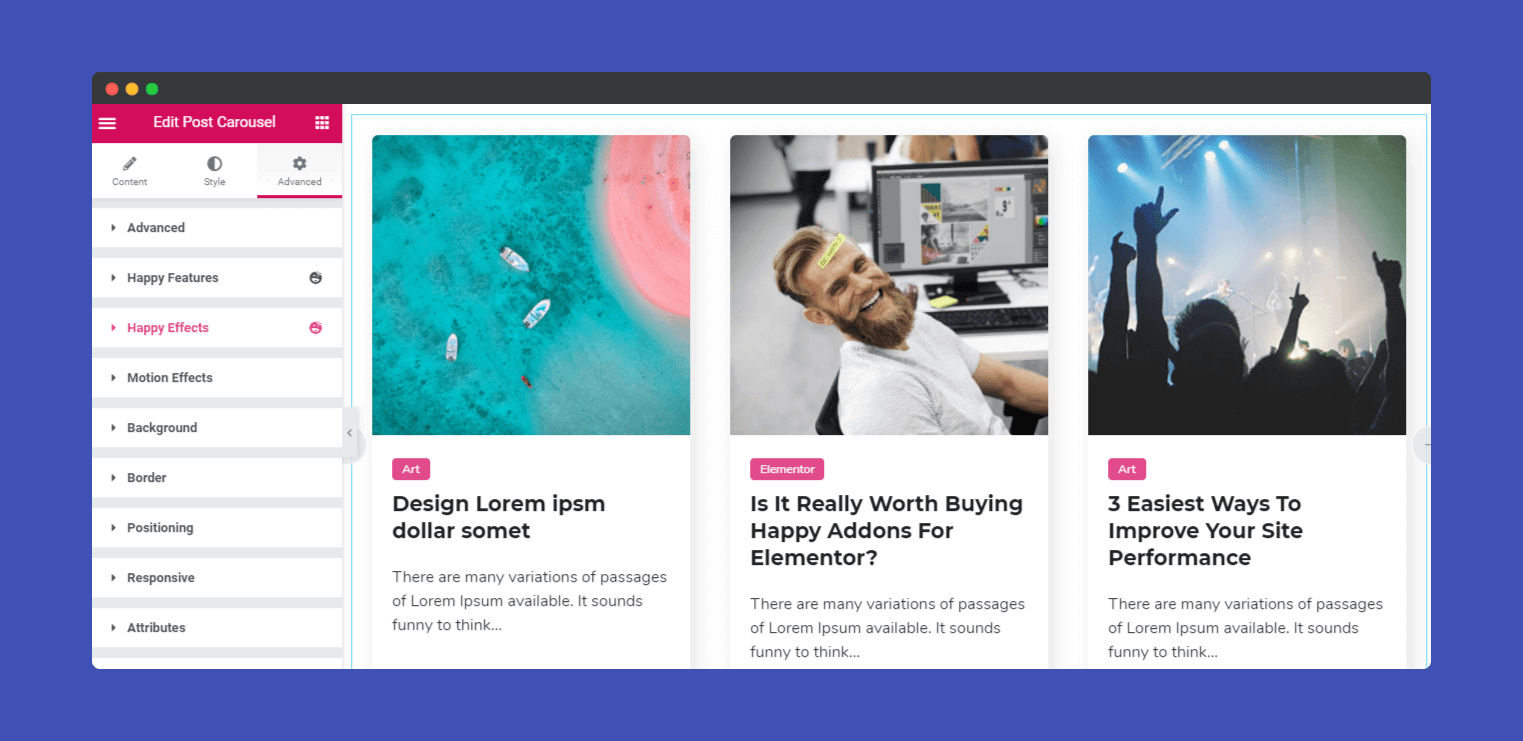
If you want to add motion effects, happy effects, background, or make it responsive and more intriguing, click on ‘Advanced‘ to explore those options. the ‘Advanced‘ is a default feature of Elementor.
Give a read to this Document to know more about Advanced features and its uses.
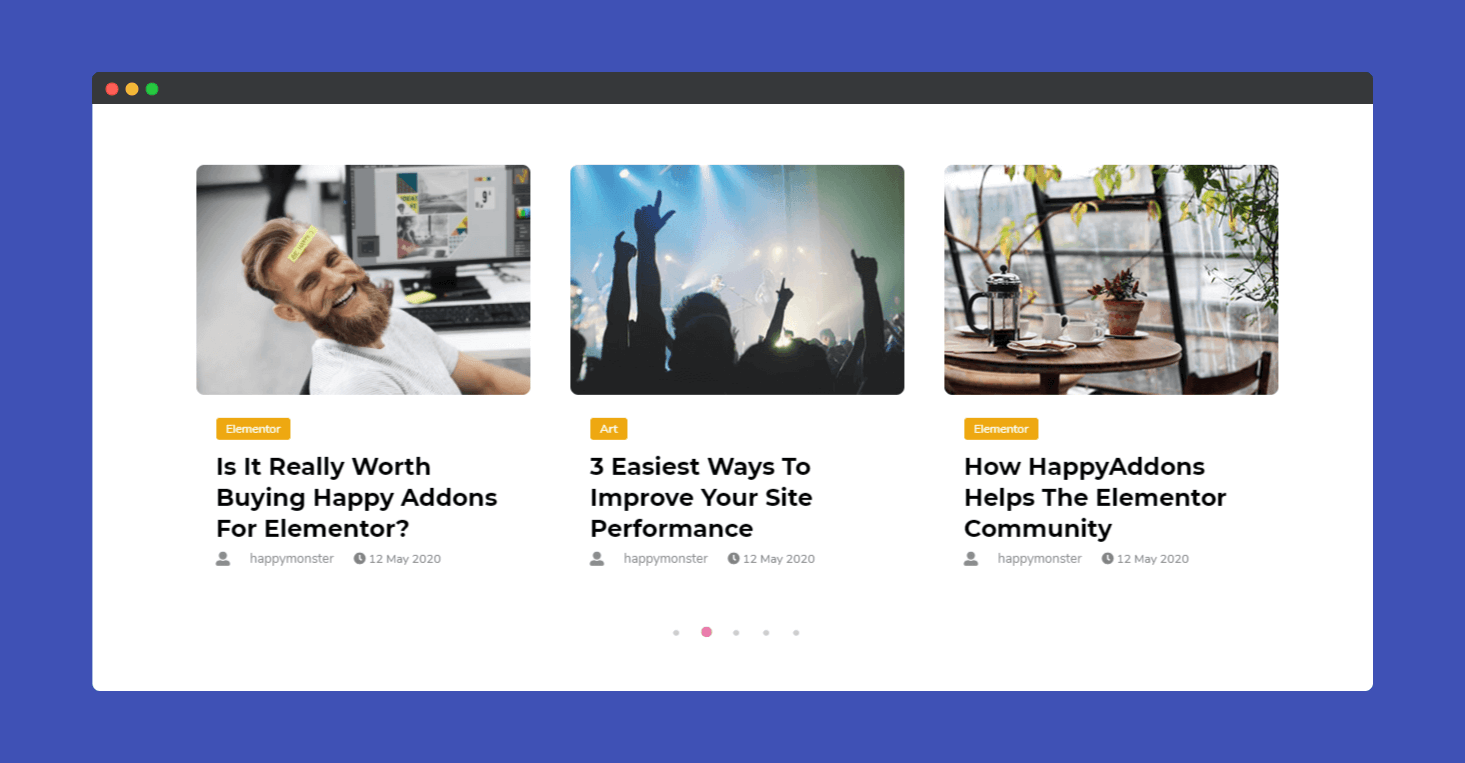
Finally, click the publish button to see the beautiful post carousel on your webpage.
That’s it!
