View your WooCommerce products in the most stylish way and make it more attractive to customers with the new Product Grid widget of Happy Elementor Addons Pro.
You can design the product page with more finesse and easily increase the revenue of your store. Let’s see how to set it up.
Pre-requisites
- WooCommerce
- Happy Addons
- Happy Addons Pro.
Set up Product Grid
Step 1:
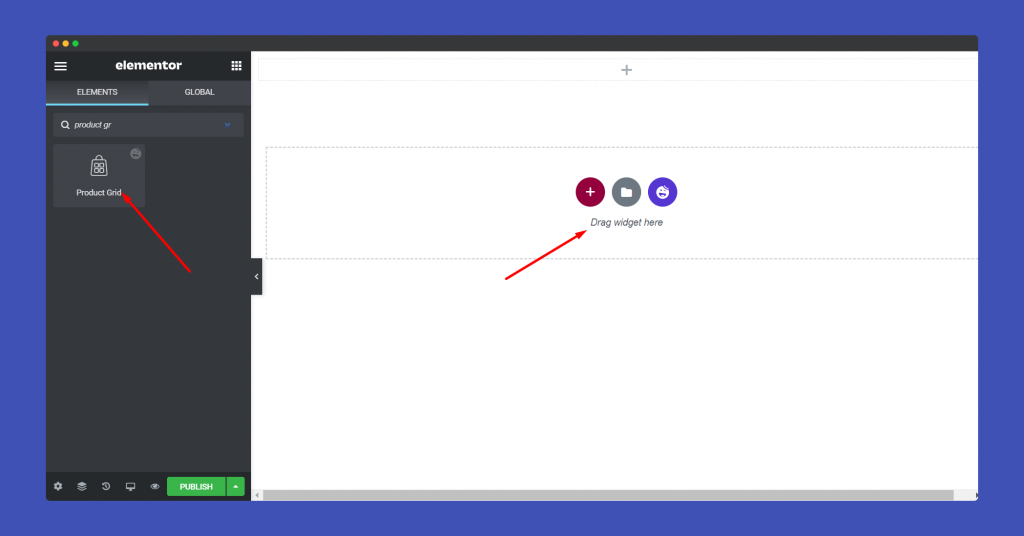
Select the Product Grid widget from the menu bar on the left-hand side of the screen then drag and drop it in the selected area.
Step 2:
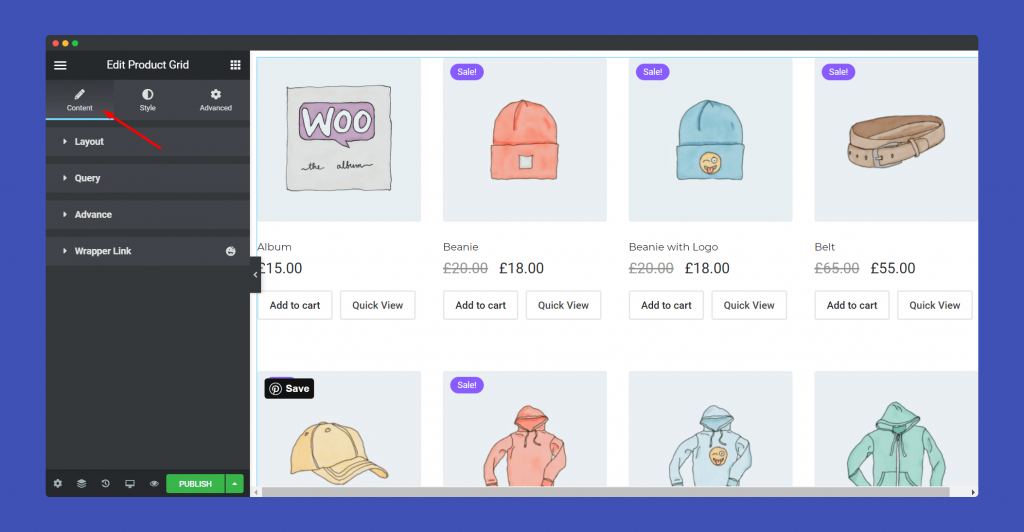
In the ‘Content‘ section, you will find options to edit ‘Layout‘, ‘Query‘, ‘Advance’, ‘Wrapper Link’.
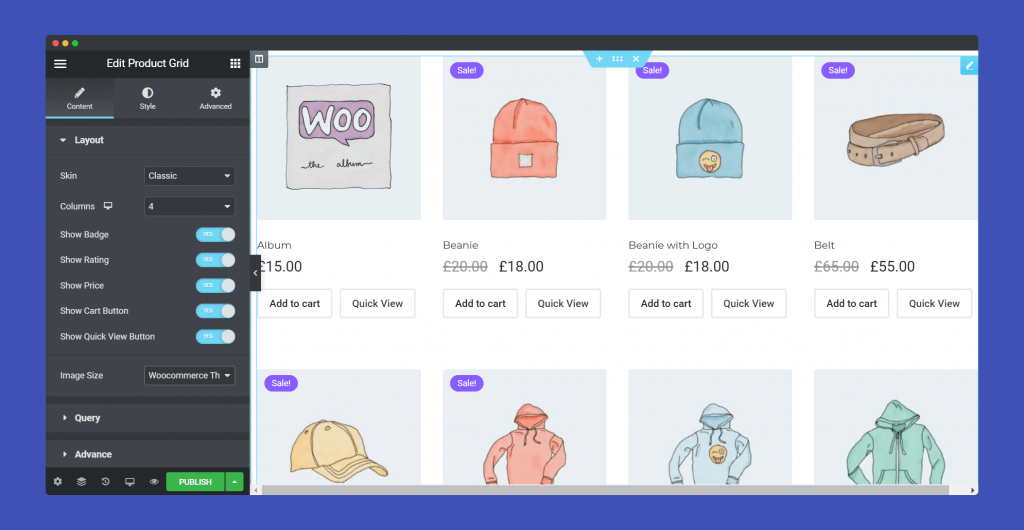
In the Layout part, you can choose the Skin, Column number, enable badge, rating, price, cart button, quick view button. Choose the image size as well.
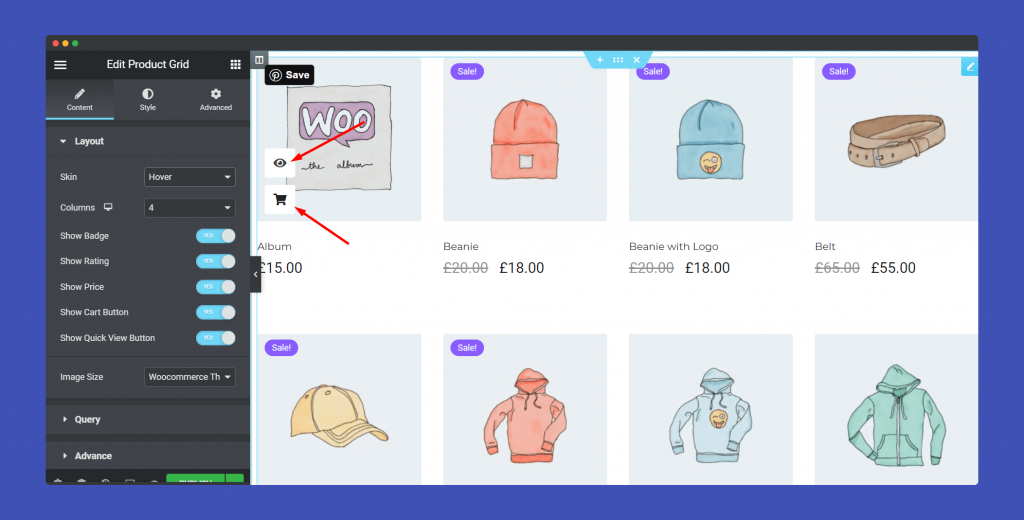
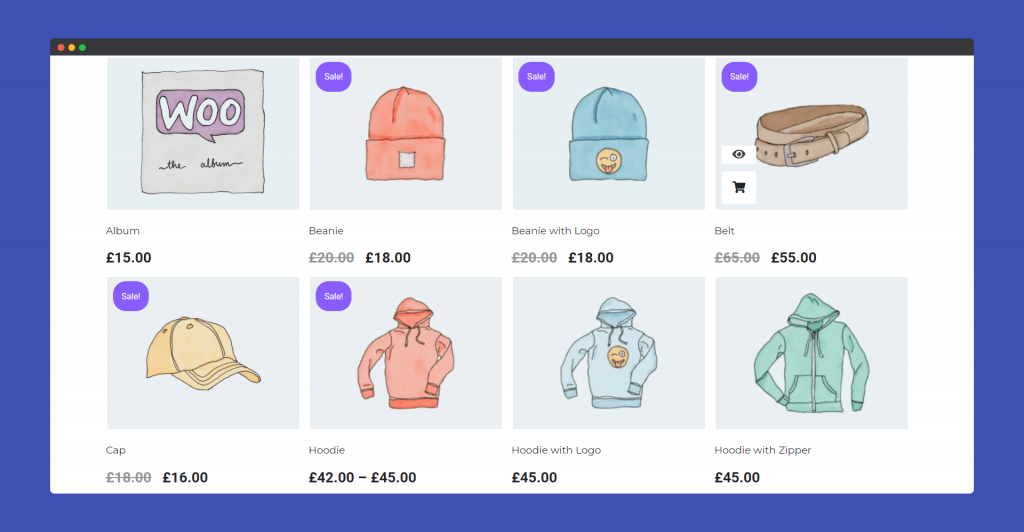
Now, you can select two types of skins. For the classic version you will get the default view. However, If you choose Hover, you will get two new options. Quick view button and the Add to cart button.
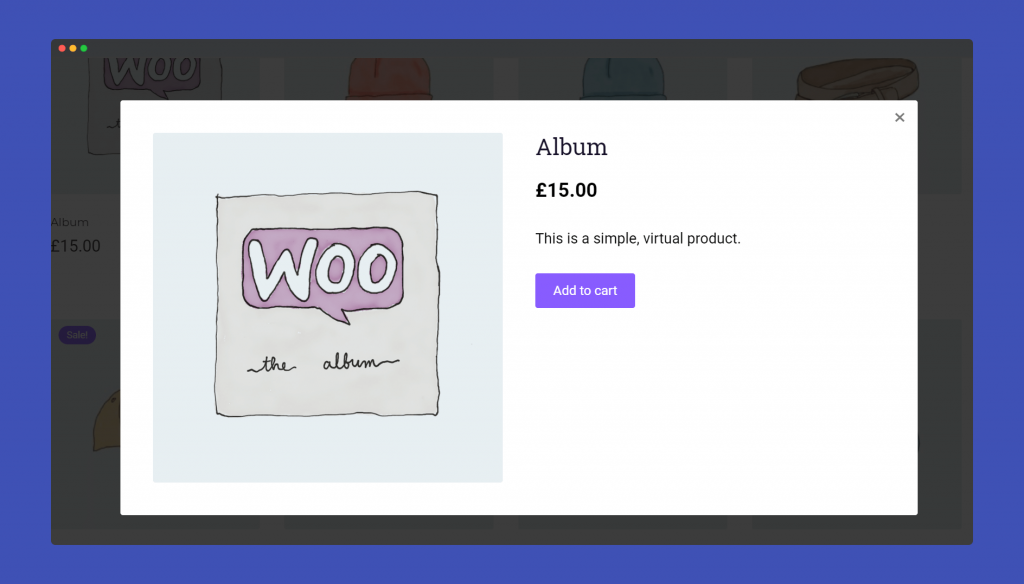
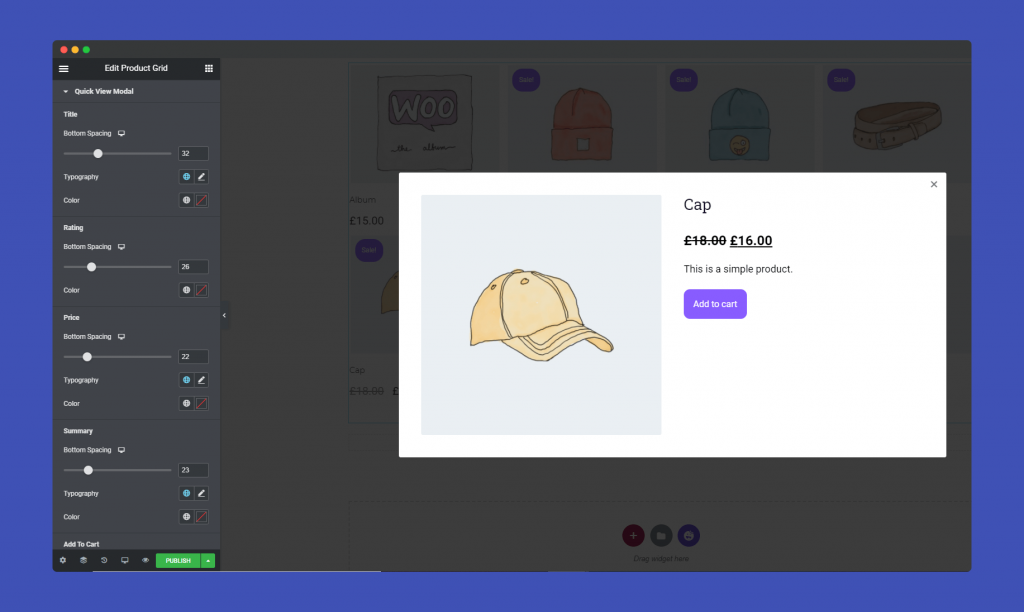
Here is what the quick view modal looks like,
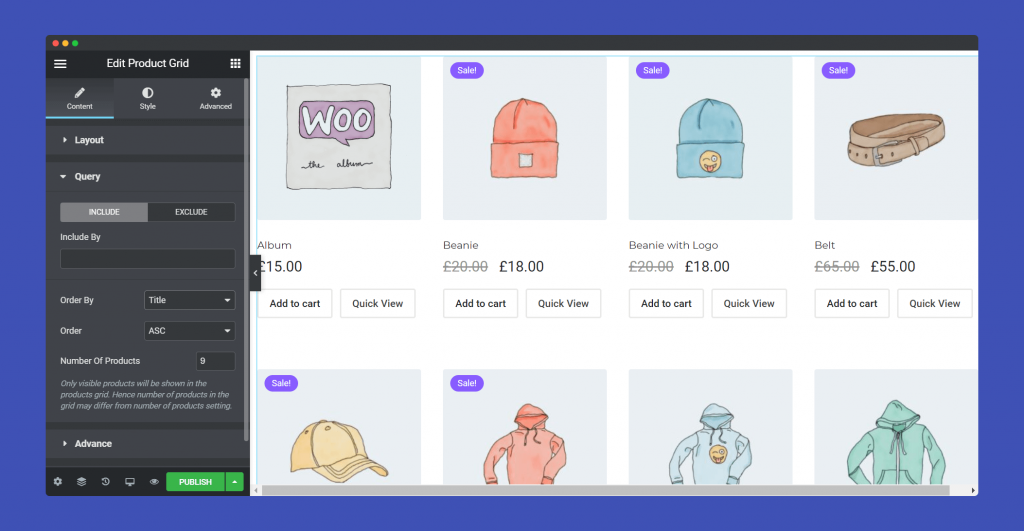
Now, in Query, you can include, exclude, design the order by and order by Ascending and Descending both.
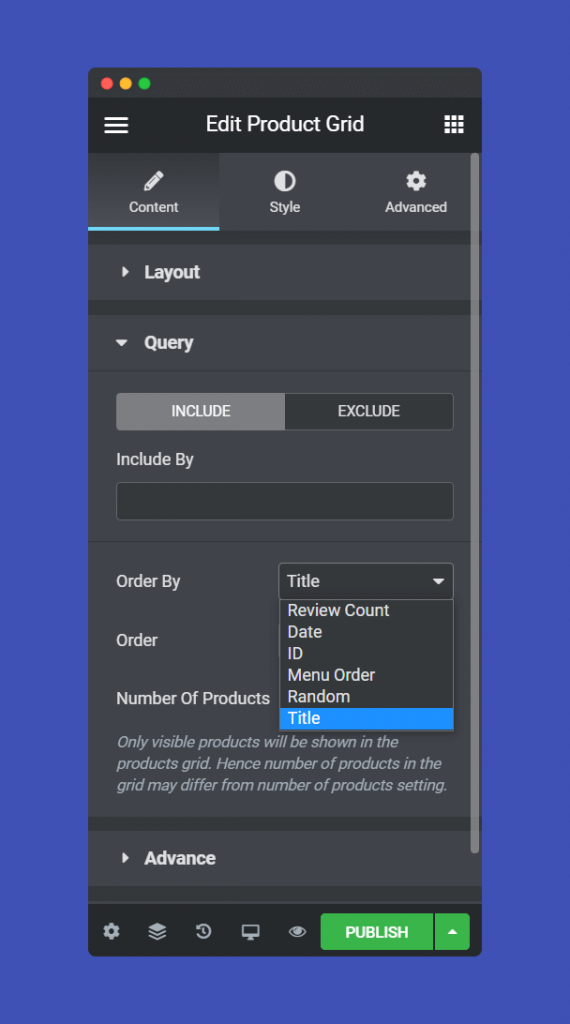
Now, order the products by review count, date, ID, random, Title.
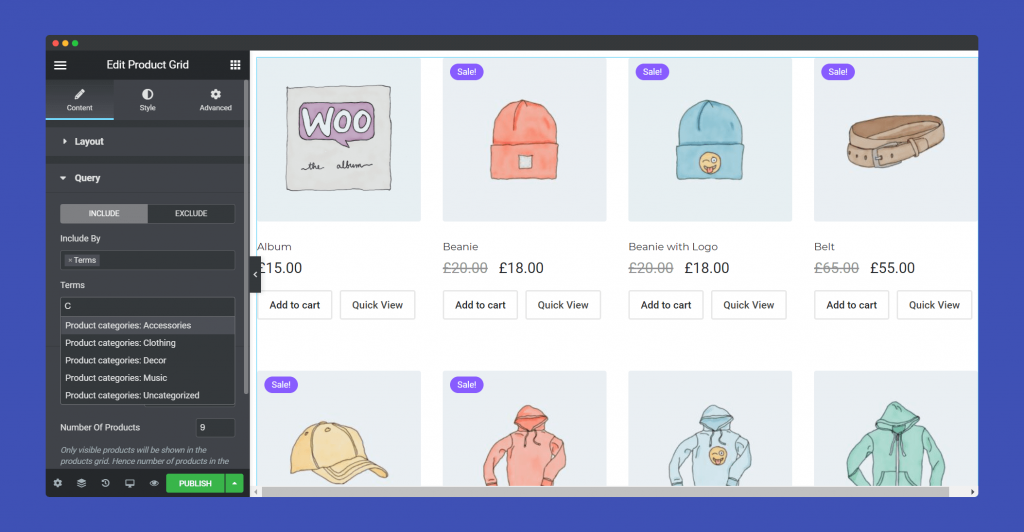
You can use the query in two ways. Include and Exclude. When you choose to include, you get two options. Terms and Featured Products. When you choose Terms, you need to choose the categories.
That means products only from these categories will be included/shown on your website.
And for the Featured Products, only the featured products will be included on your website when for your users.
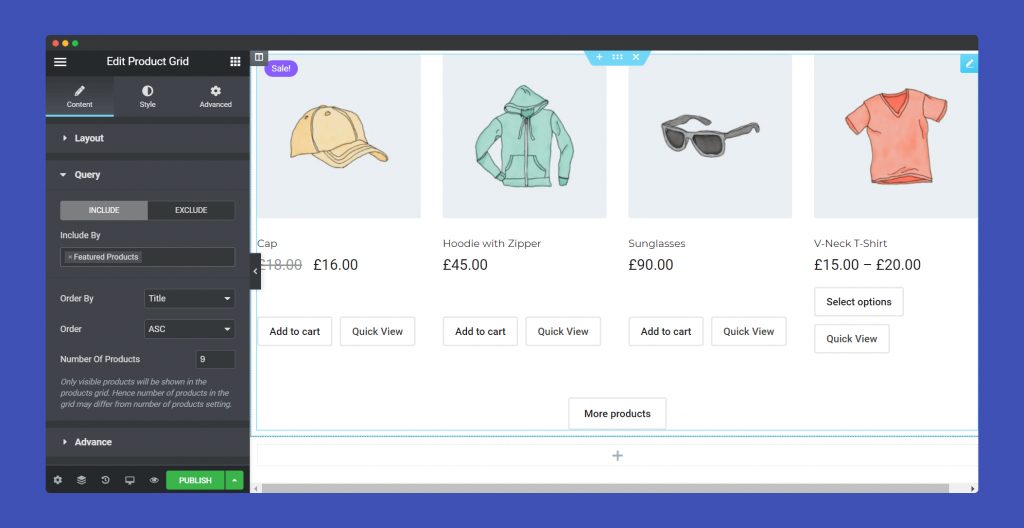
For the Exclude option, you get three choices to exclude products from the lineup. Current Product, Manual selection, Terms.
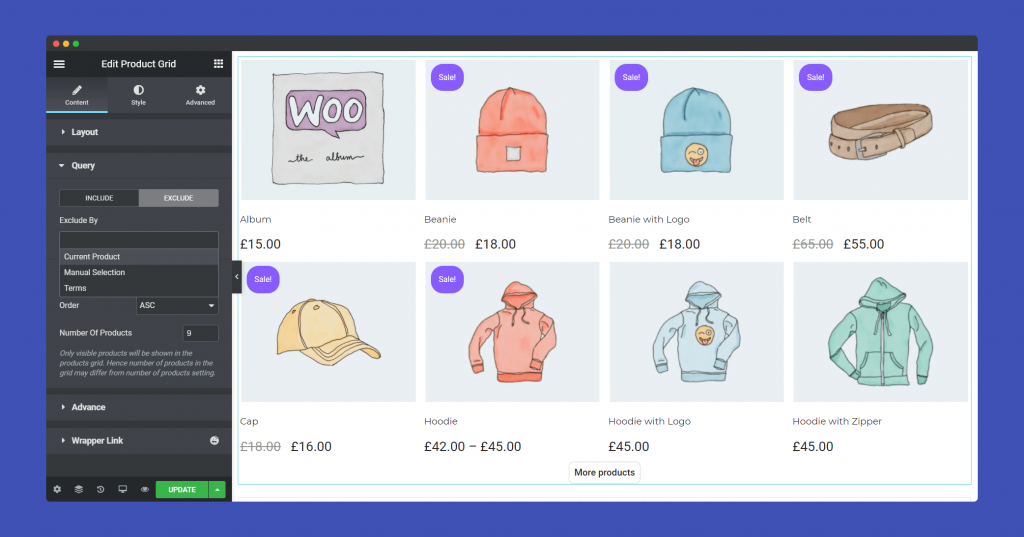
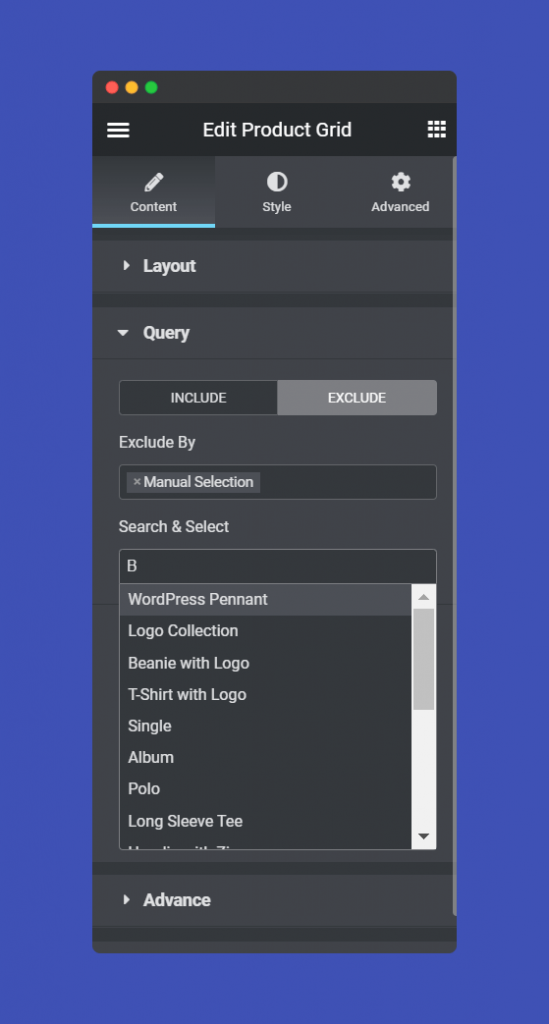
When you choose the Manual Selection, you can manually select a product to exclude from the product grid.
For terms, it as same as before. You get to choose a category of a product to exclude/remove from the product grid.
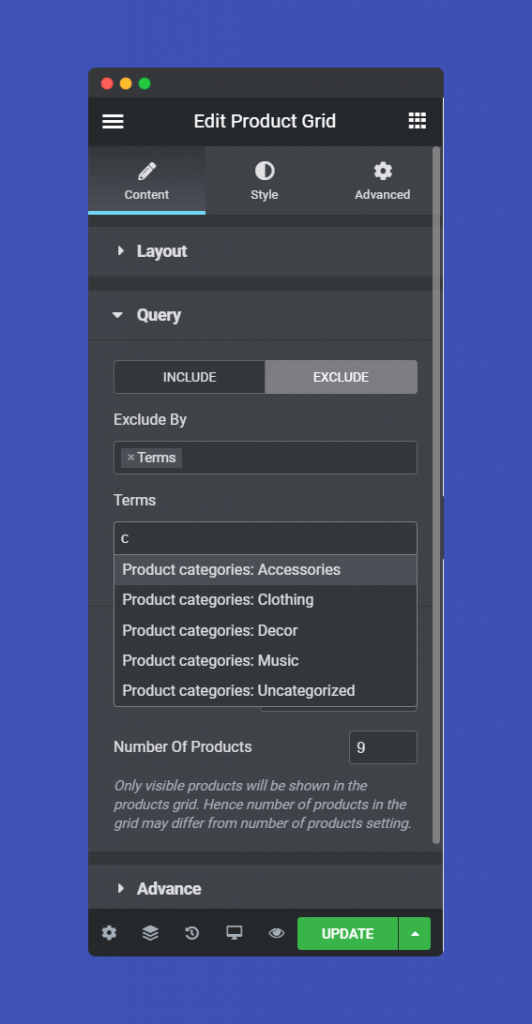
Note: If you choose the same term on include and exclude, then it will not work.
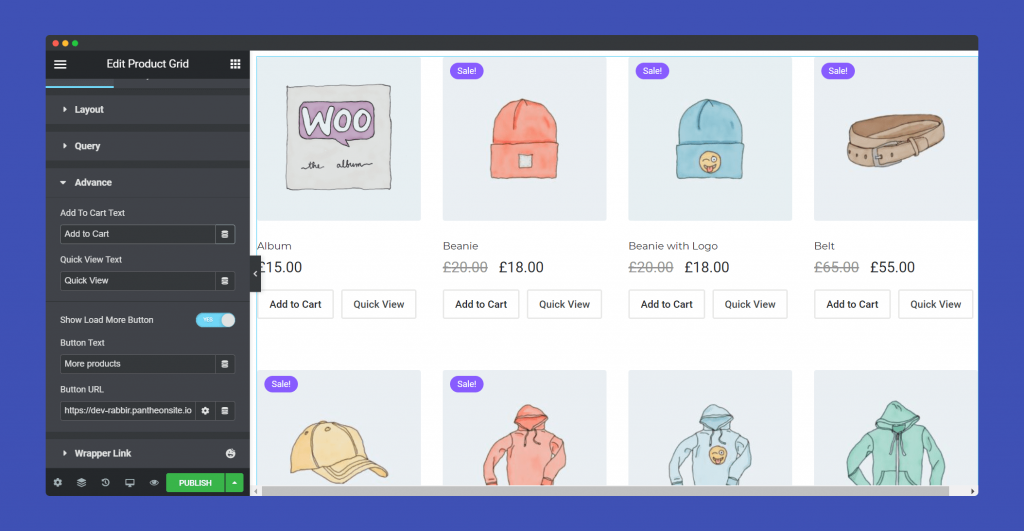
On the Advance part, you can edit the text for Add to cart button and Quick view button. You can enable load more buttons.
Step 3:
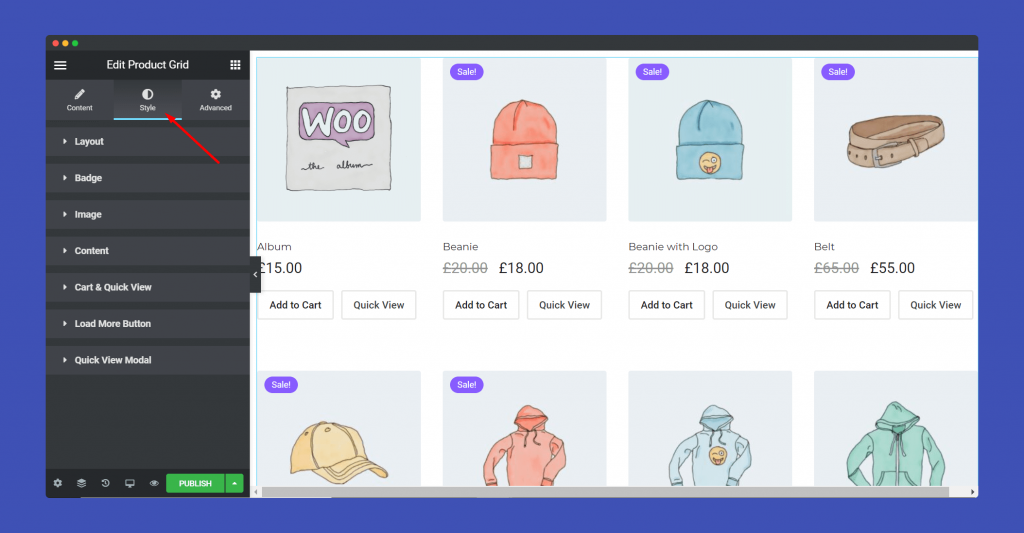
In the ‘Style‘ section, you will have options to design ‘ Layout’, ‘Badge’, ‘Image’,’Content’, ‘Cart & Quick View’,’Load More Button’, ‘Quick View Modal’.
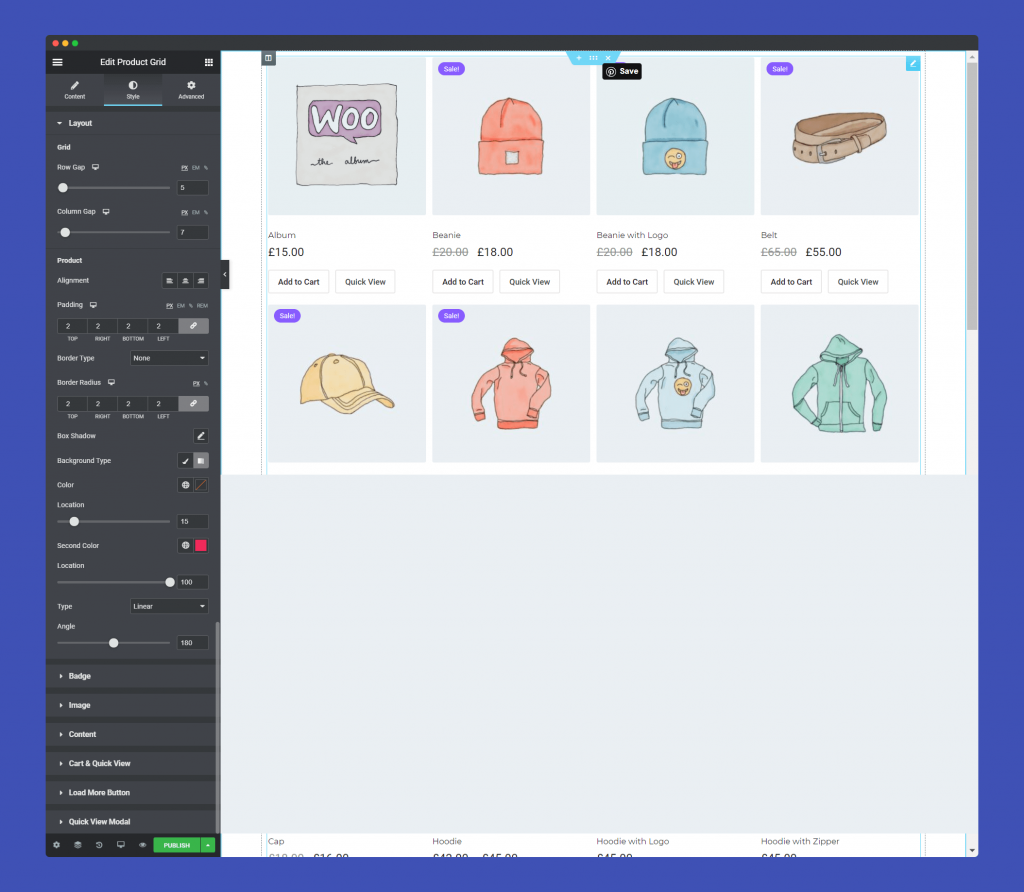
In the Layout part, you can set the column gap. row gap. alignment, padding, border type, background type, box-shadow, and many more.
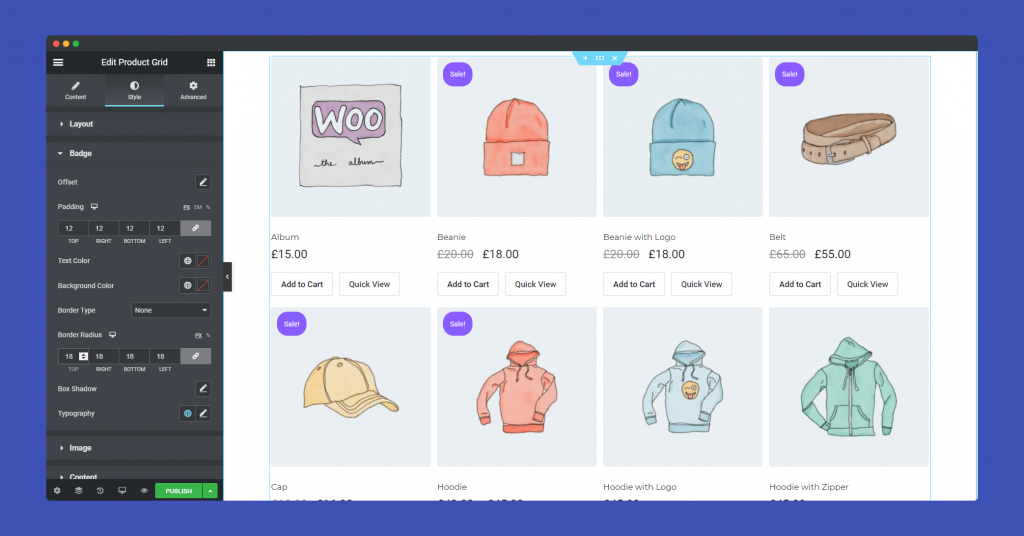
Same goes for designing Badge as well. You can set padding, offset, text color, background color, border type, border-radius, box-shadow, typography.
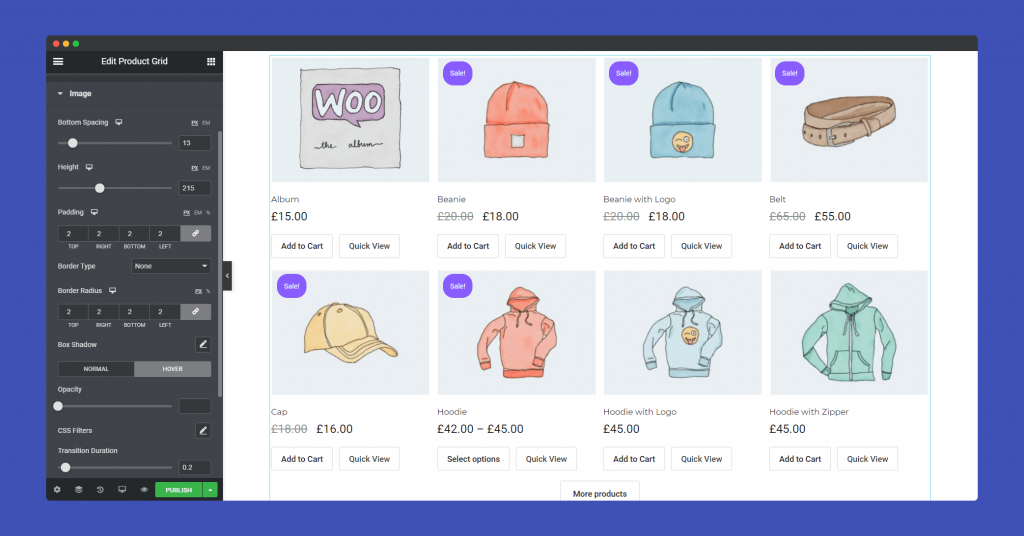
For the Image part, you can set height, bottom spacing, padding, border type, box-shadow, transition duration, opacity for the product images.
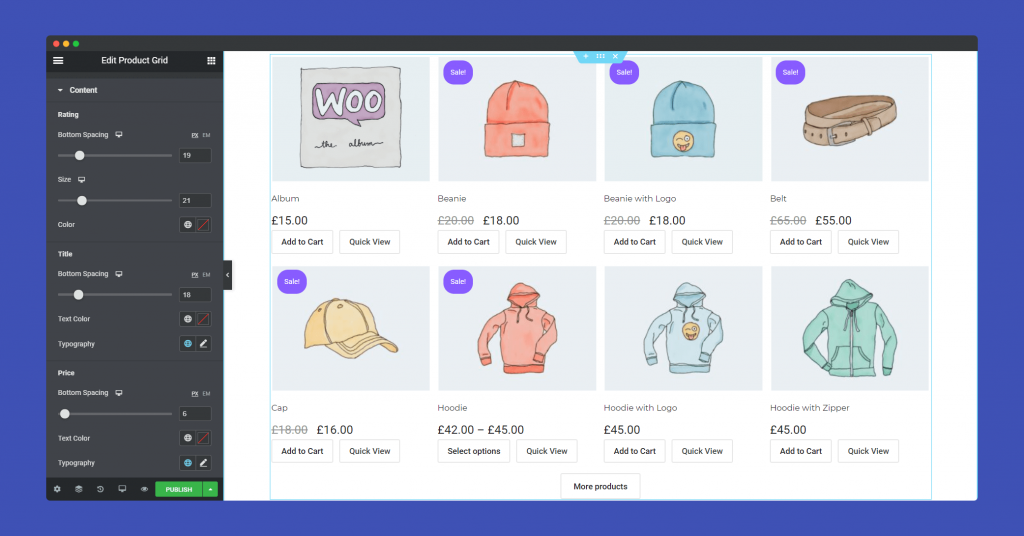
In the Content part, you can design the ratings, price, title with bottom spacing, size, color, typography, text color.
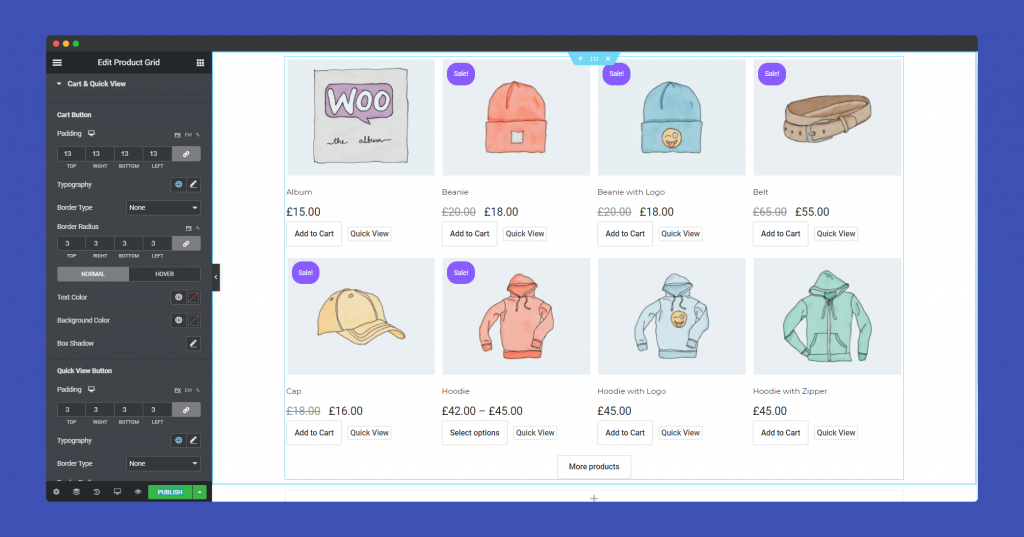
You can also stylize the Cart & Quick View button. You can set height, bottom spacing, padding, border type, box-shadow, typography, and many more.
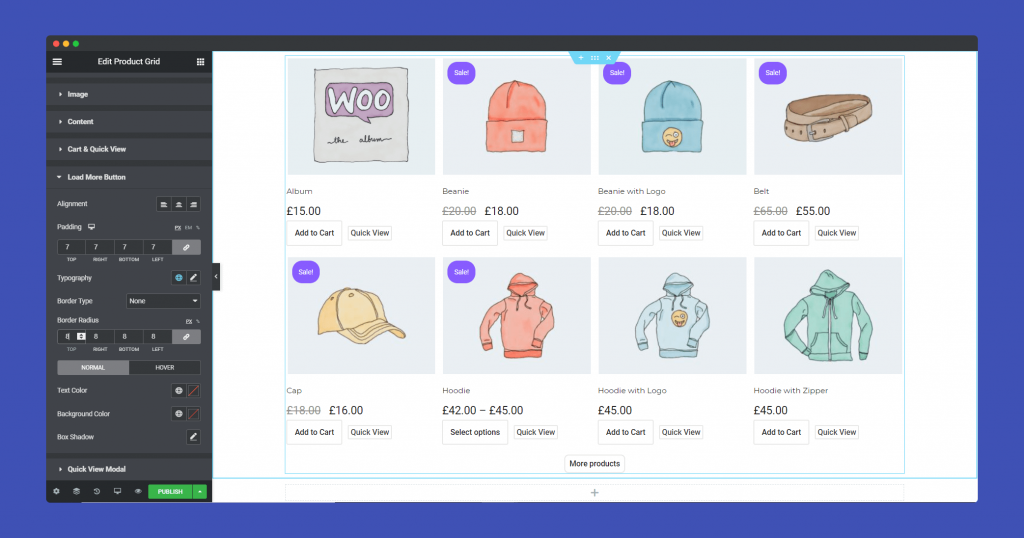
The Load More button, you can design by setting padding, border type, box-shadow, typography, border-radius, background color, text color.
If you choose the Hover skin, you will enable the Quick View Modal. And you can design it from this section. You can set bottom spacing, typography color for title, rating, price, summary, add to cart button.
Step 4:
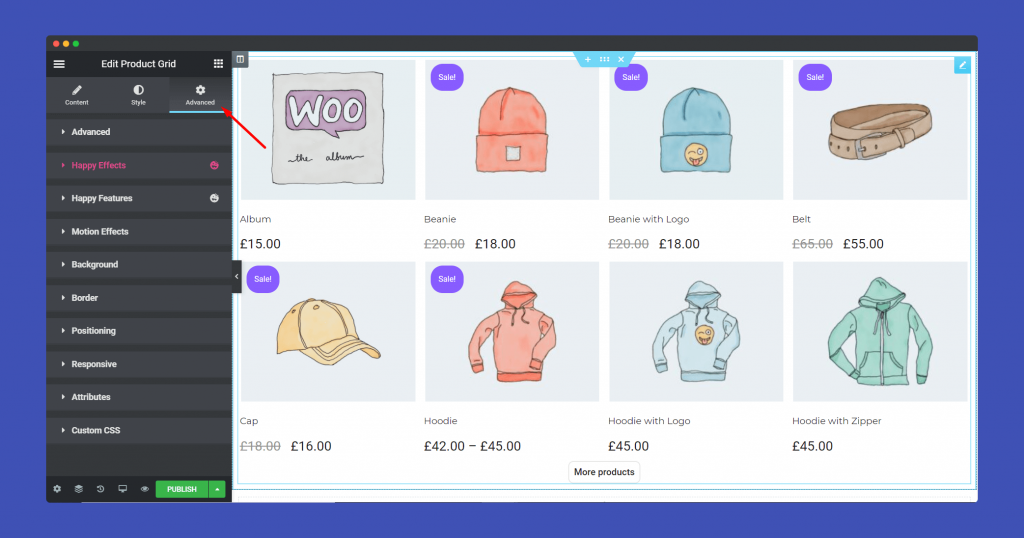
If you want to add motion effects, happy effects, background or make it responsive and more intriguing, click on ‘Advanced‘ to explore those options. the ‘Advanced‘ is a default feature of Elementor. Give a read to this Document to know more about Advanced features and its uses.
Finally, you will get a WooCommerce page like this,
That’s it!
