How to Use The Instagram Feed Widget of Happy Elementor Addons
The Instagram Feed widget fetches posts from your Instagram account and displays the images in a grid view on your website.
Important Notice: Please read carefully, due to Instagram’s New API, we are unable to continue a few options of our Instagram Feed Widget. The Missing Features are as follows,
- Image Sorting By Number of Comments
- Image Sorting By Number of Likes
- Image Sorting by Image Resolution Size
- Showing the Comment and Like Counts
Actually, it’s not at our end. Instagram restricts all of the above things in their new API system. We are sorry for the inconvenience. But Still, you can use the other features of ours. Let’s see how to use it.
Using Instagram Feed
Go to your Elementor site and start editing the page with Elementor.
Step 1:
Select the Instagram Feed widget from the menu bar on the left-hand side of your screen then drag and drop it in the selected area.

Step 2:
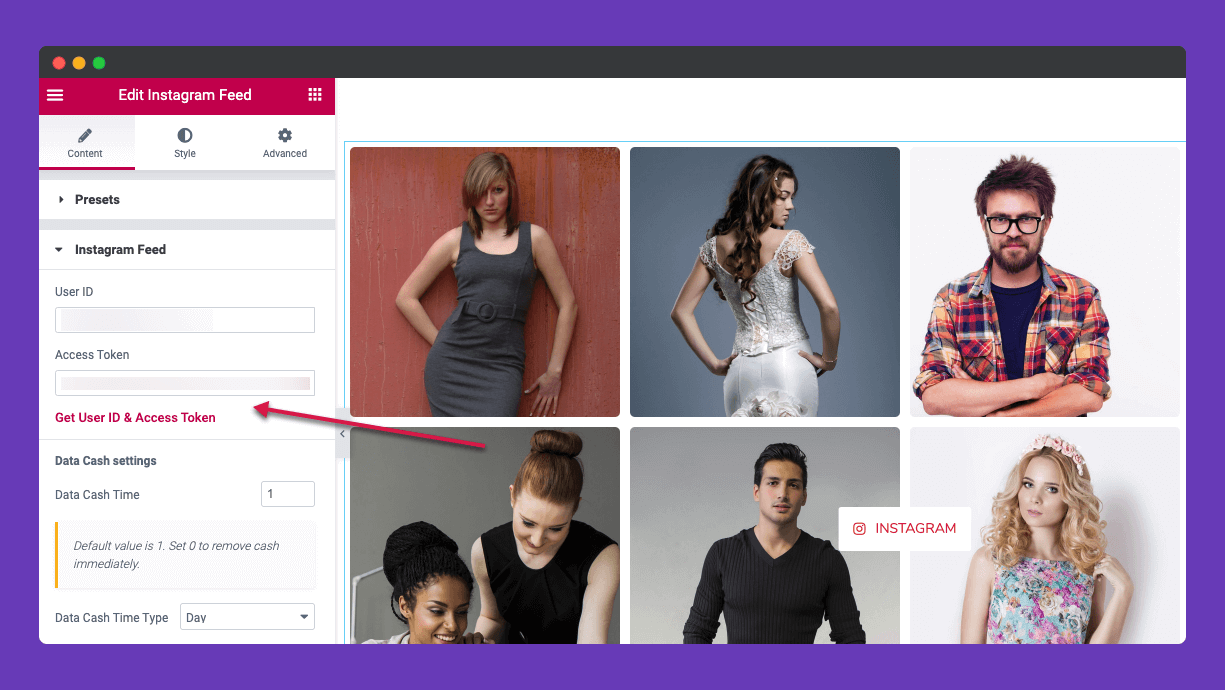
You will get a window with the basic setting options under the Content tab. There are three options to add your personal Instagram account and customize the presentation style of the grid on the left-hand side and a default grid view on the right-hand side canvas.

At first, press the tab Instagram Feed to add user ID & access token of your Instagram account. In order to get access token hit the link like the following image.
How You can generate the New Access Token?
To generate the new Access Token please visit here. Follow the detailed documentation provided by the dev team of Instagram and generate your own Access Token.
What does the Data Caching Setting do?
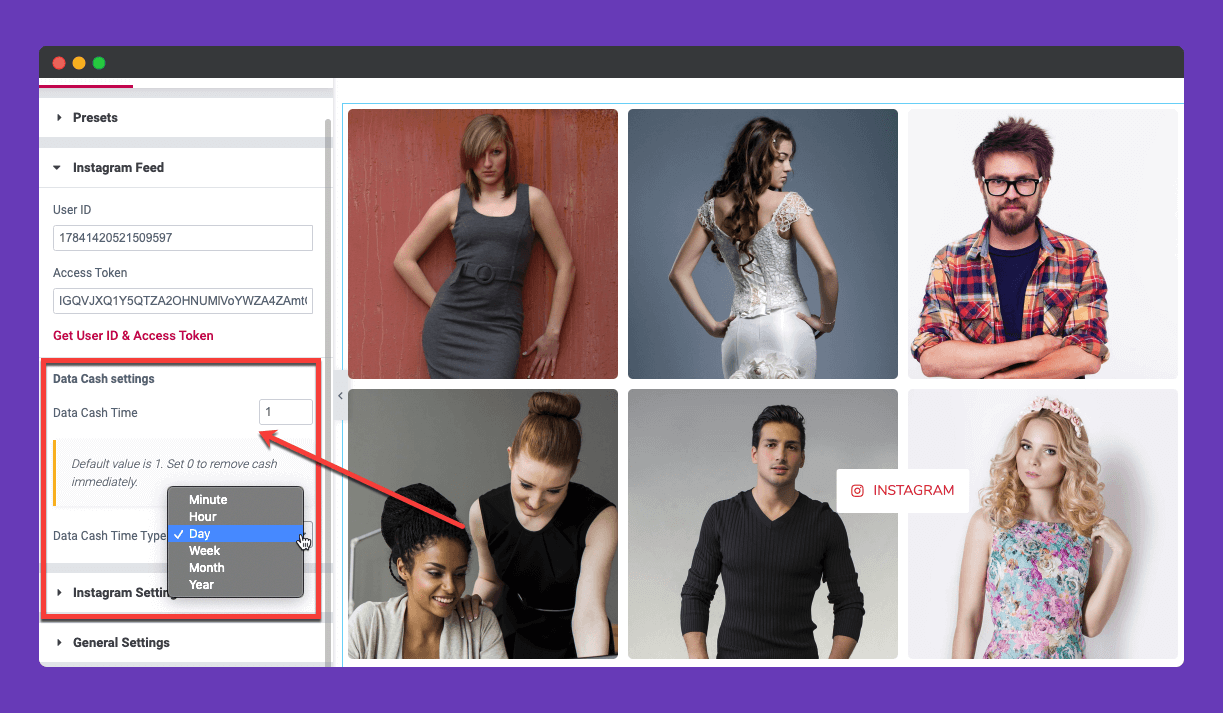
Previously, we set a default caching time of 10 minutes. Our tool used to send requests to Instagram every 10 minutes intervals to update the feed and cache the data for 10 mins. But now we provide flexibility to you. You can set the cache limit according to your need.
Default data cache time is 1, you can set it 0 to get instant update of your feed. But turn it back to 1 to run the system smoothly.
Also, there is a Data Cache Time Type option; Minute, Hour, Day, Week, Month, Year. Set it as per your demand.
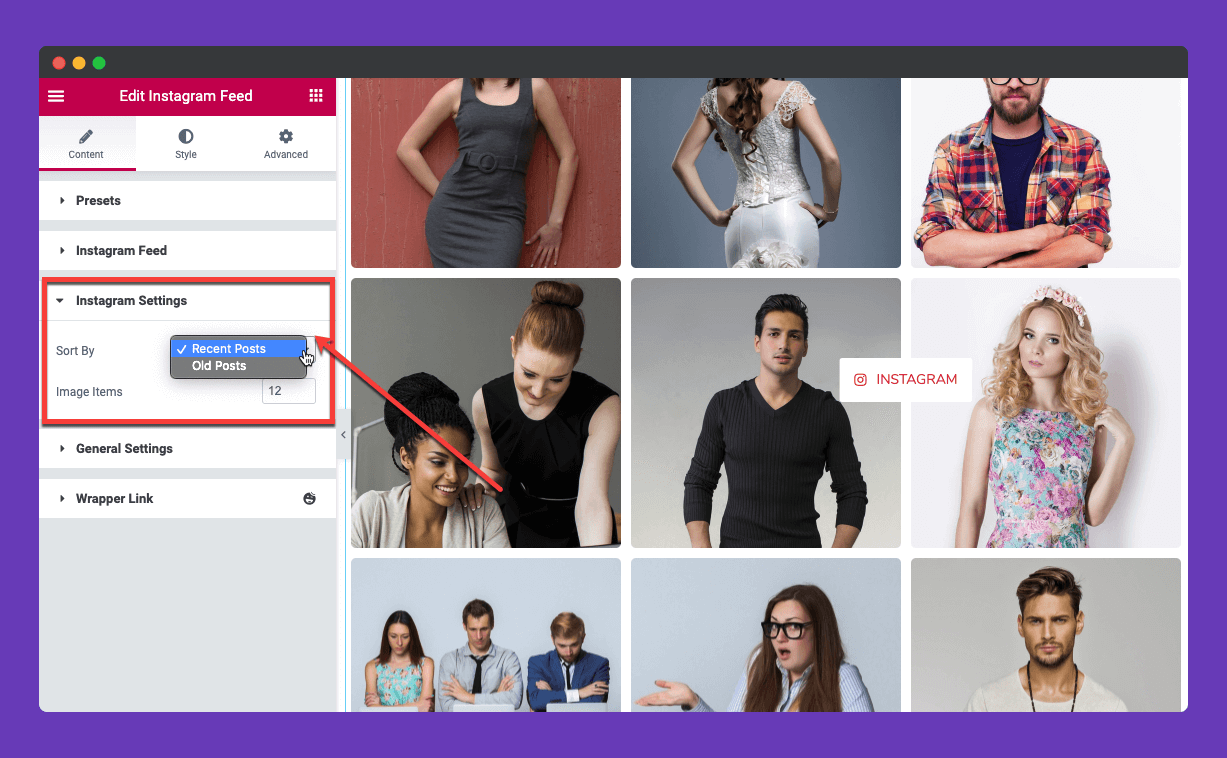
From the Instagram Settings tab, you can sort the images by Recent Posts & Old Post. Also, you can set the number of items that you want to display.
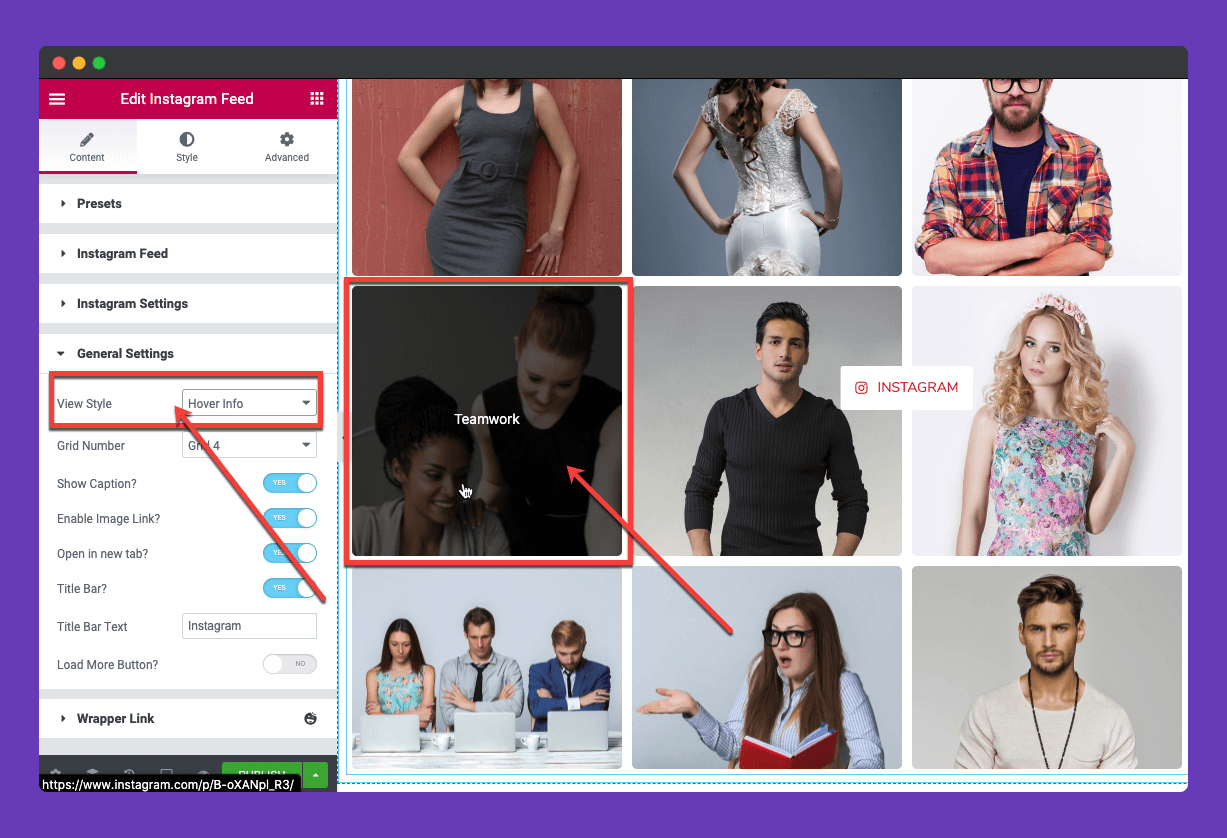
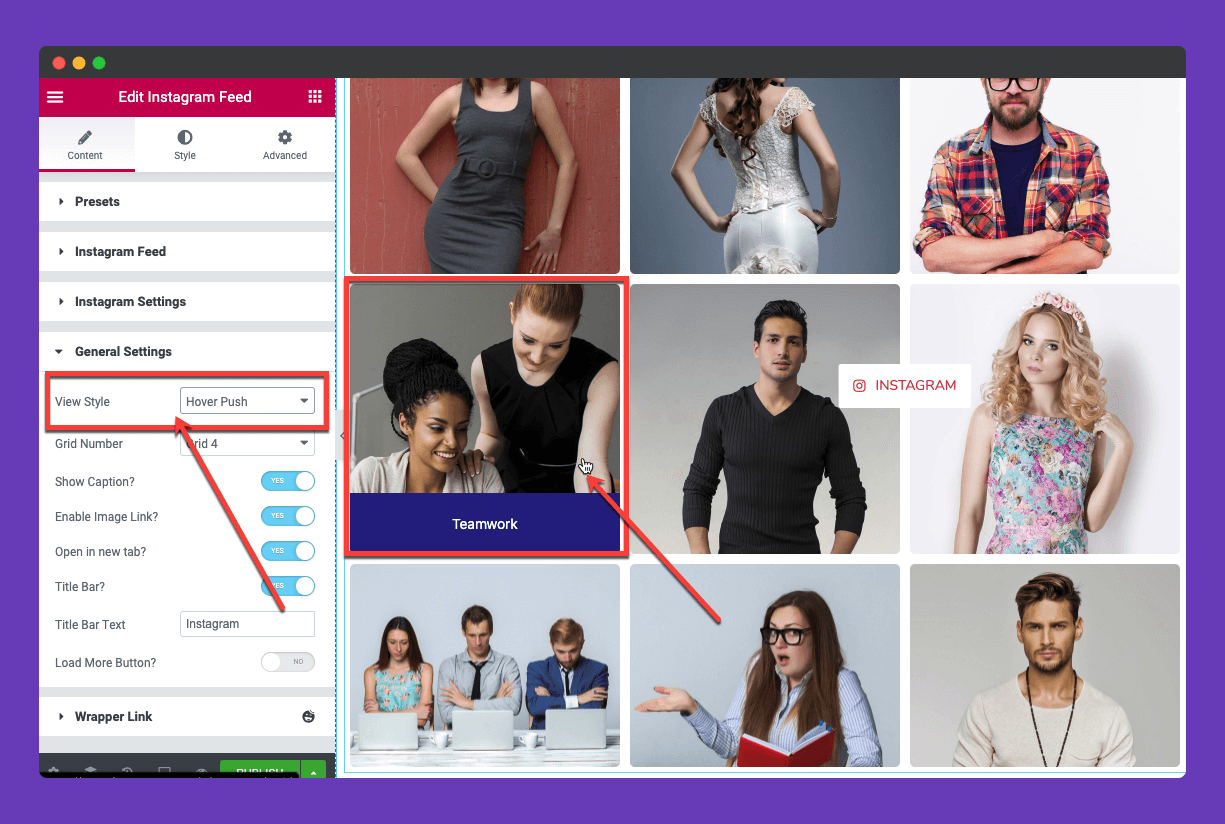
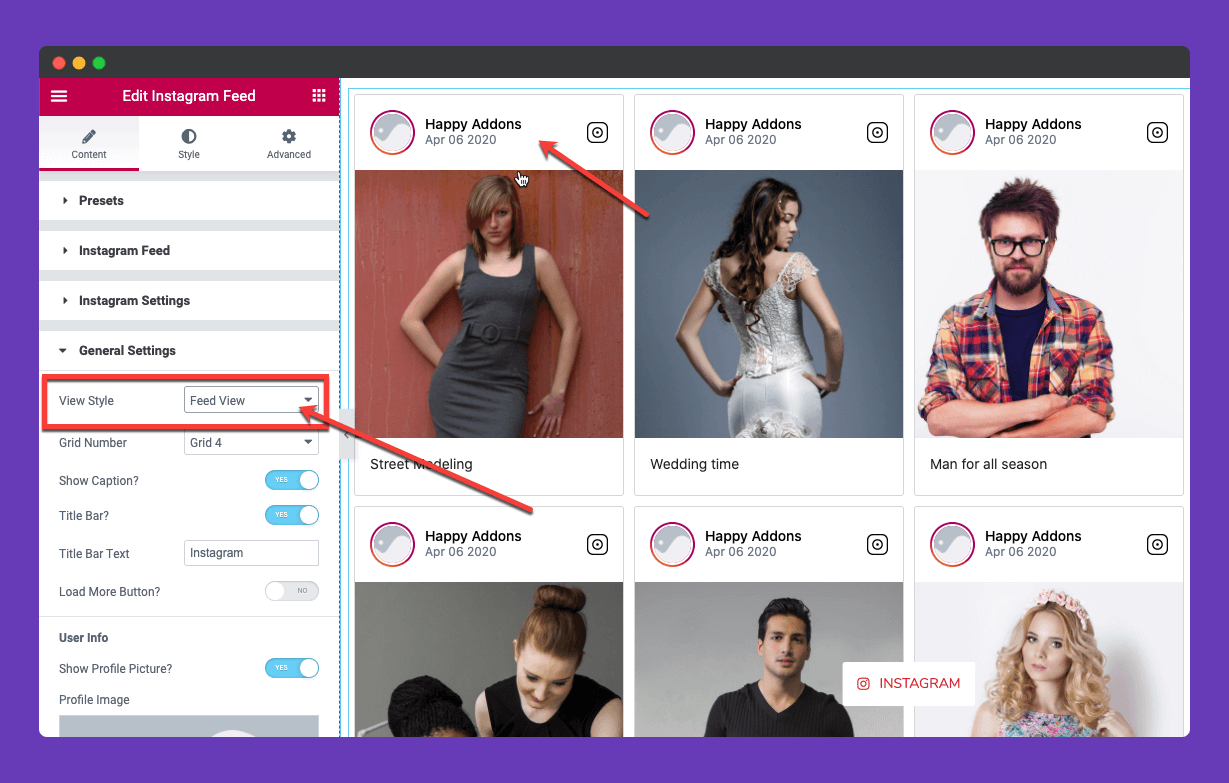
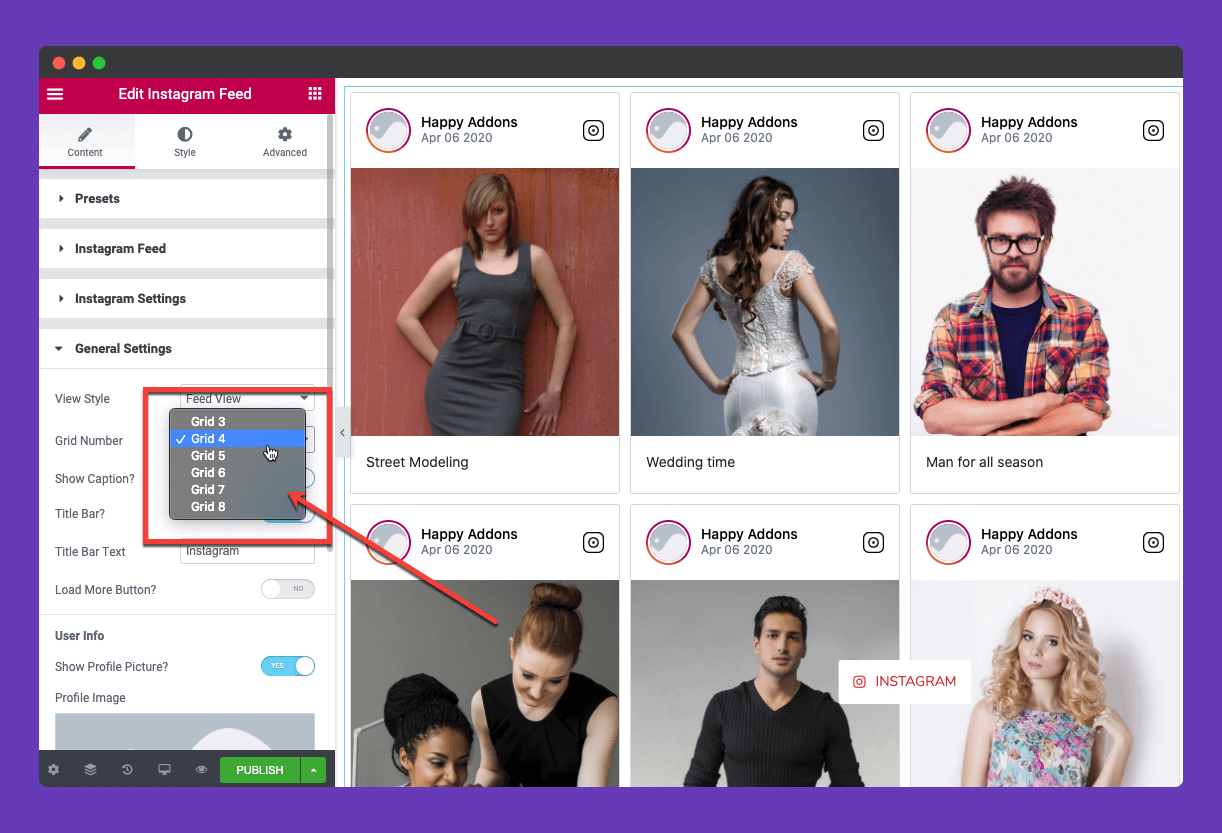
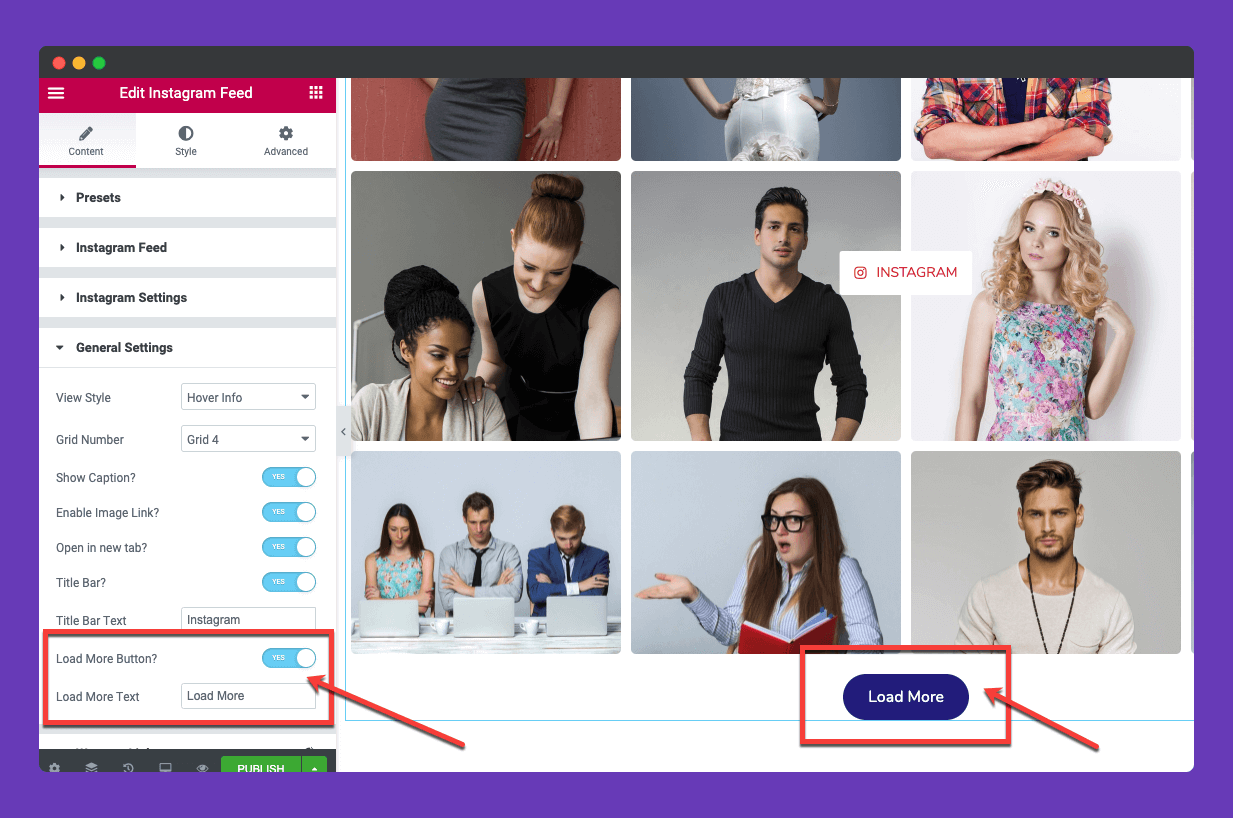
Hit the General Setting tab and you will find the settings of View Style, Grid Number, Show Caption, Enable Image Link, Open In New Tab, Title Bar, Title Text Field, Load More Button enable, and disable option.
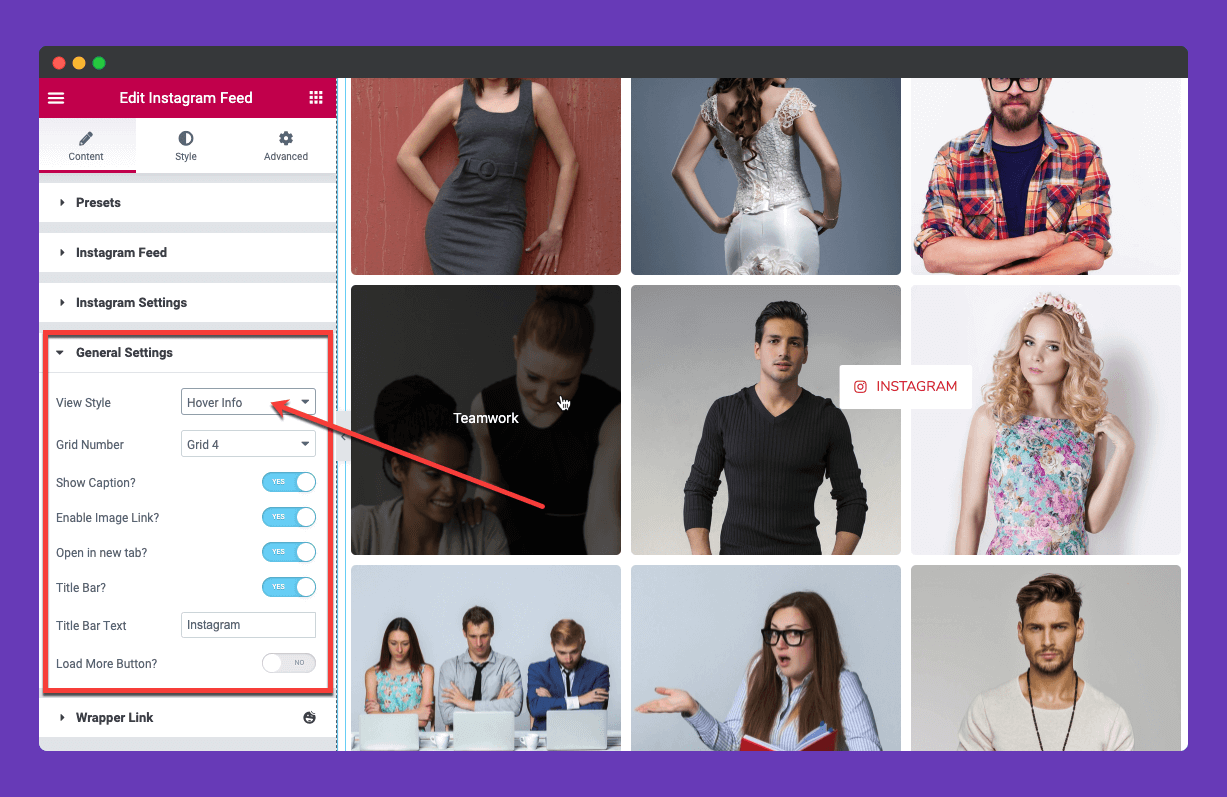
You will get Three types of View style,
Example of Hover Info style:
Example of Hover Push Style;
Example of Feed View Style,
Grid Number: You can sort it by grid 4- grid 8.
Load More Button: You have to enable this feature. By default, it will remain closed.
Step 3:
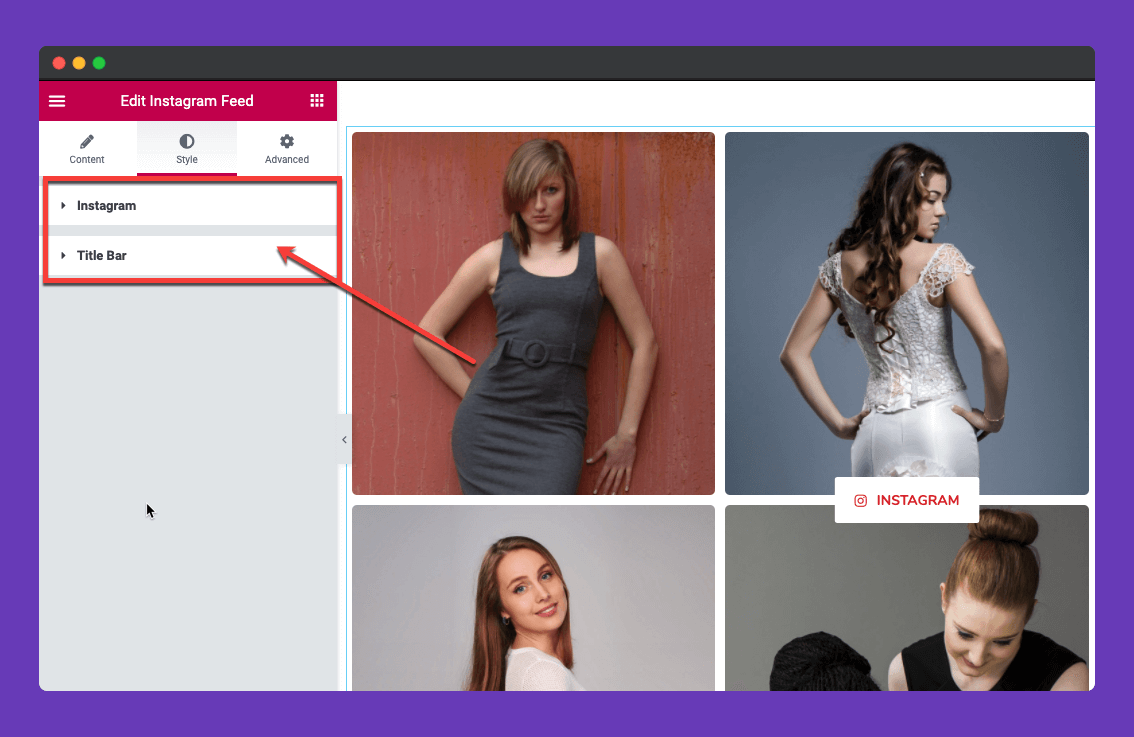
From the style tab, you can configure the typography, color, padding, etc of the Instagram Setting, Title Bar Setting, and Load More button (If enabled).
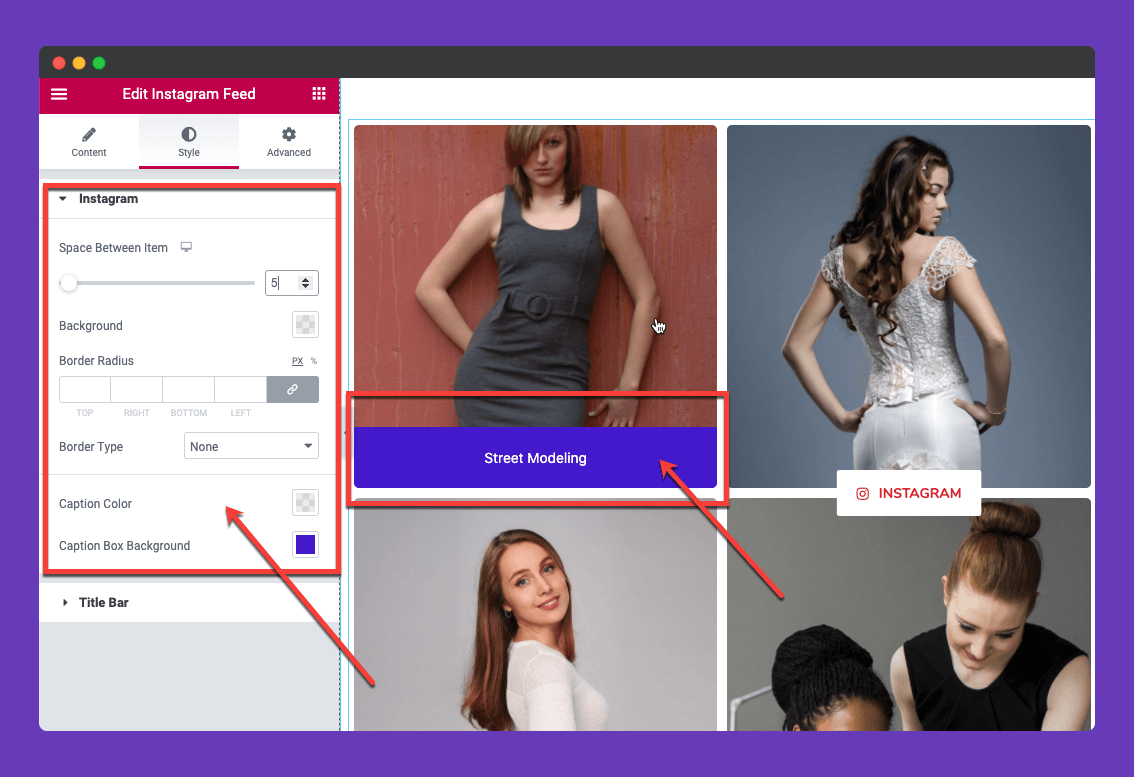
From the Instagram tab, you can set the Space Between Items, Background Color, Border-Radius, Border Type, Caption Color, Caption Box Background.
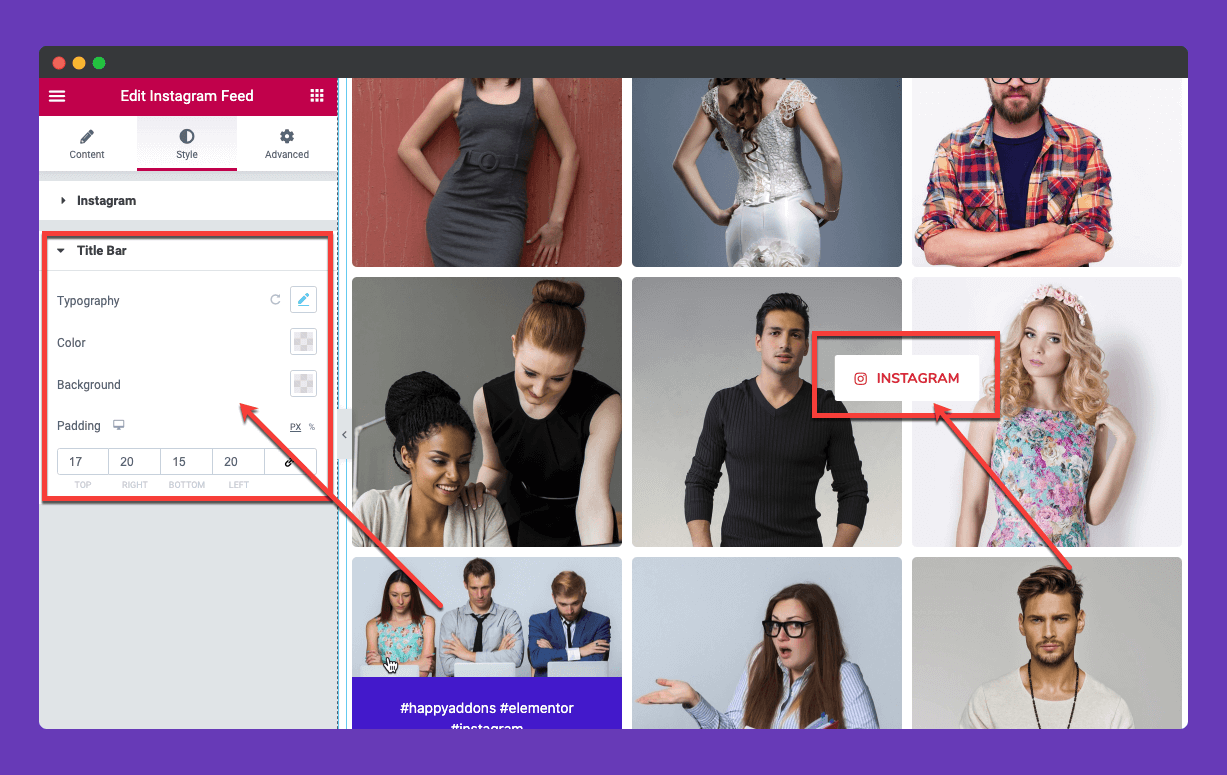
Styling the Title Bar:
From here you can set typography, the color of the title, Background, and Padding.
Step 4:
If you want to add motion effects, Happy Effects, background or make the page responsive, click on ‘Advanced’ to explore those options. This ‘Advanced’ tab is a default feature of Elementor. Give a read to this Document to know more about Advanced features and its uses.
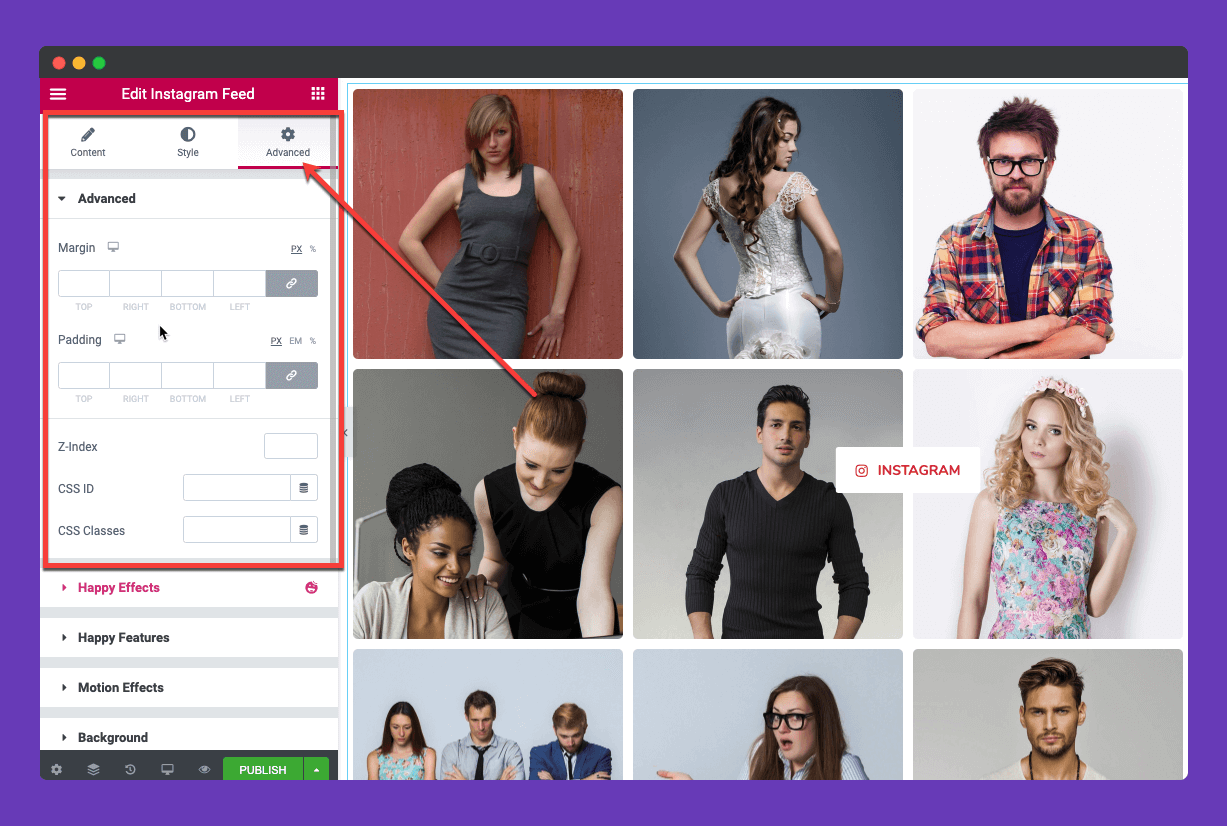
Finally, after completing all the customization click on ‘Publish’ to see your work live.
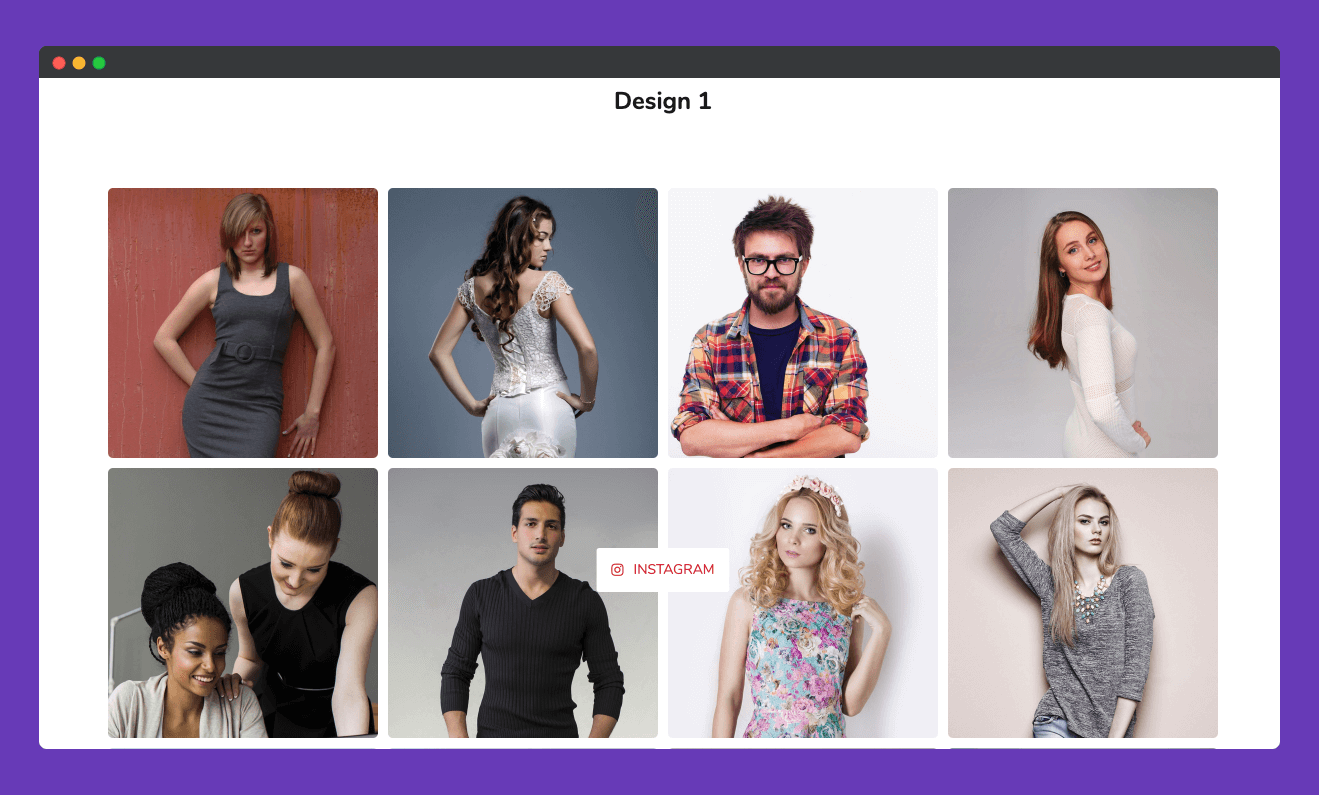
Great job! You have done it successfully.
