Looking for a solution to design a unique and custom checkout page for your website? Try the Happy Addons’ new ‘EDD Checkout‘ widget lets you design a new checkout page or customize your store’s existing checkout page in your own style.
How To Use EDD Checkout Widget of Happy Addons
You need to install and activate the below plugins to your website:
Pre-requisites
- Easy Digital Downloads (EDD)
- Elementor (Free)
- Happy Addons (Free)
- Happy Addons Pro
Let’s get started:
Set Checkout Page From Setting
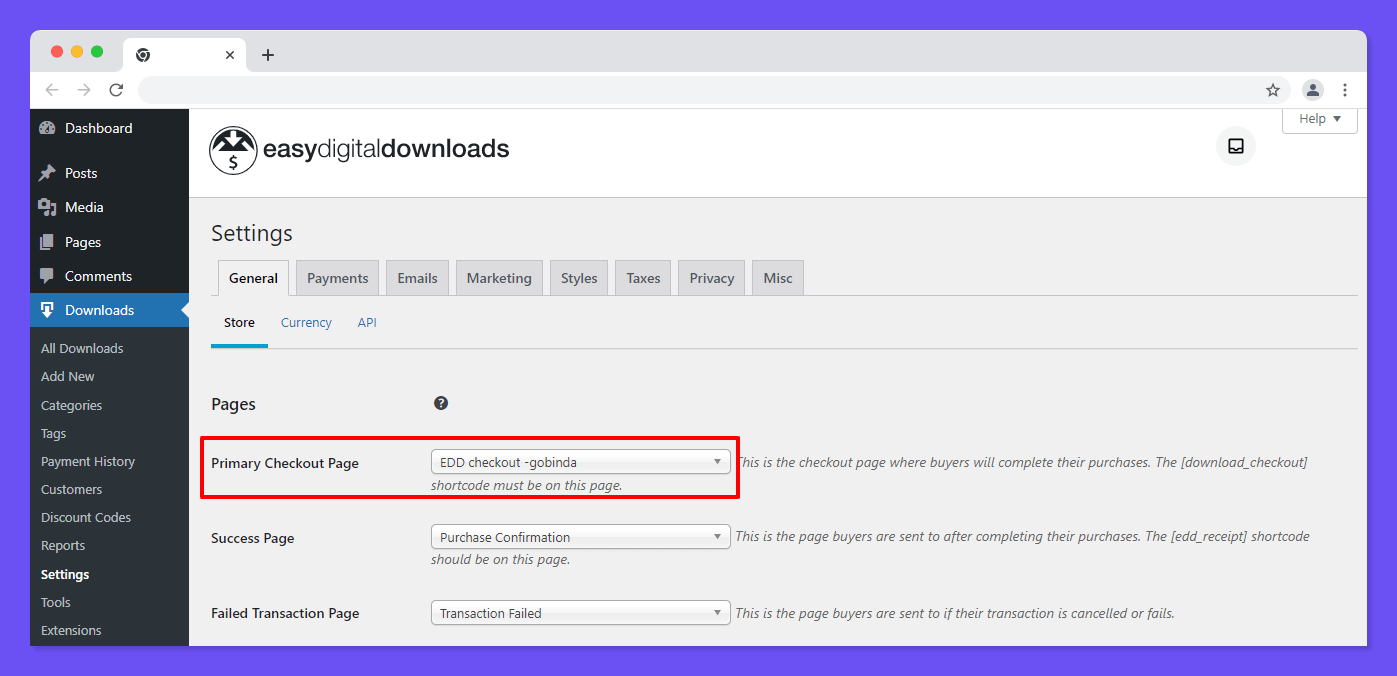
To customize the checkout page, you need to select the Checkout page first from the EDD Setting. Go to the Downloads->Settings. Then open the General tab and select your checkout page from the Primary Checkout Page drop-down list.
Manage Checkout Page Cart Table Content
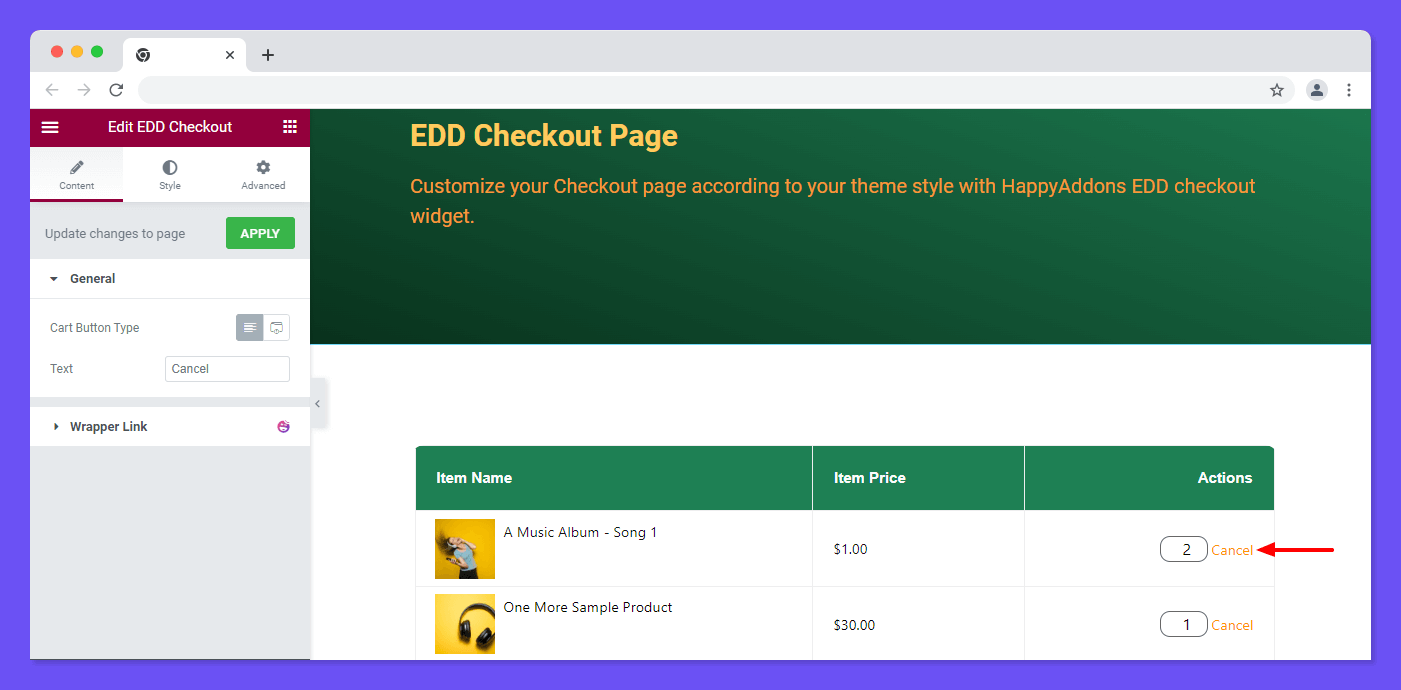
In the Content->General area, you can set the Cart Button Type like Text or Icon.
Text is set as the default Cart Button Type. You can also change its text in the Text area.
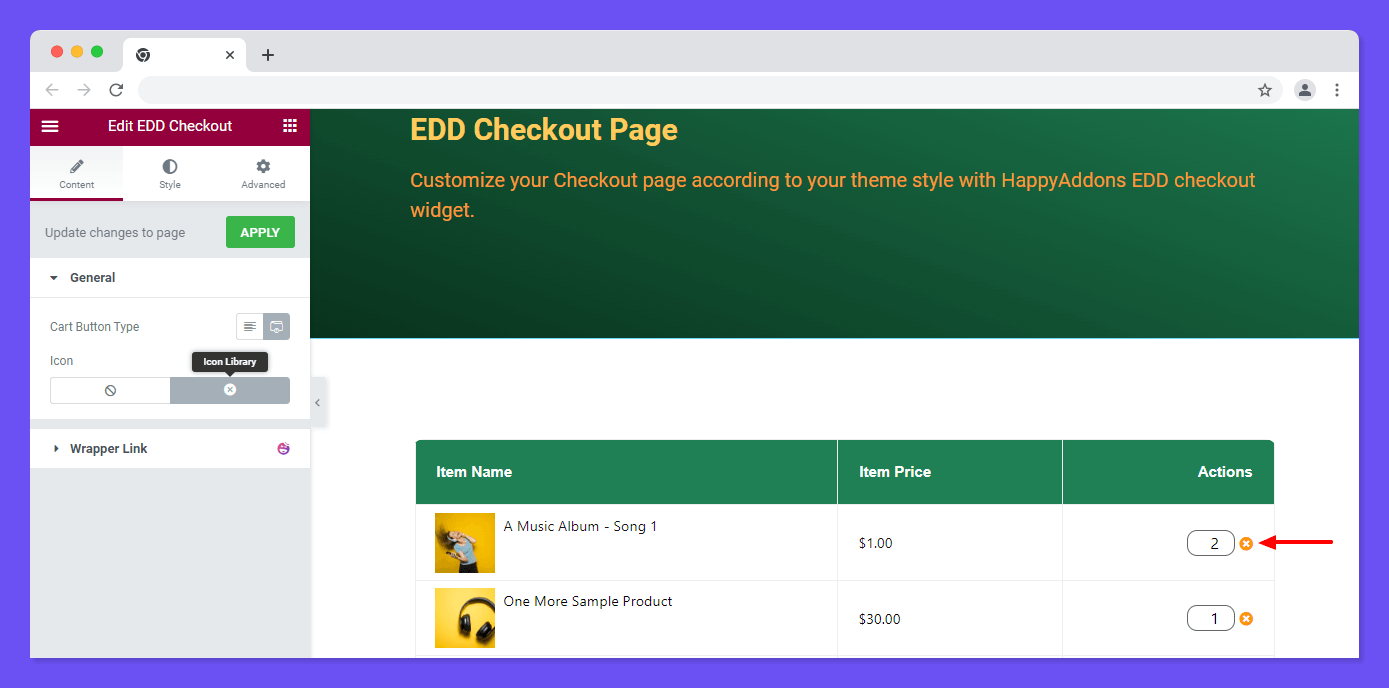
You can also remove an cart item form the table uisng with the Icon. You need to change the Cart Button Type from Text to Icon and choose a suitable icon from the Icon Library.
Style Options of EDD Checkout Widget
In the Style section, you will get all the necessary styling options to customize your checkout grid. Here options are.
- Checkout Cart Table
- Discount
- Headings
- Labels
- Inputs
- Purchase Total
- Button
Checkout Cart Table
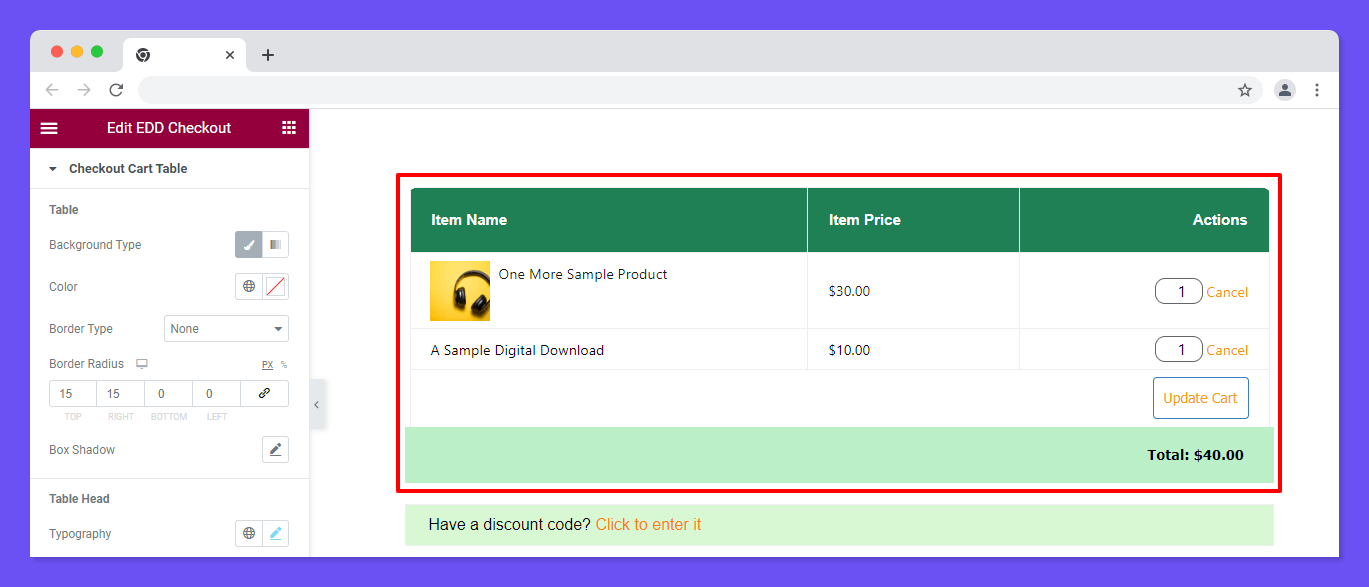
To restyle the Checkout Cart Table, you need to go to the Style->Checkout Cart Table area. Then you’ll get all the necessary styling options to customize the Table, Table Head, Cart Items, Quantity Input, Product Remove, Update Cart Button, and Table Footer.
Discount
In the Style->Discount area, you can change the default design of Show Discount, Discount Area, Discount Area, and Description. And make your Discount section more attractive.
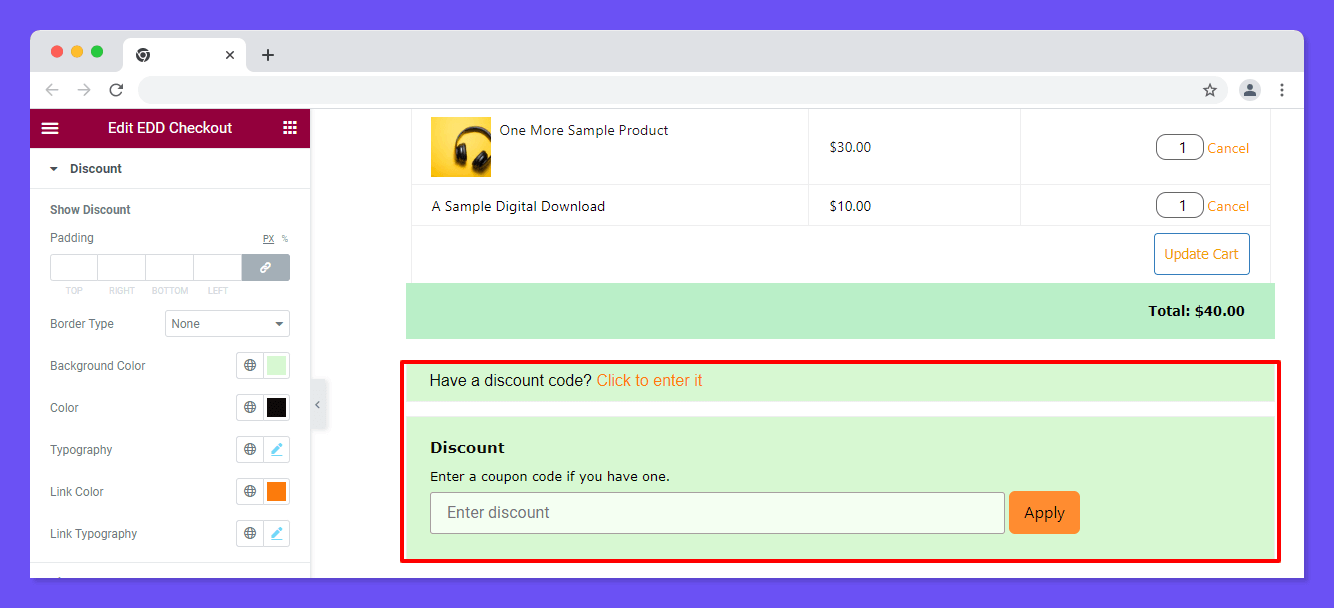
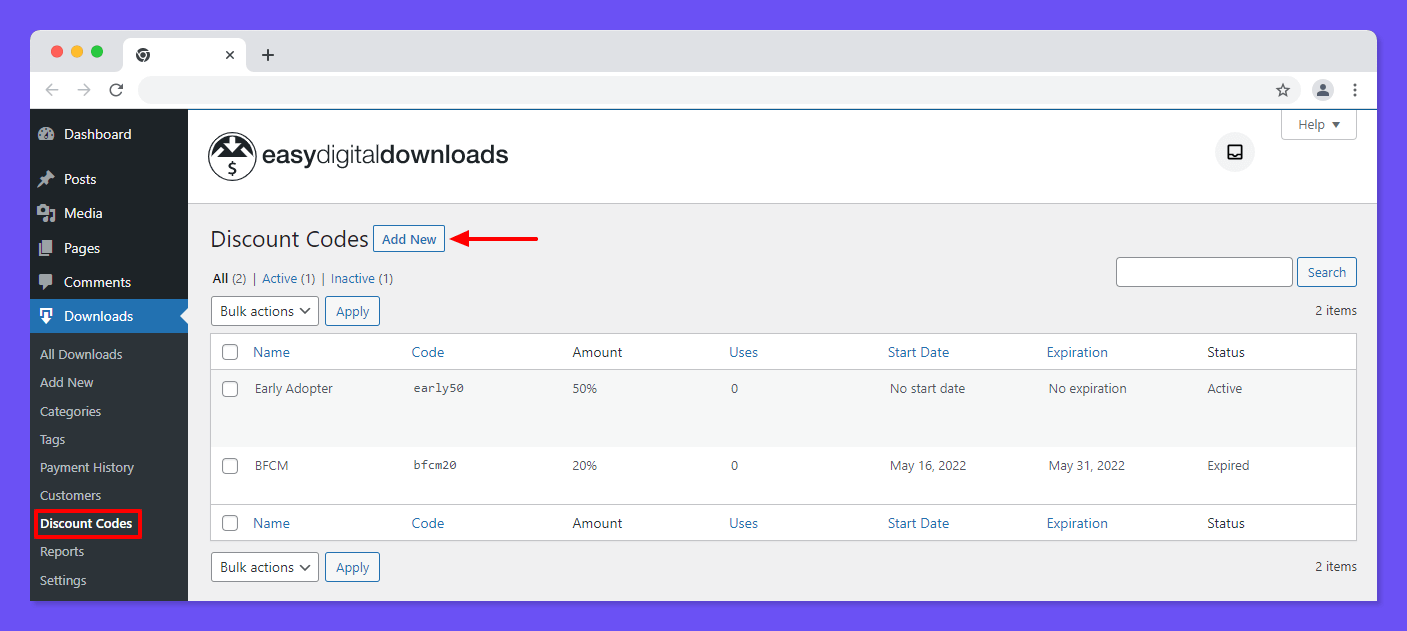
Note: To customize the Discount section, you need to create a Discount Code from the Dashboard->Download->Discound Code area.
Headings
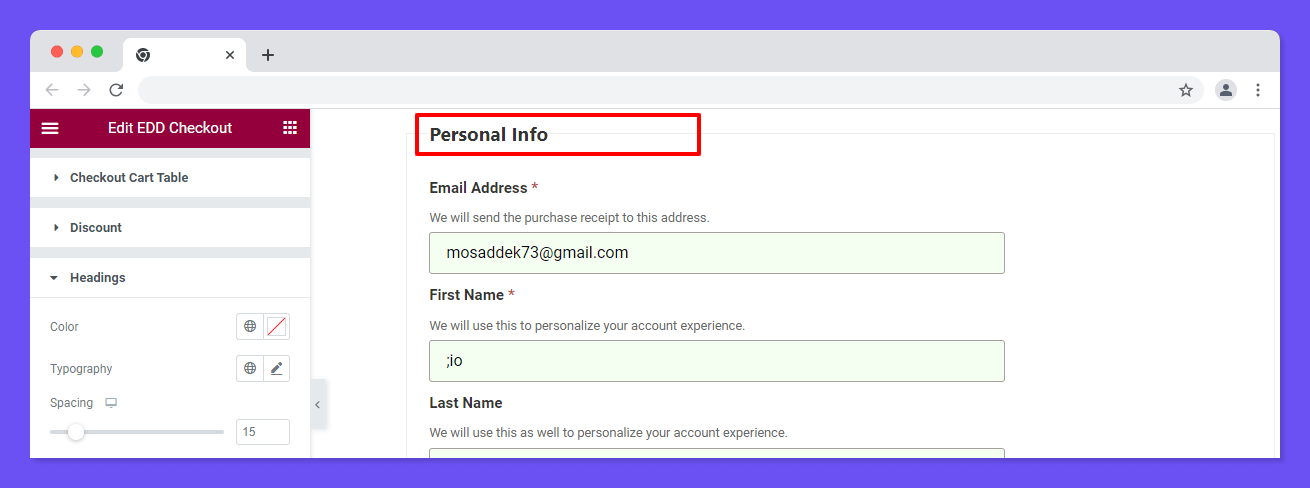
You are able to change the Color, Typography, and add Spacing to the Heading.
Labels
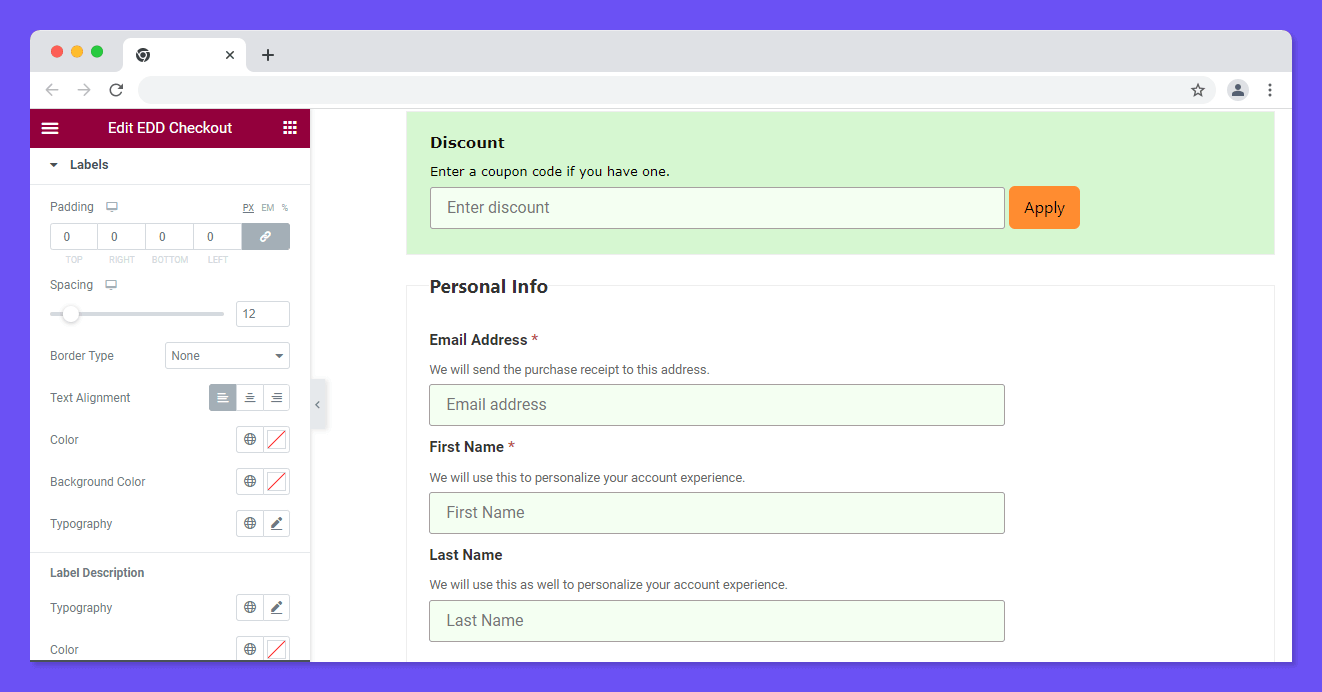
You can restyle the checkout form Labels. You can add Padding, Spacing, and Border Type. Also, you can set the Text Alignment, Color, Background Color, and Typography of the Labels.
Inputs
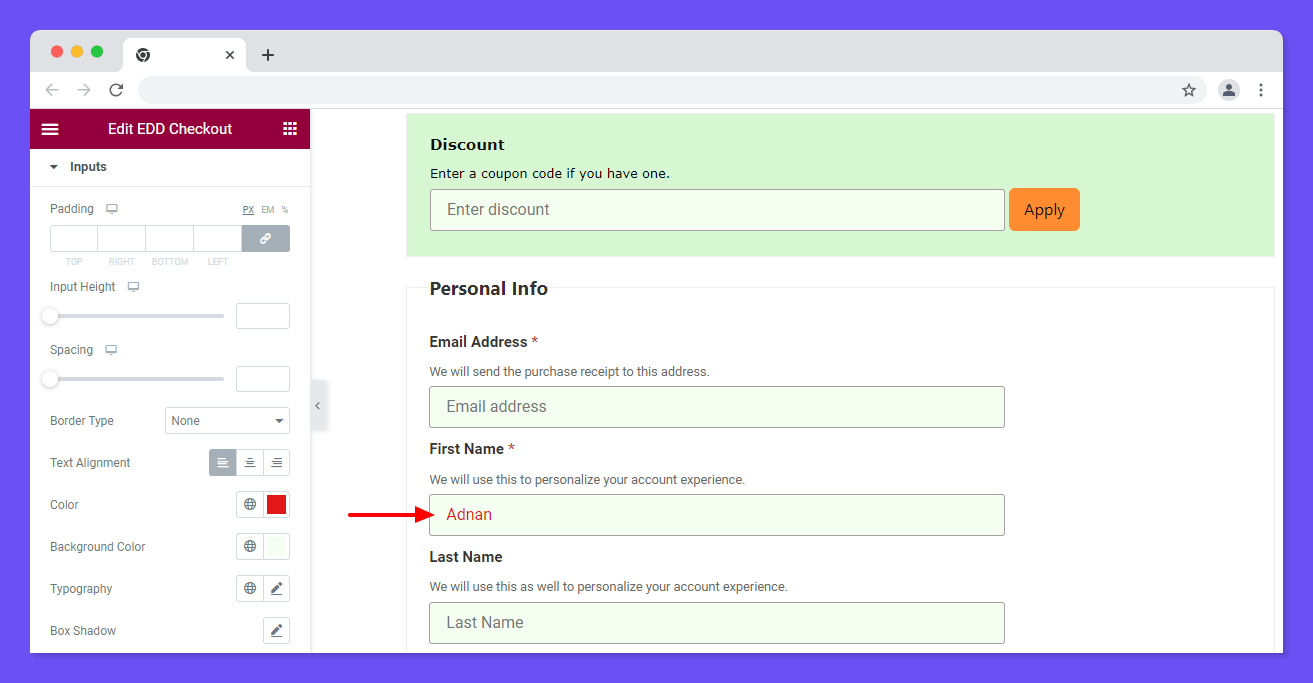
You can use add Padding, manage Input Height, and Spacing. Also, change the Border Type, Text Alignment, Color, Background Color, Typography, and Box Shadow of the Inputs fields.
Purchase Total
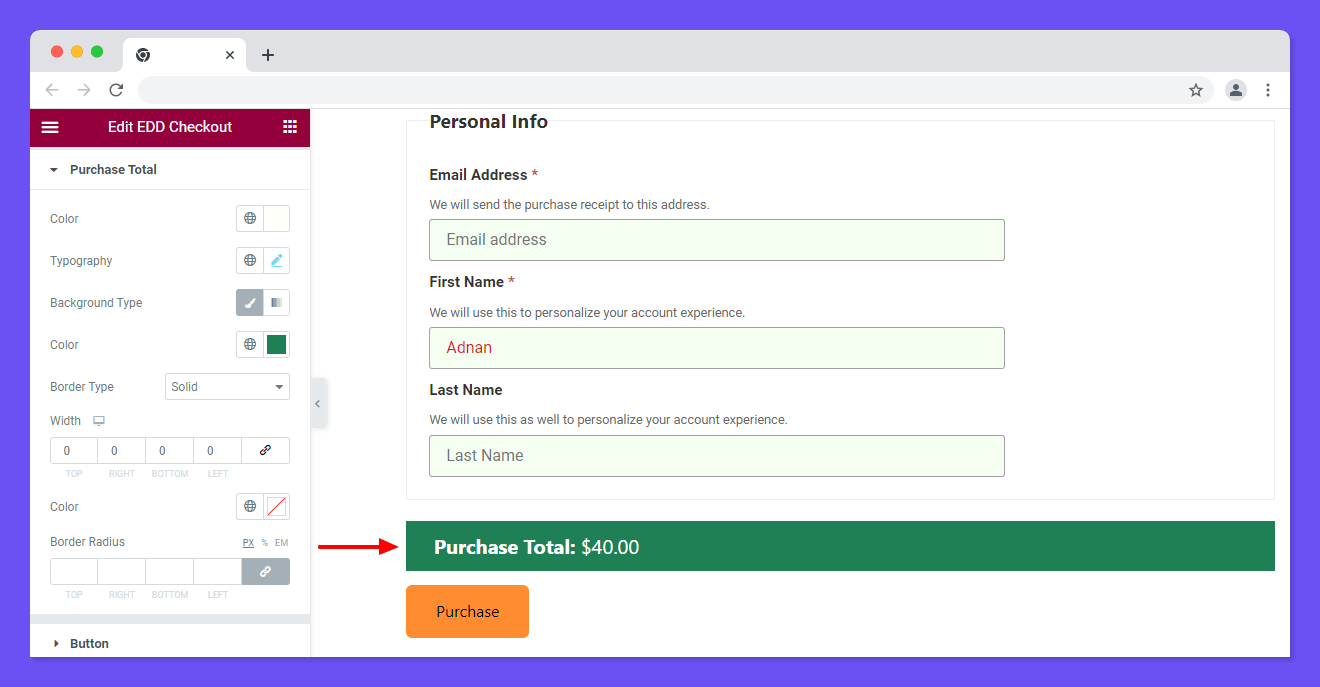
If you want to customize the Purchase Total default design, you can use these options Color, Typography, Background Type, Border Type, Color, and Border Radius.
Button
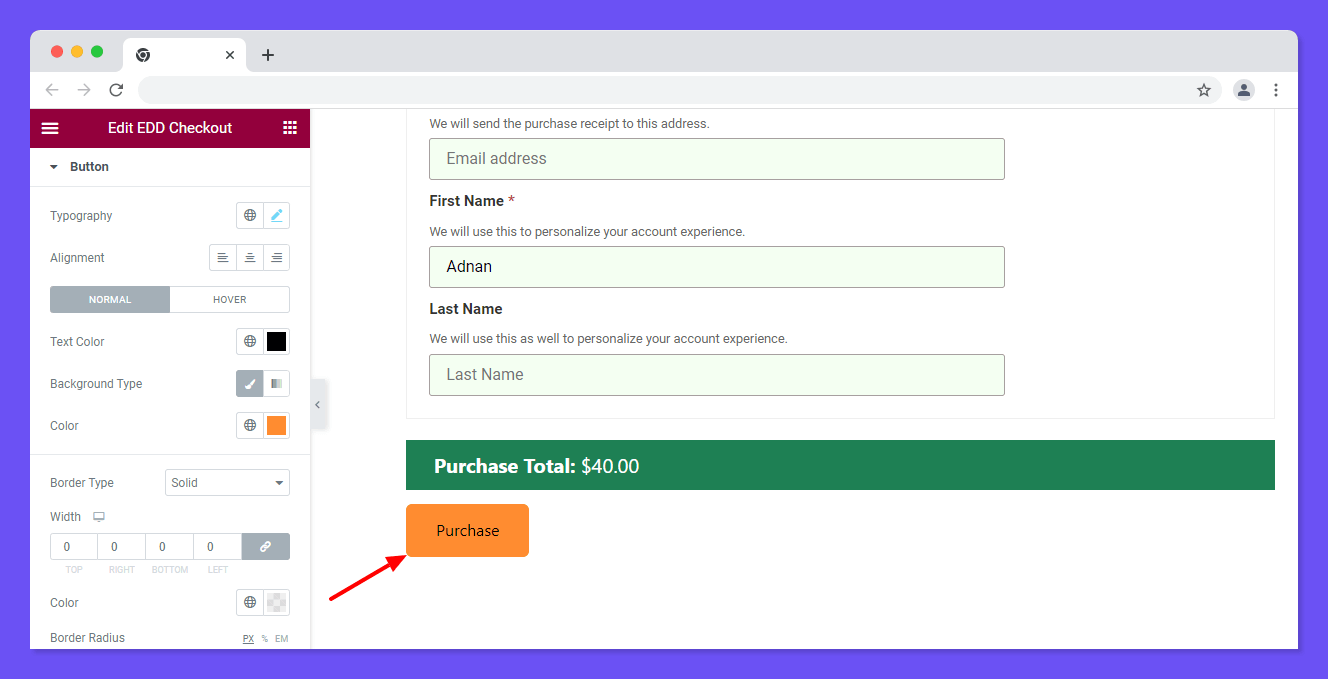
To style the Button, you use these styling options Typography, Alignment, Text Color, Background Type, Border Type, Color, Border Radius, Box Shadow, and Padding.
Advanced Settings
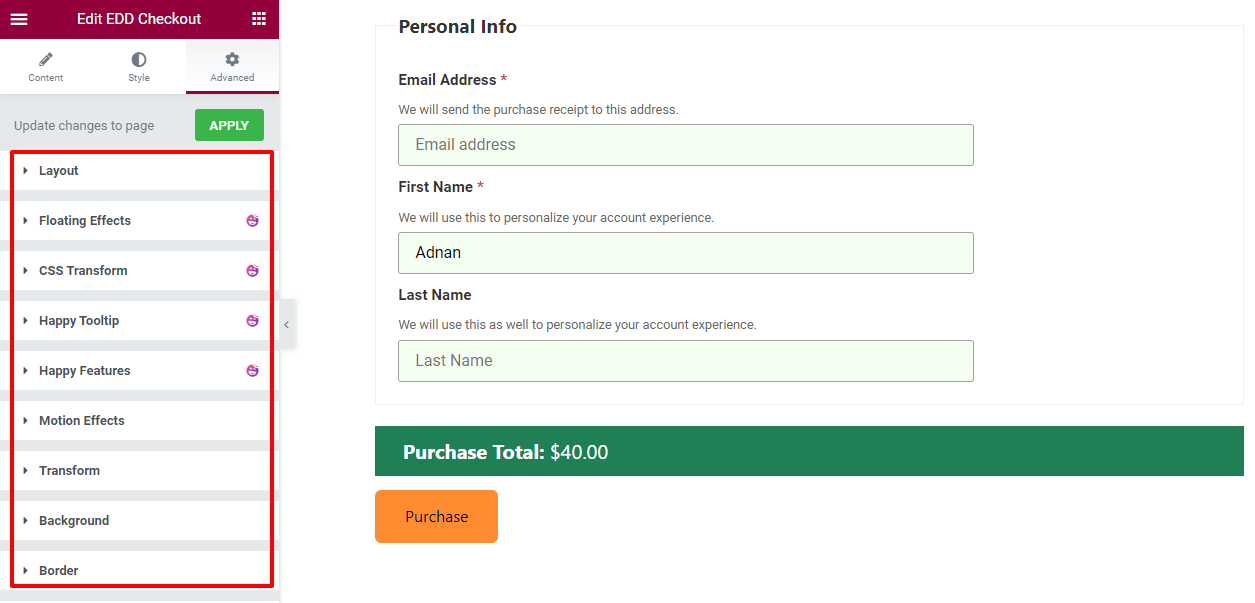
If you want to add motion effects, happy effects, background, or make it responsive and more intriguing, click on ‘Advanced‘ to explore those options. the ‘Advanced‘ is a default feature of Elementor.
Give a read to this Document to know more about advanced features & functions.
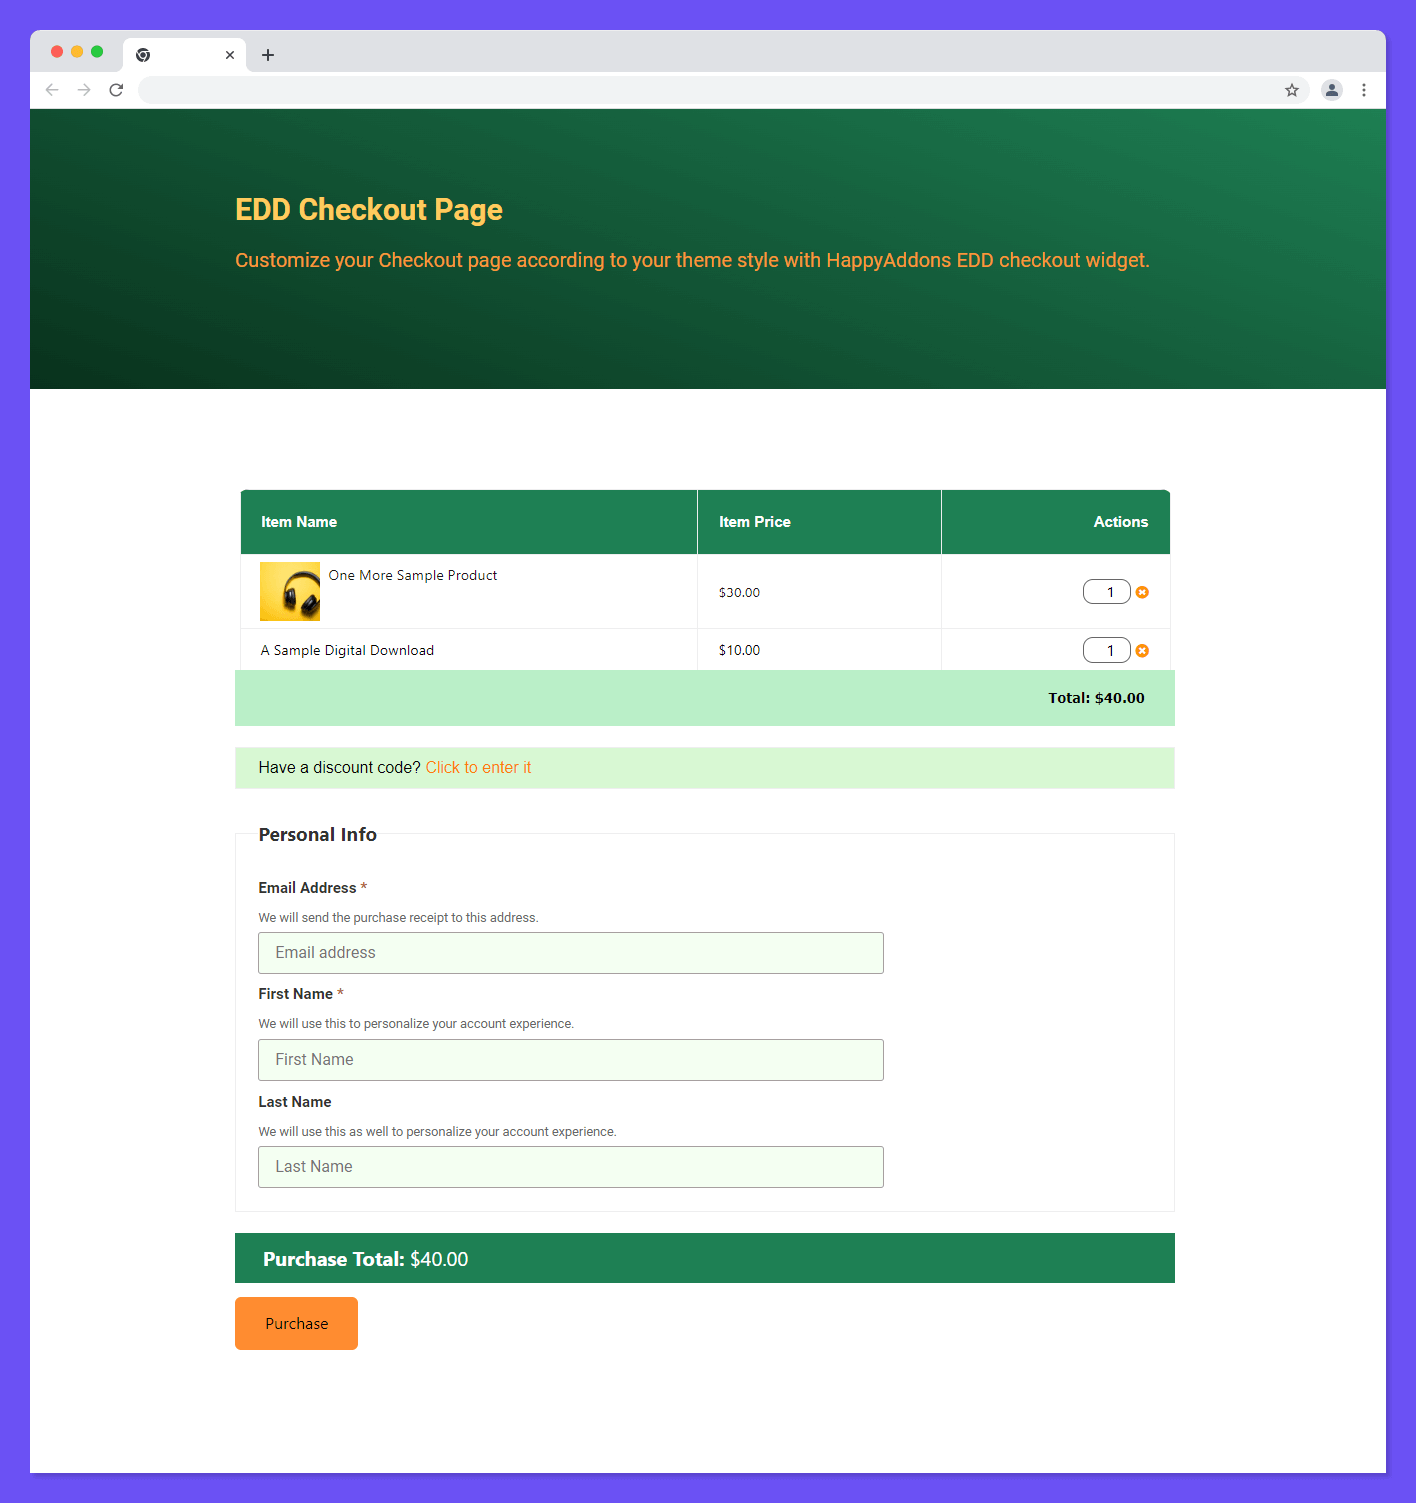
Final Preview
Check out the final preview of our newly created Checkout page using the EDD Checkout widget.
If you need a video guide you can have a look at this tutorial.
That’s it.
