How to Use The List Group Widget of Happy Elementor Addons
The List Group widget lets you create fully styled and easy customizable lists for your website. You can add icon, image, text, links and modify the presentation of your list with this widget.
Using List Group
Go to your Elementor site and start editing the page with Elementor.
Step 1:
Select the List Group widget from the menu bar on the left-hand side of your screen then drag and drop it in the selected area.

Step 2:
You will get a window with List Items and Settings under Content Tab.

The List Items will show a list of all the items in the widget. You can drag and drop them to change their order. Click on the Add Item button to add another item to the list.

You can delete an item by clicking on the cross X button.

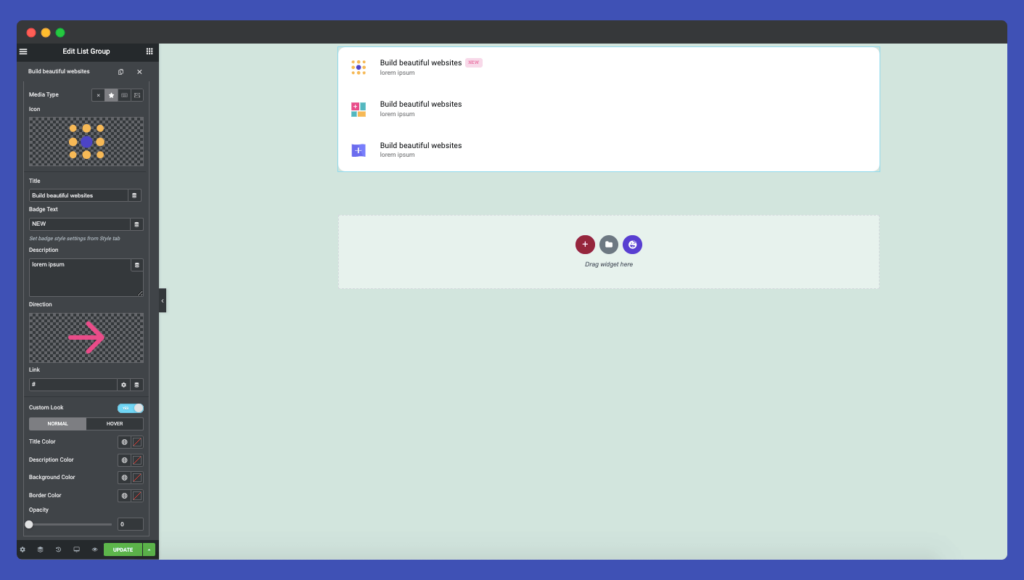
By clicking on each item you can customize their media type, title, description, direction icon, link, and, custom look.
- Media Type: Add icon, number or image with the item
- Title: Set the title of the item
- Badge Text: Set the text for the badge
- Description: Add a description of the item
- Direction: Set the direction icon from the icon library or upload the SVG file
- Link: Enter the URL for the item’s link. Click on the Link Options cog to either add rel=nofollow to the link or to open the link in a new window.
- Custom Look: Set your title-color, background-color, description color, border color.

Hit the Setting tab to customize the list style and direction.
- List mode: Set the presentation style of list
- Direction Position: Set the direction of the items: left to right or right to left

Note: If you change the color design from Custom Look, then you might face some problems adjusting the color in the Global Color settings in the Style option.
Also, unless you put any link you will not get the color effect on your link.
Step 3:
By clicking Style Tab you can customize list style, item style, typography, color, padding, spacing, shadows, etc.

They work like:
- Common: Add padding, border type, width, color, border-radius, and box-shadow for the items.
- Media Type: Customize the style of media files.
- Title and Description: Add style for typography in normal mode and hover mode of item’s title and description.

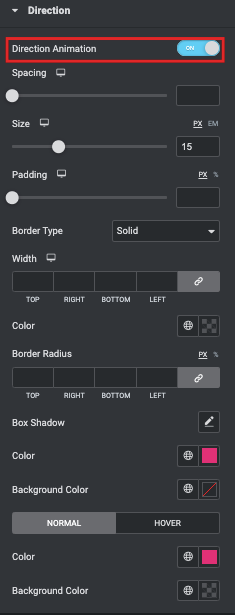
- Direction: Change the style of direction icon. You can also add animation effect to your direction icon. Just enable the Direction Animation option.

Step 4:
If you want to add motion effects, Happy Effects, background or make the page responsive, click on ‘Advanced‘ to explore those options. the ‘Advanced’ is a default feature of Elementor. Give a read to this Document to know more about Advanced features and its uses.

Finally, after completing all the customization click on ‘Publish’ to see your work live.

Great job! You have done it successfully.
