With the new Happy Addons Pro Single Product widget, you can easily design and show your WooCommerce product with great ease.
This amazing widget allows you to display your eCommerce products efficiently and make them more attractive for your customer.
Let’s see how this Single Product widget works.
Pre-requisites
- WooCommerce
- Happy Addons
- Happy Addons Pro
How To Use Single Product Widget of Happy Addons Pro
Step 1:
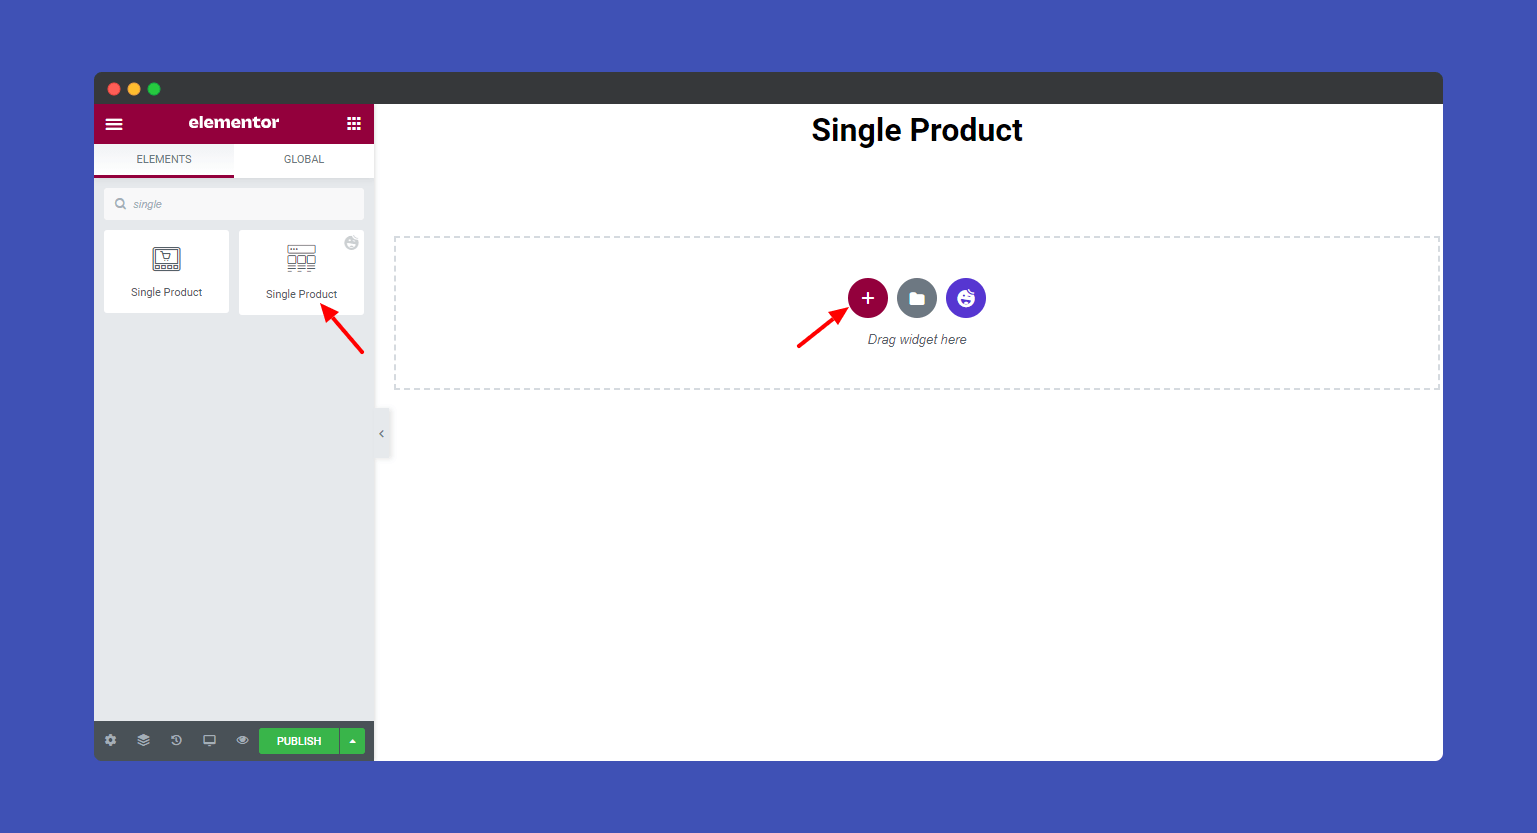
First, look for the Single Product widget in the left side menu. Then drag and drop it onto the selected area.
Step 2:
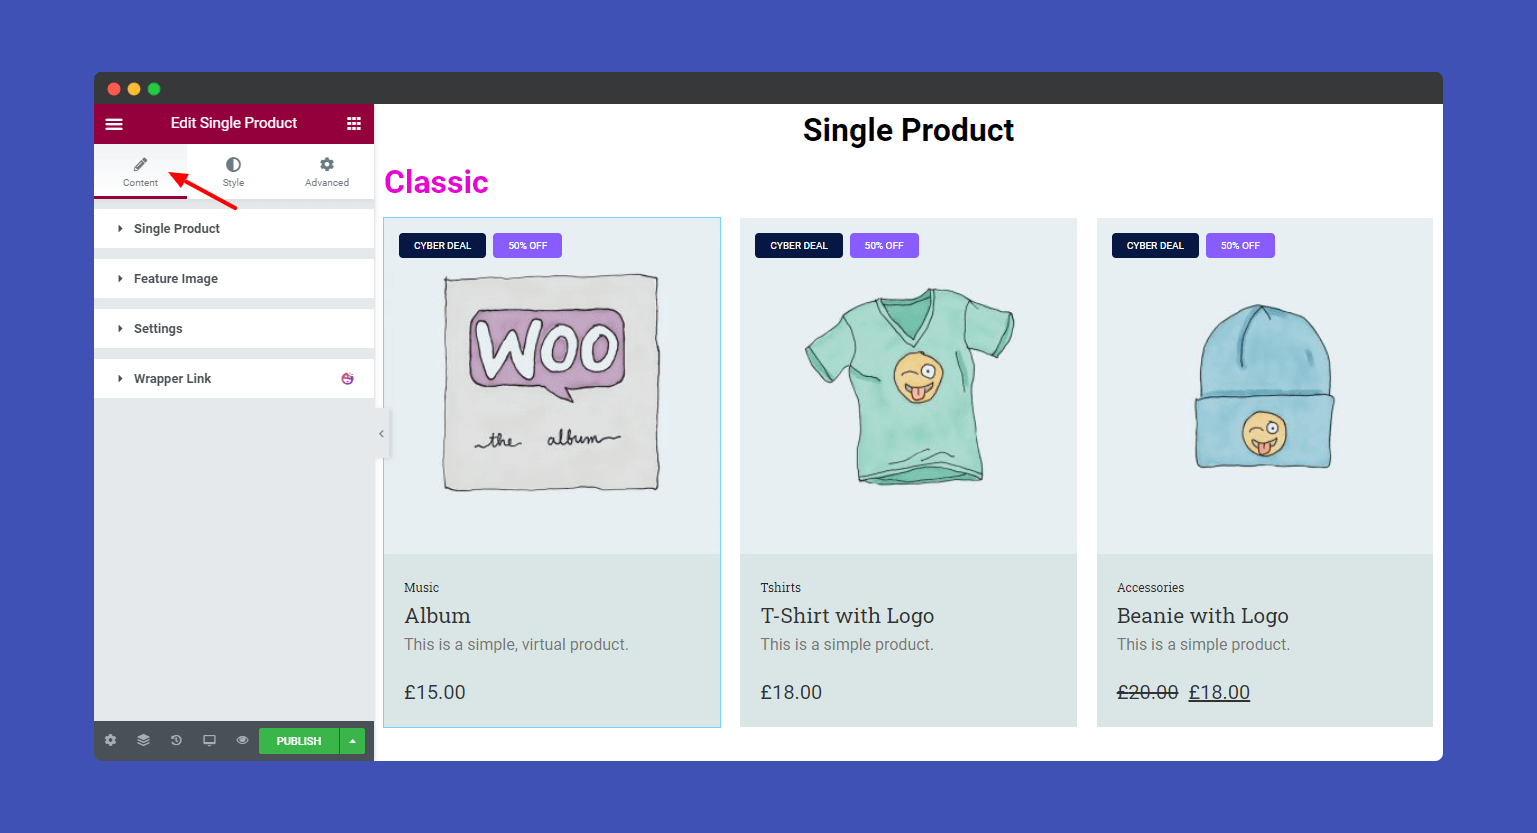
In the “Content” section, you will find the editing options for “Single Product”, “Feature Image”, “Settings” and “Link Wrapper”.
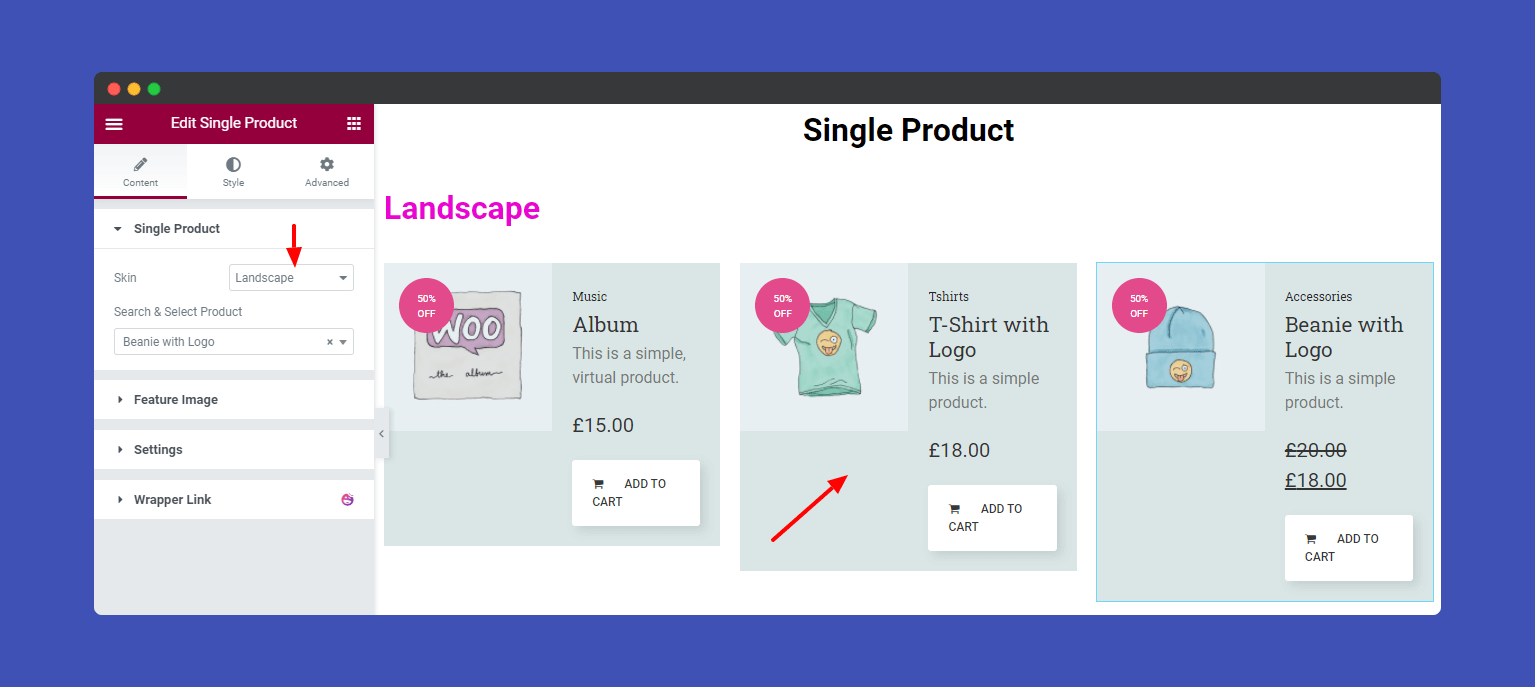
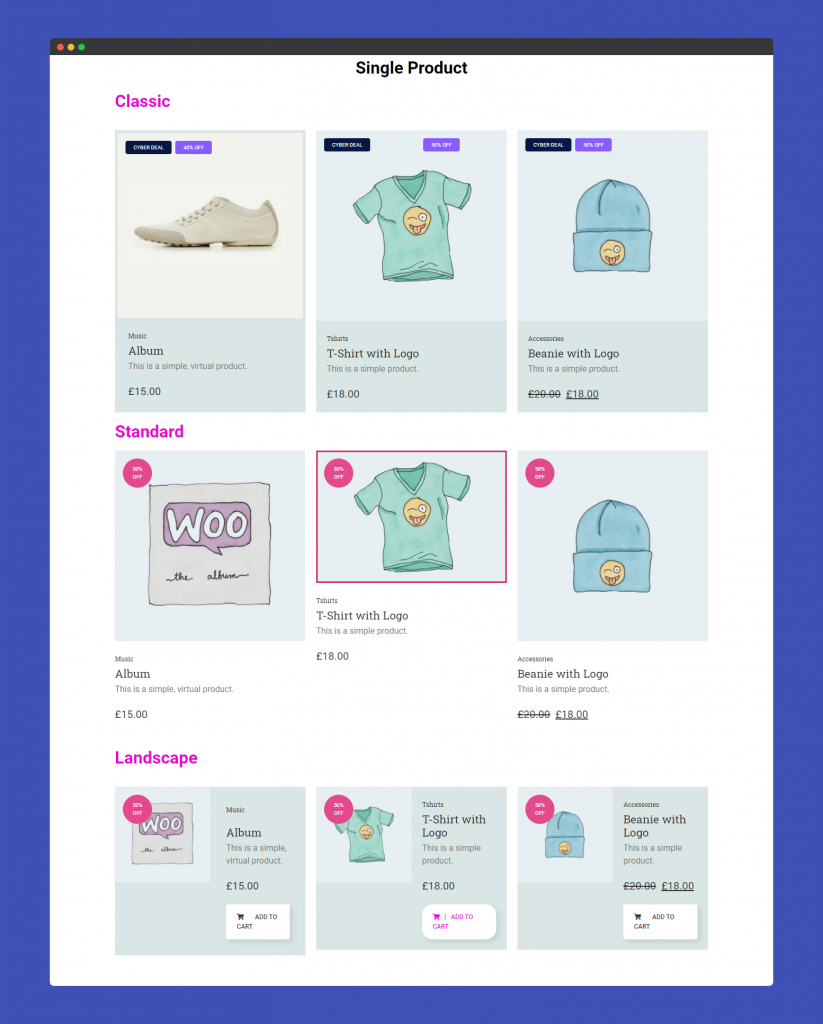
Then click on the Single Product dropdown menu and select your desire skin. Here you find three different Skins named Classic, Standard, and Landscape.
Classic Skin offers two Badges.
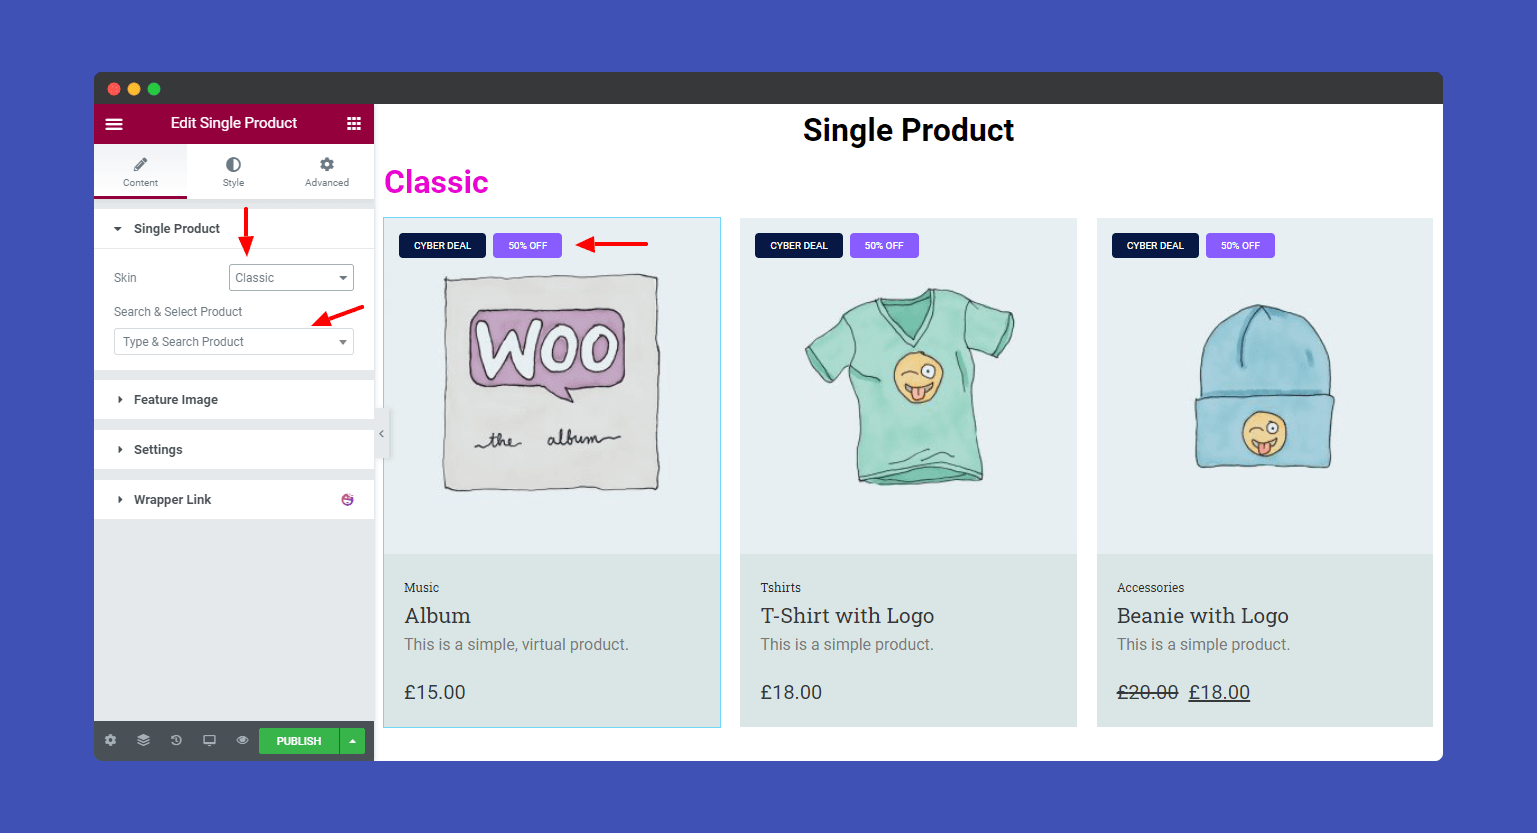
Note: You can Search and Select Products in the Single Product widget and add products as much as you want. Here we have added three products. And you can hide the product description at any time.
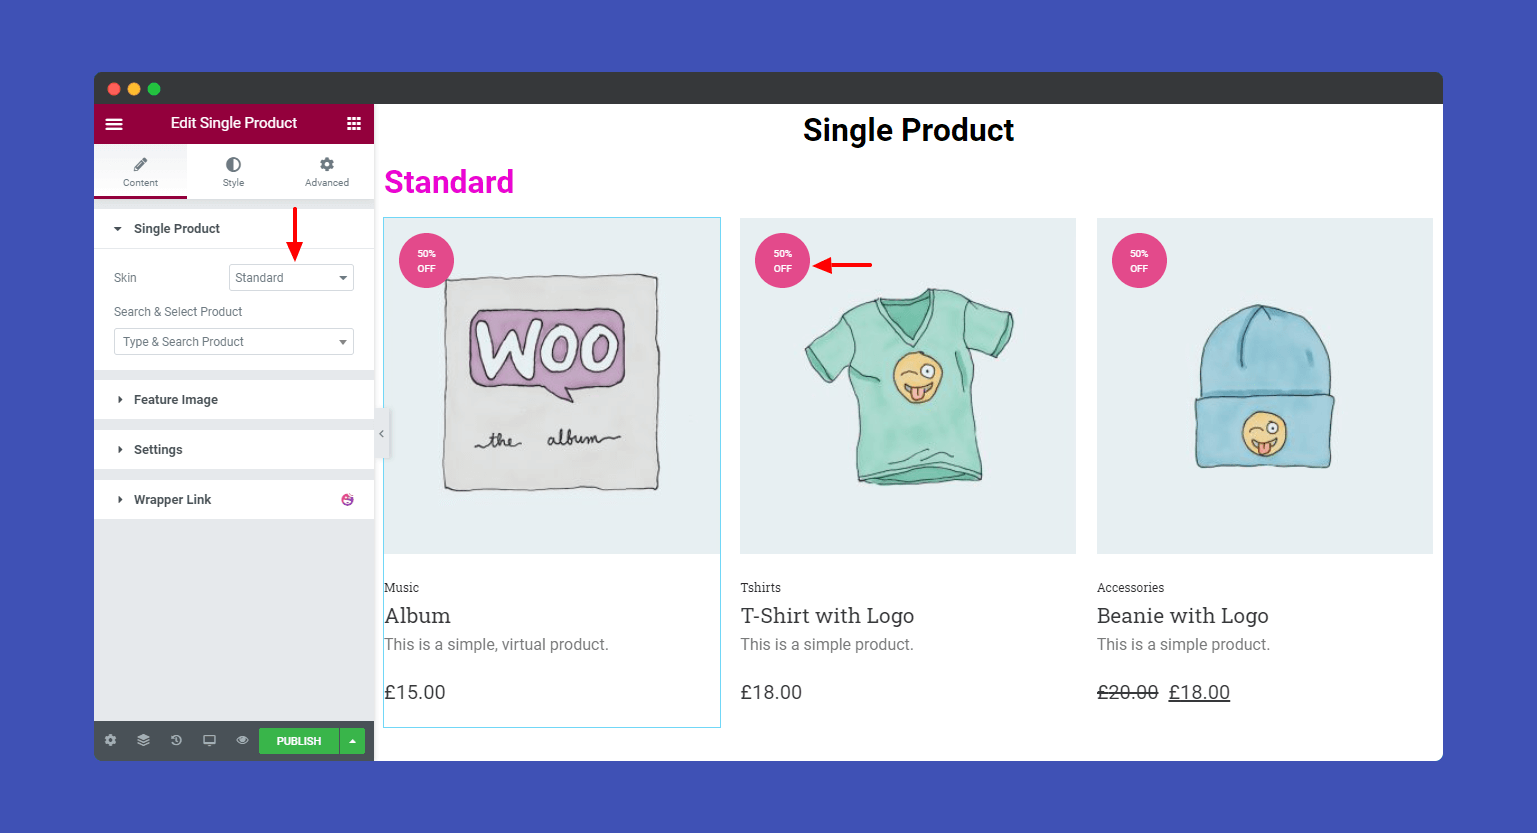
Standard Skin offers a single Badge.
Landscape Skin also offers a single Badge. But you can change the position of your product image in the Landscape mood.
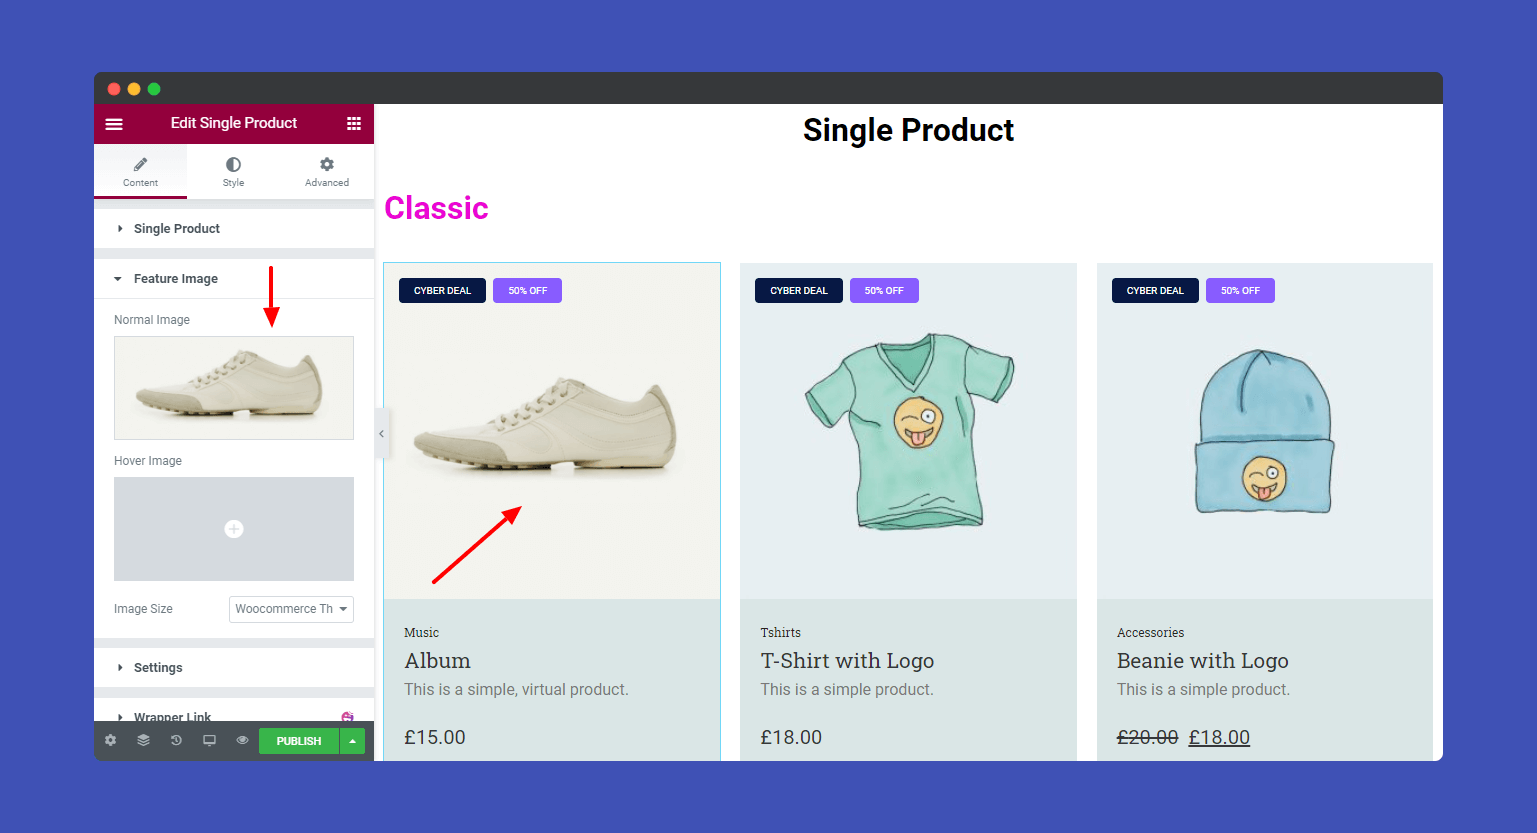
You are able to change your product Feature Image here.
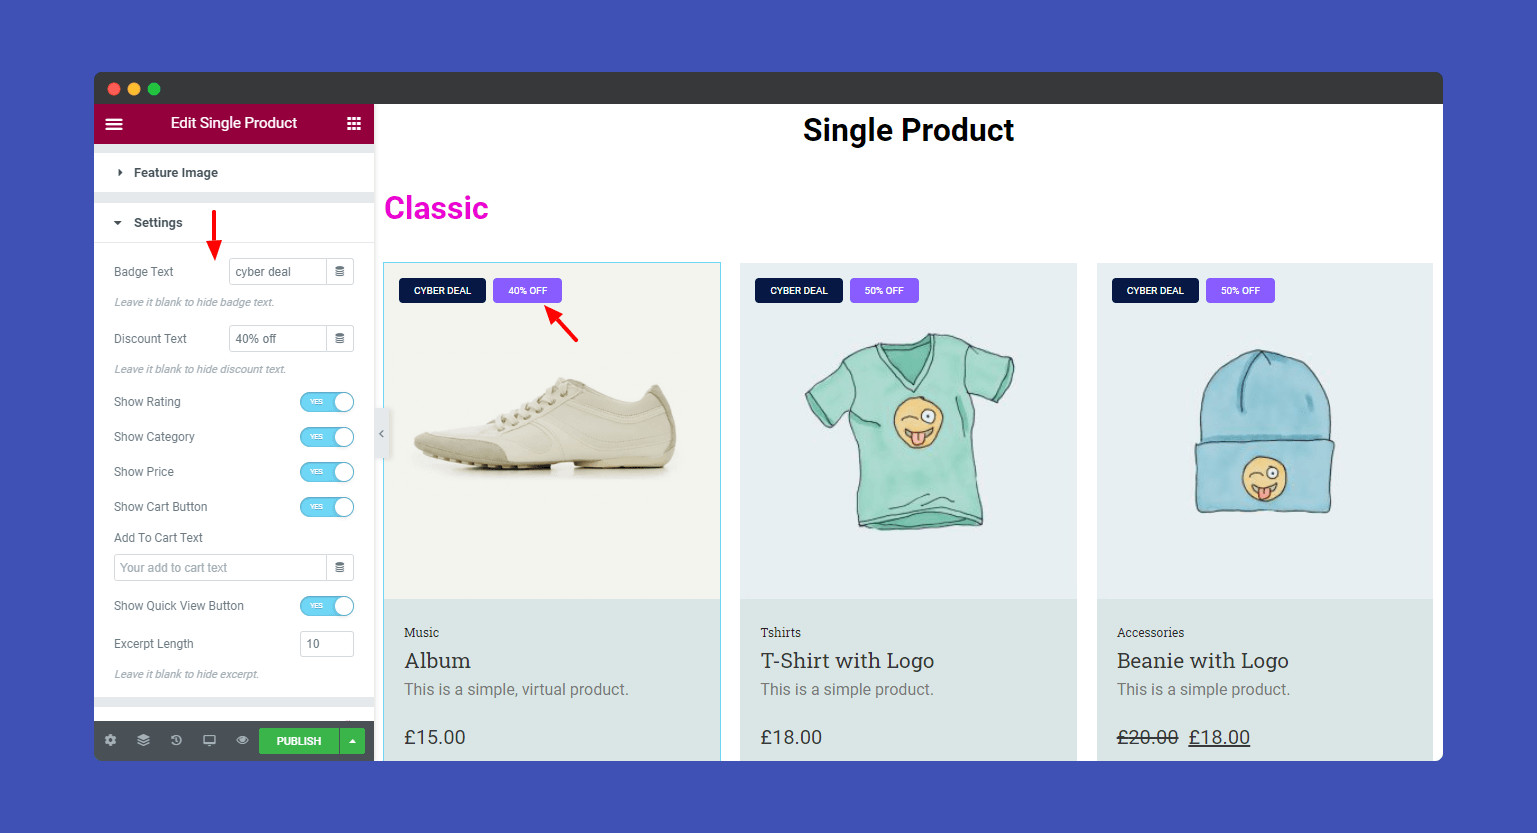
In the Settings section, you find several essential setting options like Badge Text, Discount Text, Show Rating, Show Category, Show Price, and more.
Step 3:
In the “Style” section, you will find seven options to design your product. Here are the lists.
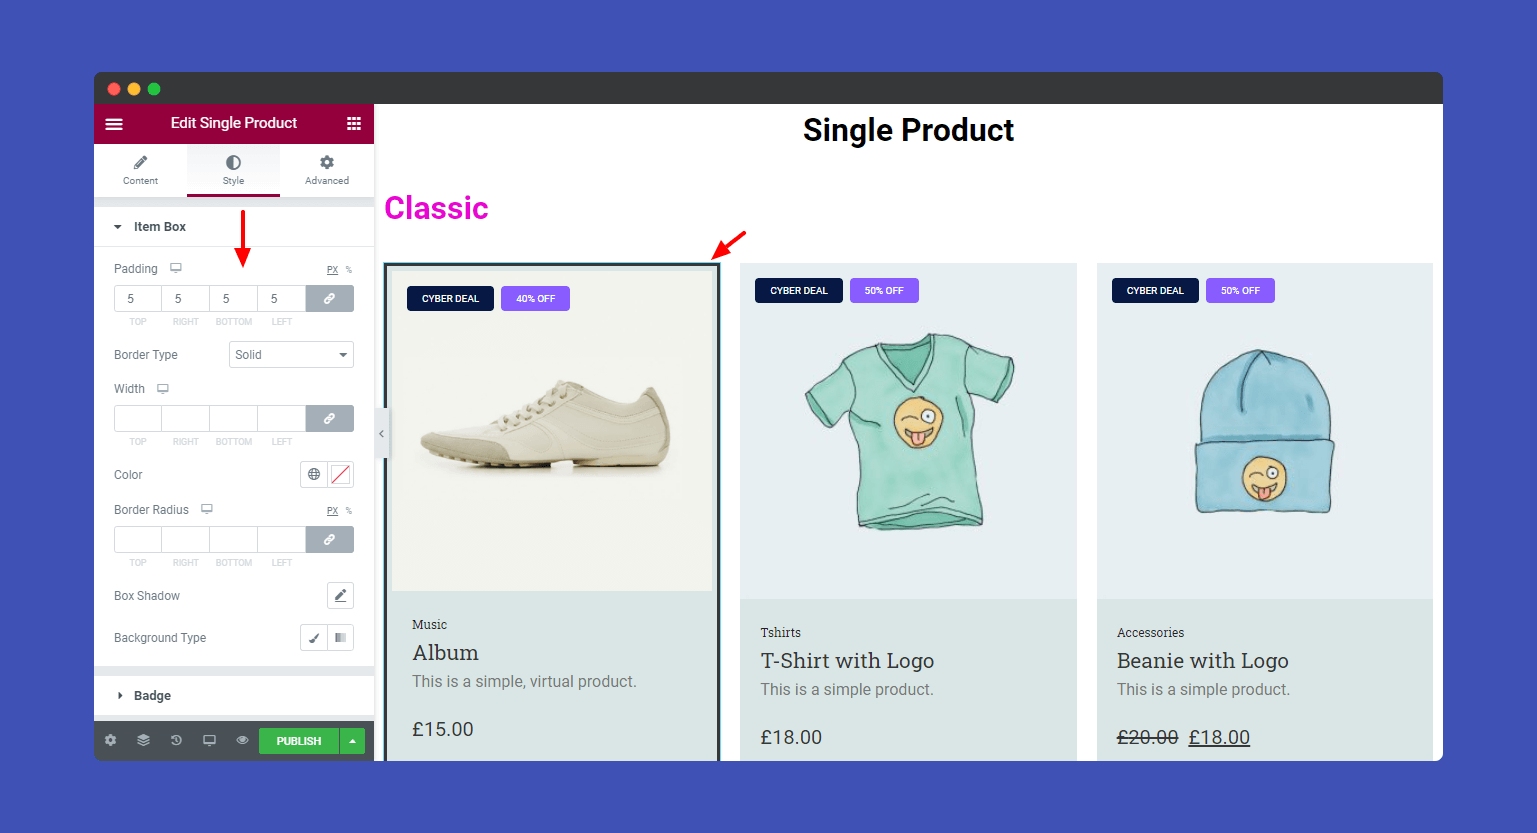
- Item Box
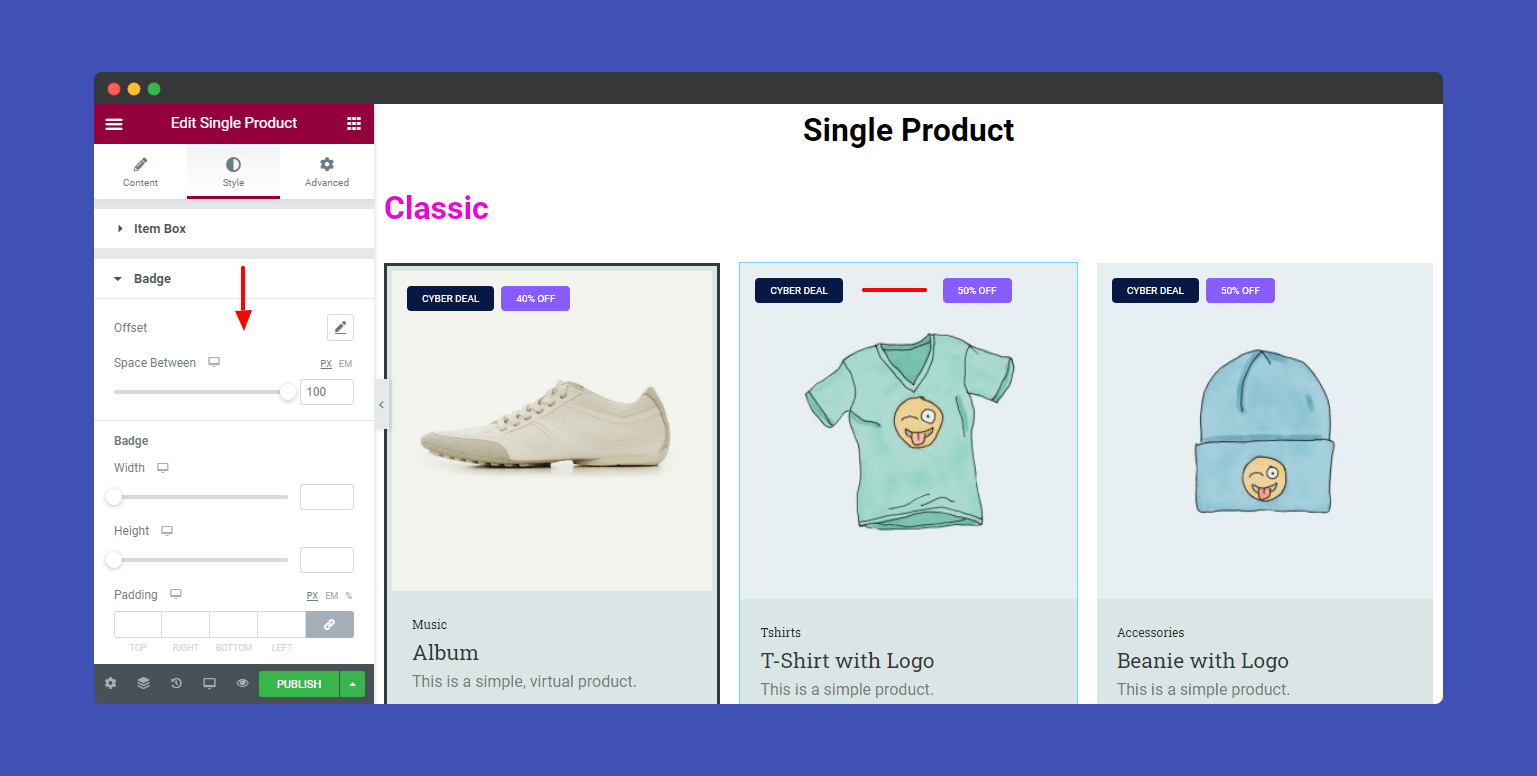
- Badge
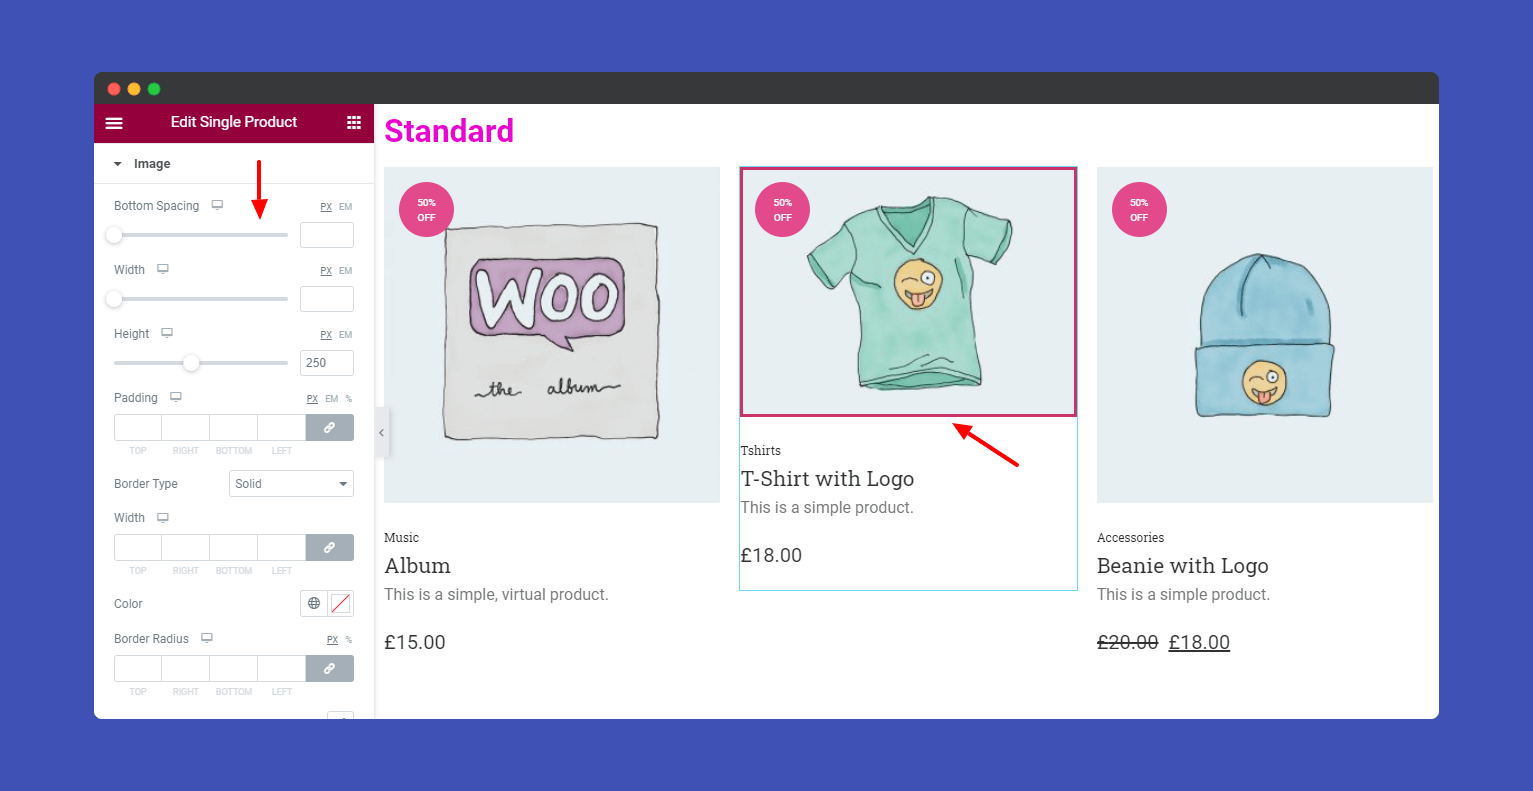
- Image
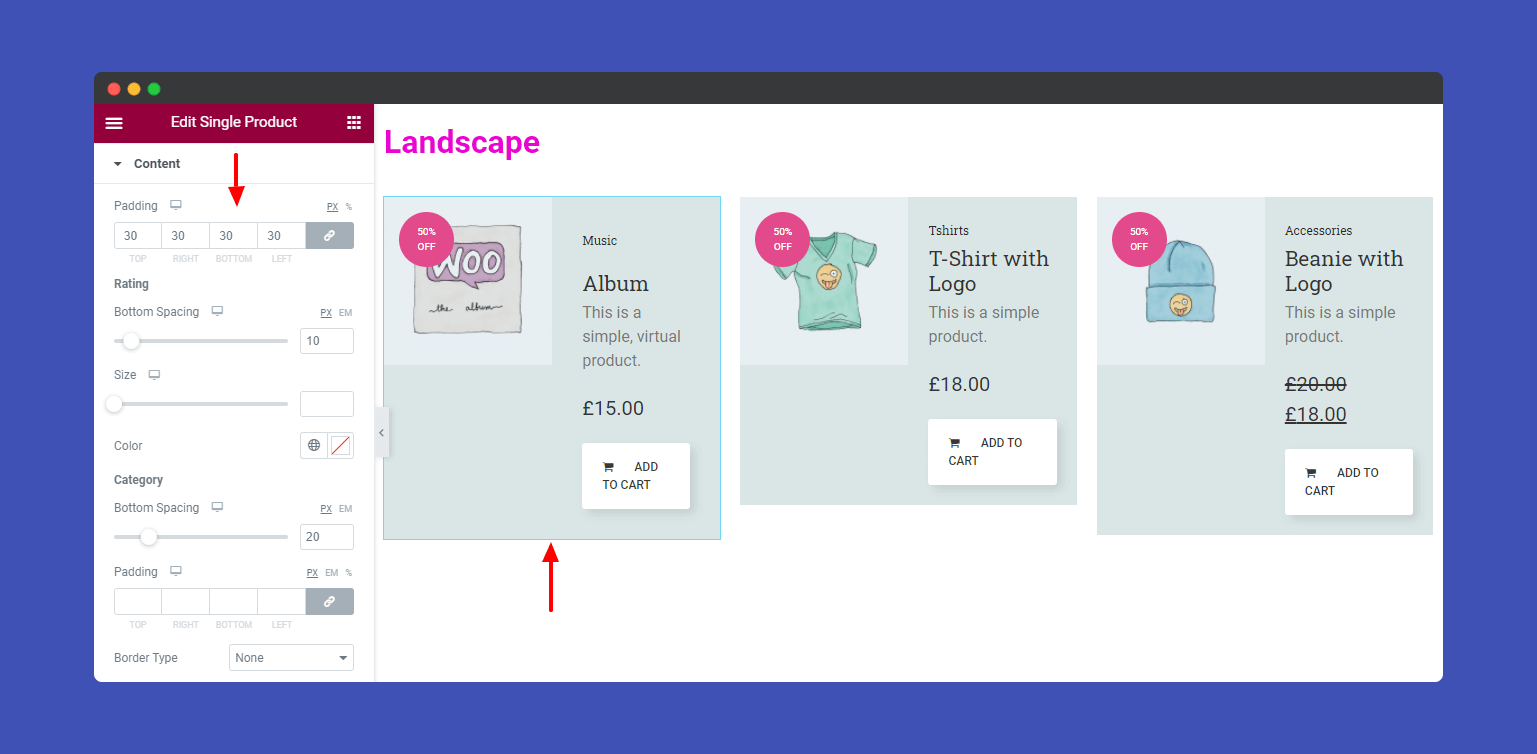
- Content
- Quick View
- Add To Cart
- Quick View Modal
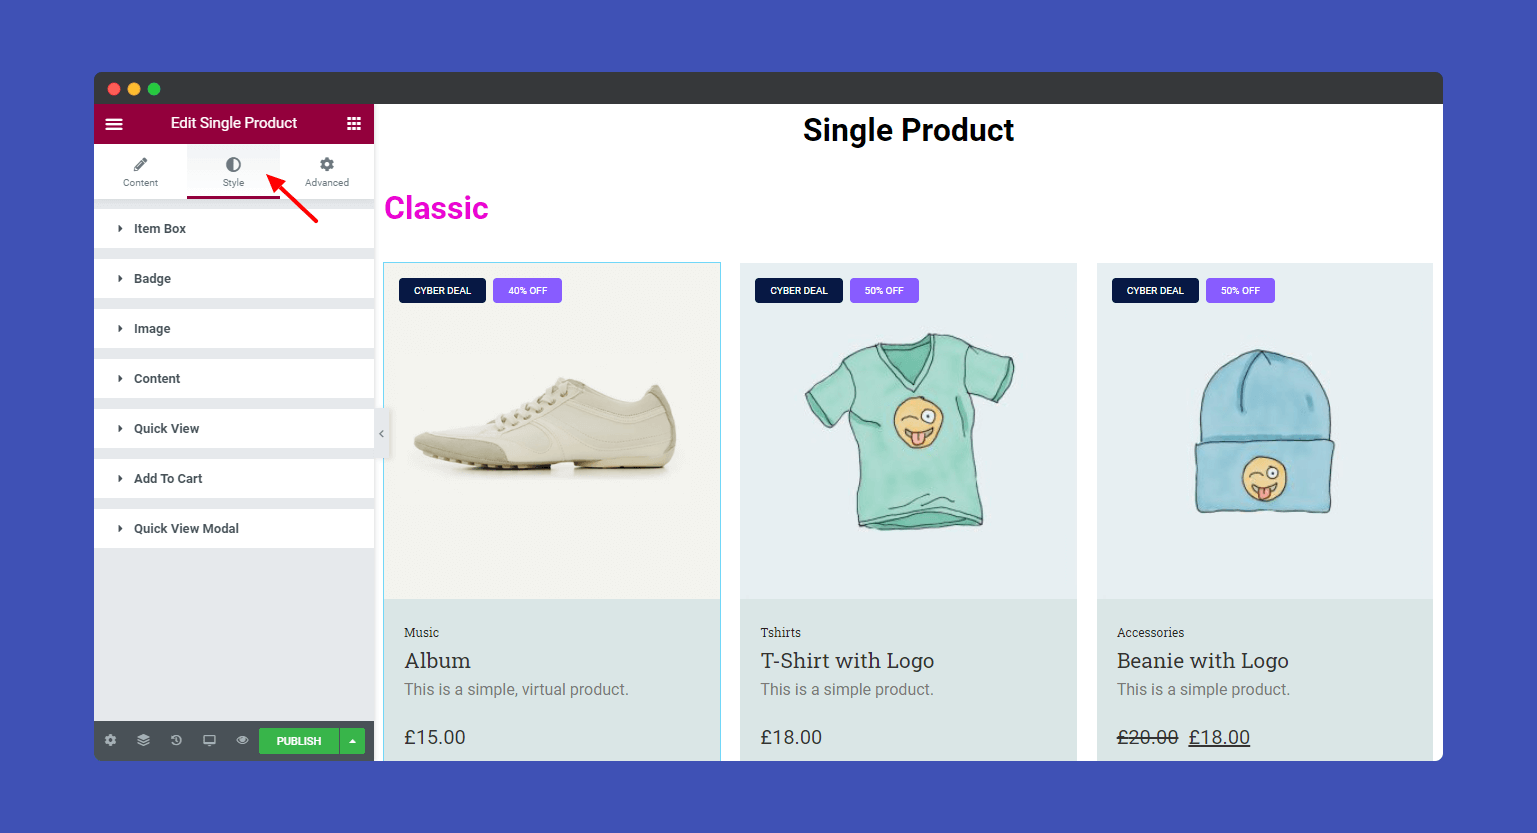
Go to Style–>Item Box and redesign your Item Box settings.
If you want to change the product Badge style, you easily change it here Style–>Badge.
In the Image section, you can also change your product image default setting like Height, Width, Padding, Border Type, etc.
To edit your product content, go to Style–>Content. then you’ll find many options to design your product content.
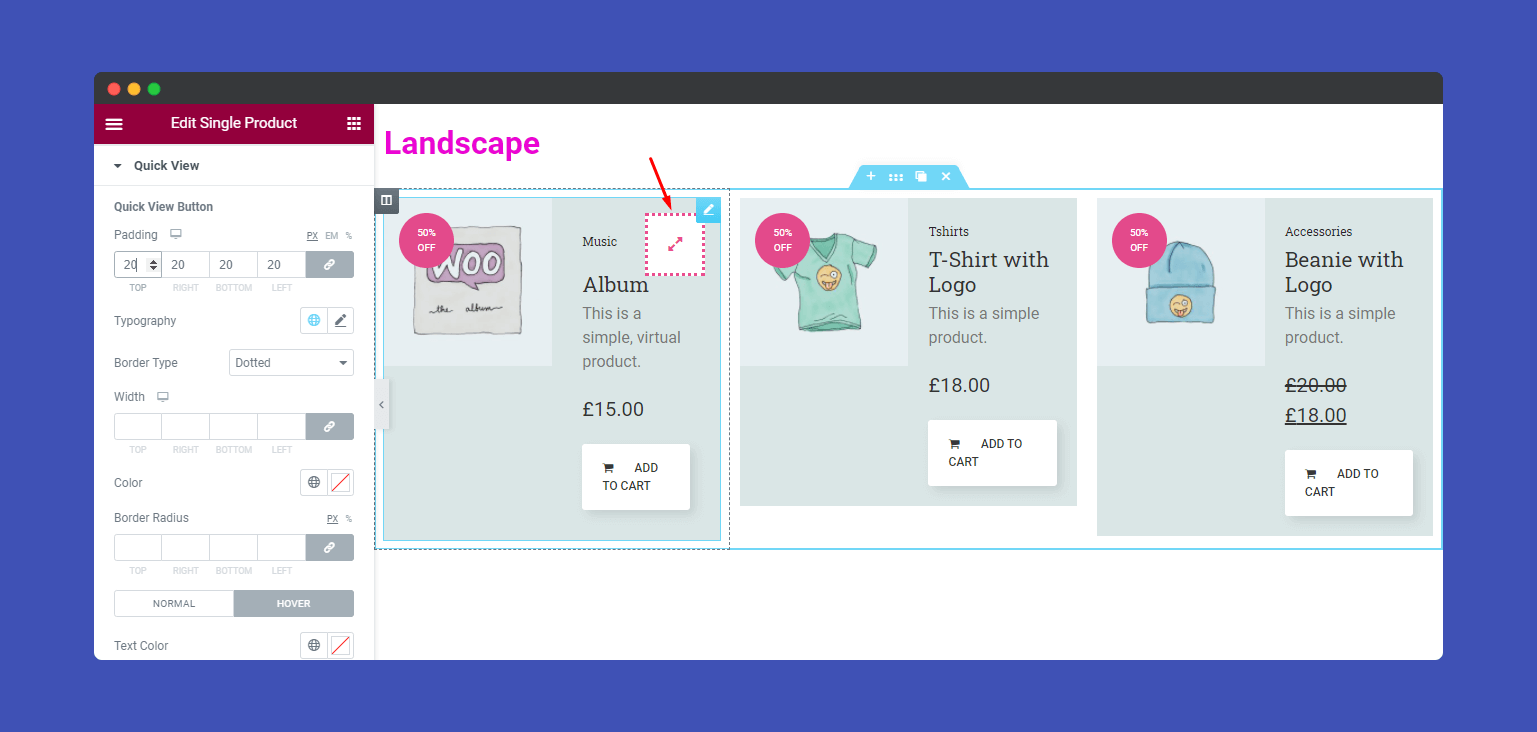
Style–>Quick View allows you to edit the Quick View Icon in your own style.
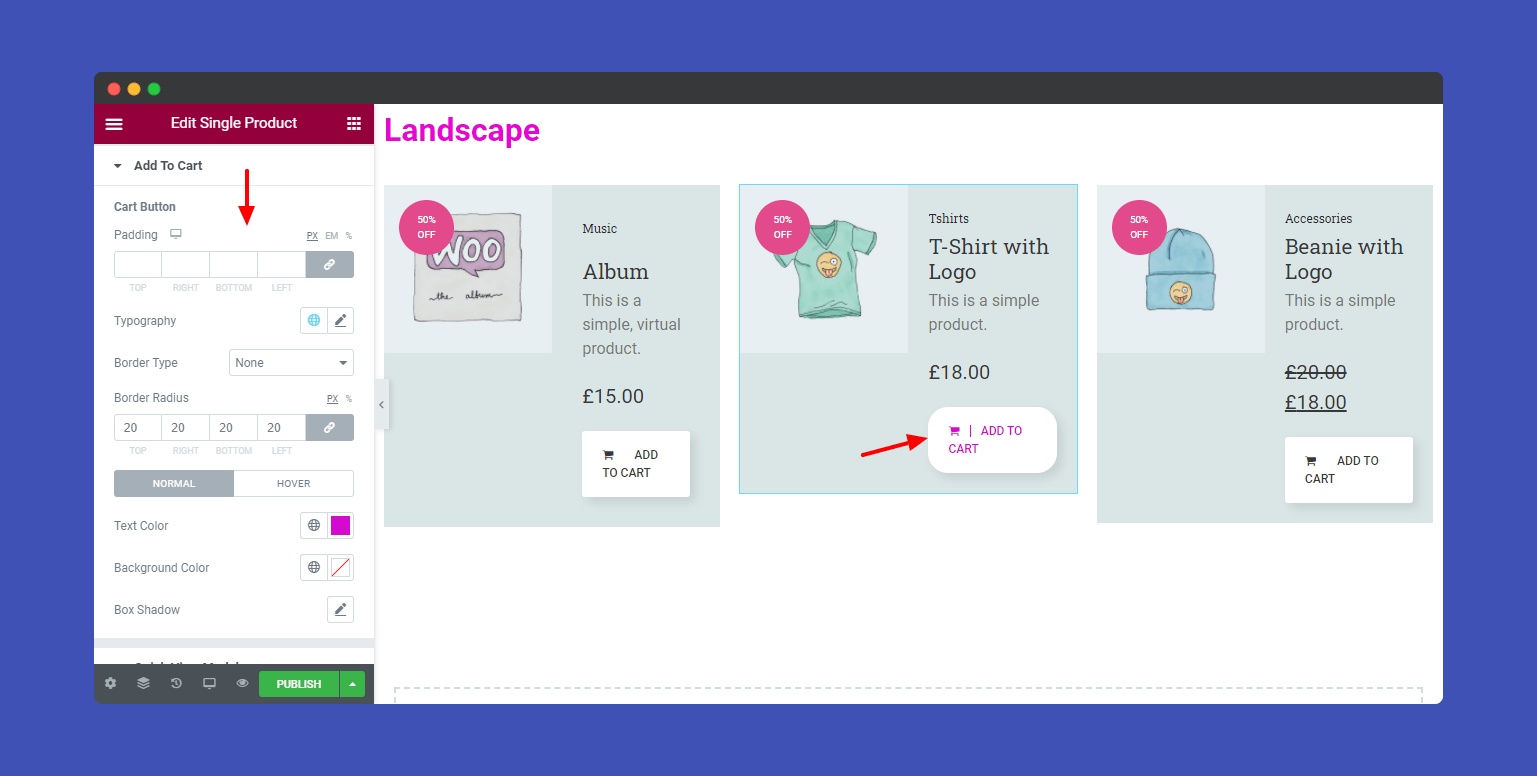
Well, you able to change your Add To Cart button. You can change the button Typography, Text Color, Background Color, Border, and more.
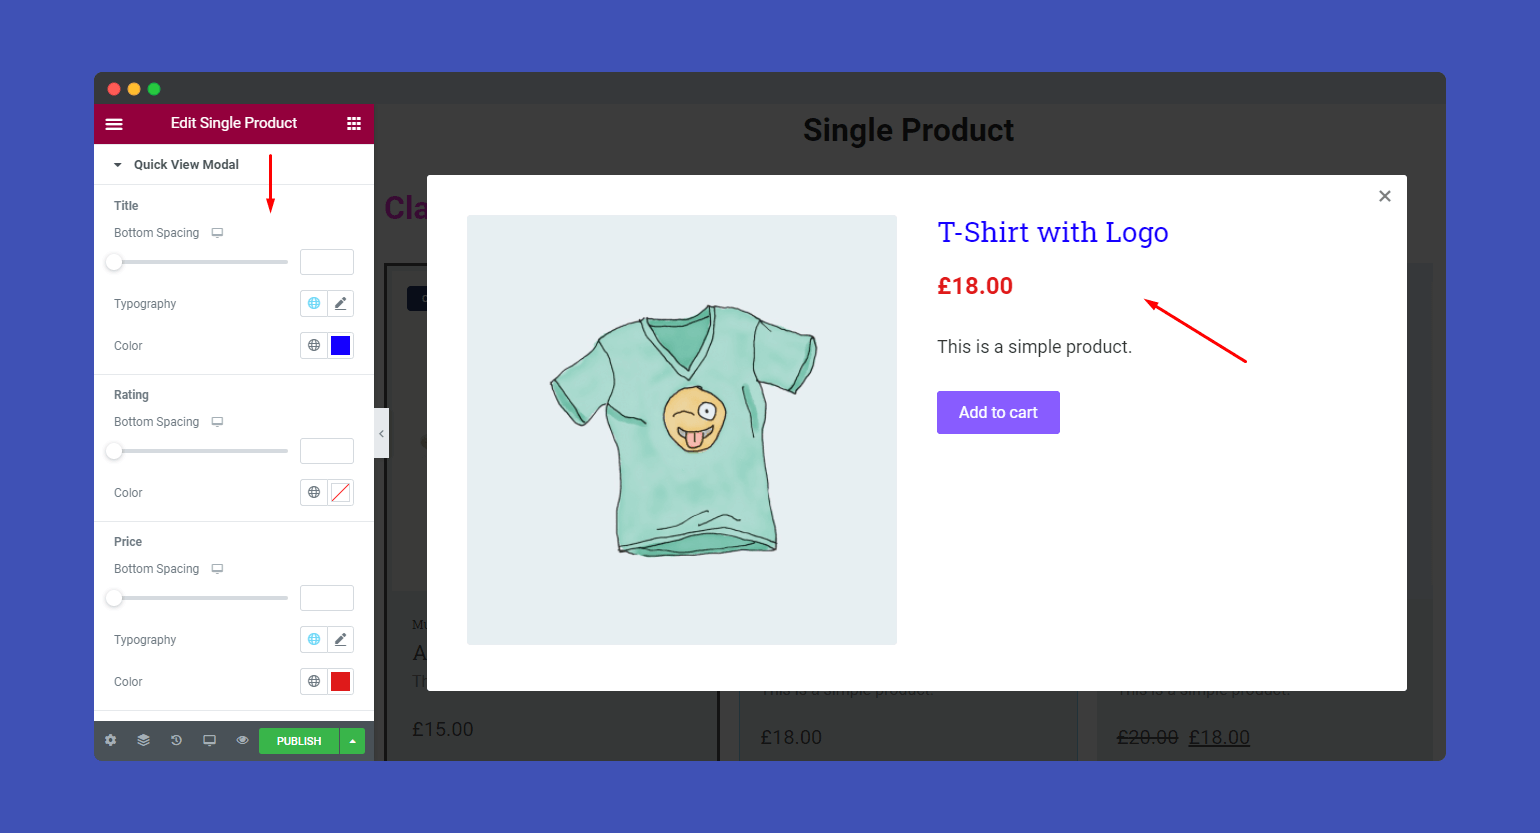
If you want to redesign your Quick View Modal design, you can do it here. You can change the Title, Rating, Price, Summary, and more.
Step 4:
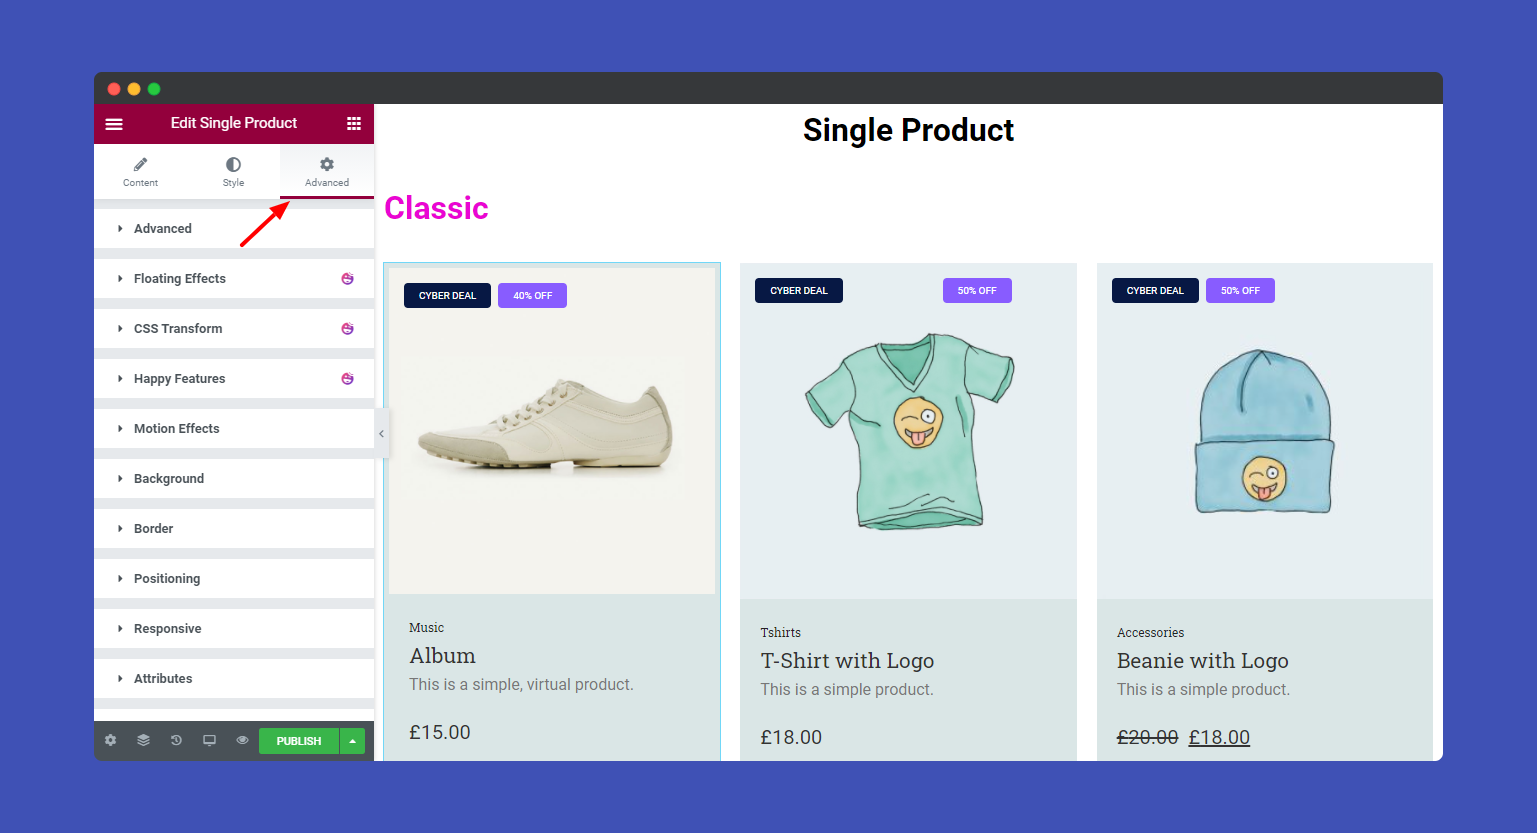
If you want to add motion effects, happy effects, background, or make it responsive and more intriguing, click on ‘Advanced‘ to explore those options. the ‘Advanced‘ is a default feature of Elementor.
Give a read to this Document to know more about advanced features & functions.
Here is the final preview of Happy Addons Single Product widget.
That’s it.
