https://elementor.com/help/advanced-tab/
How to Use the Timeline Widget of Happy Elementor Addons
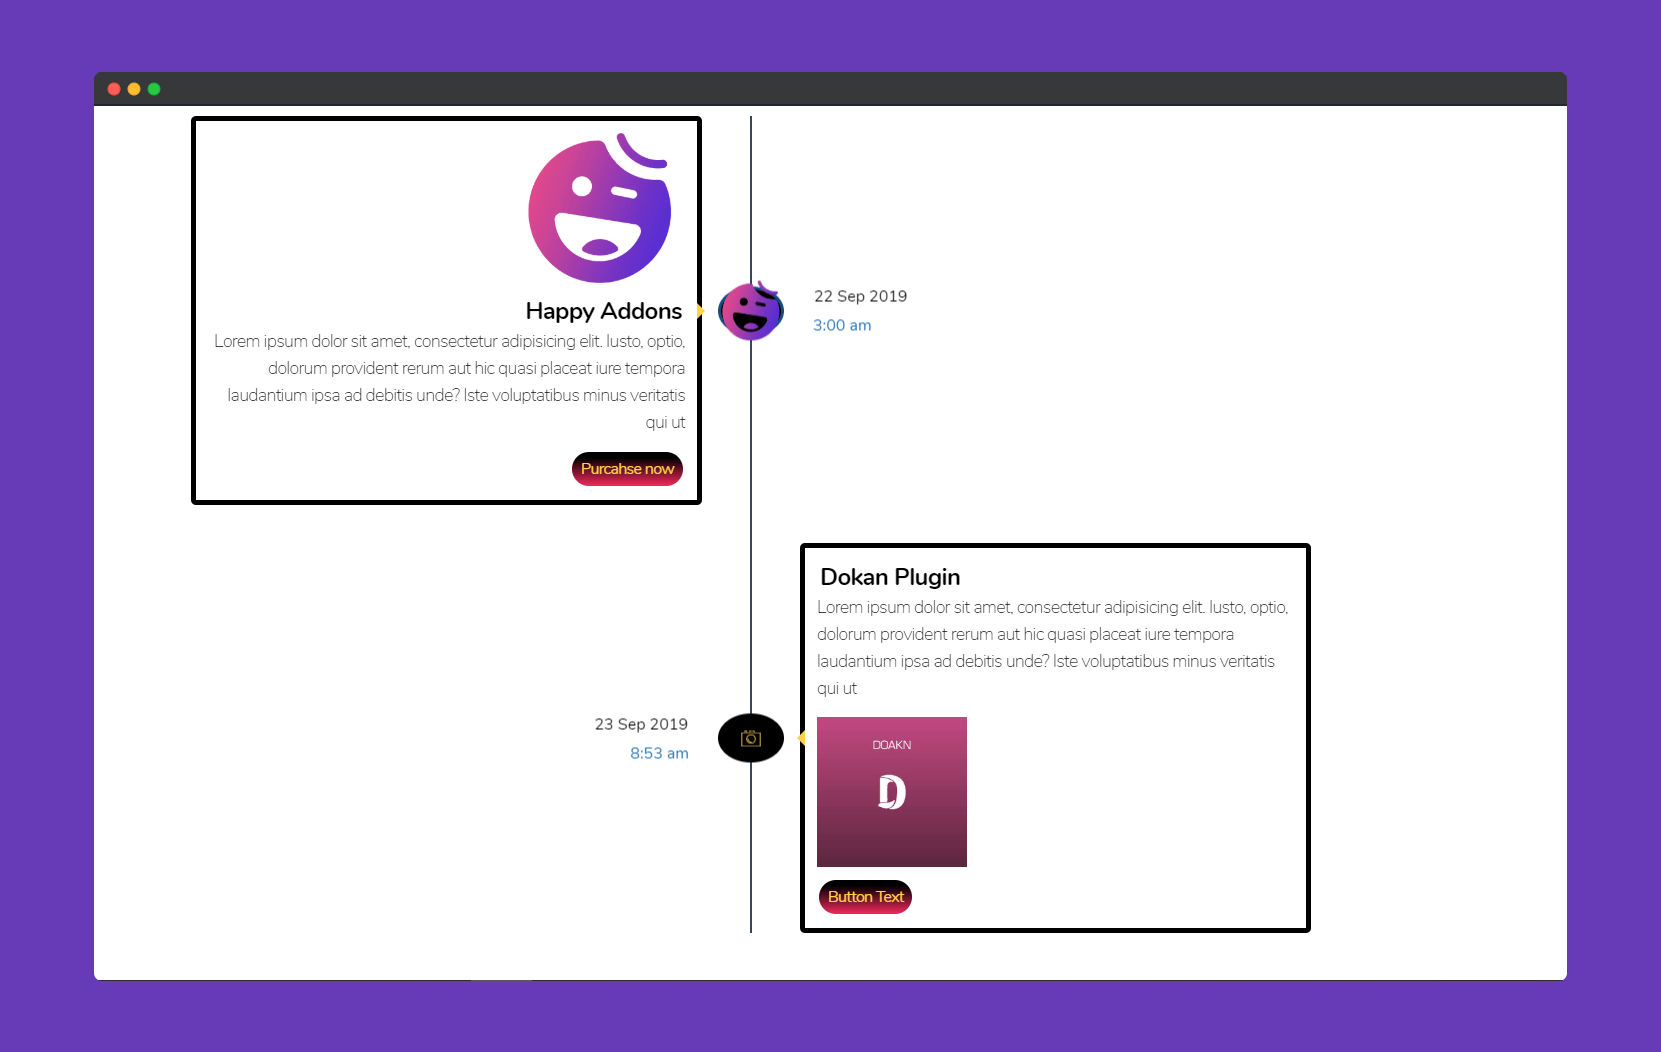
With the new Timeline Widget of Happy Elementor Addons pro, you can showcase the timeline for any particular things. For example, you can show the launch of your products, the origin of your company and many other things that can be shown in a timeline.
Using Timeline Widget
Step 1:
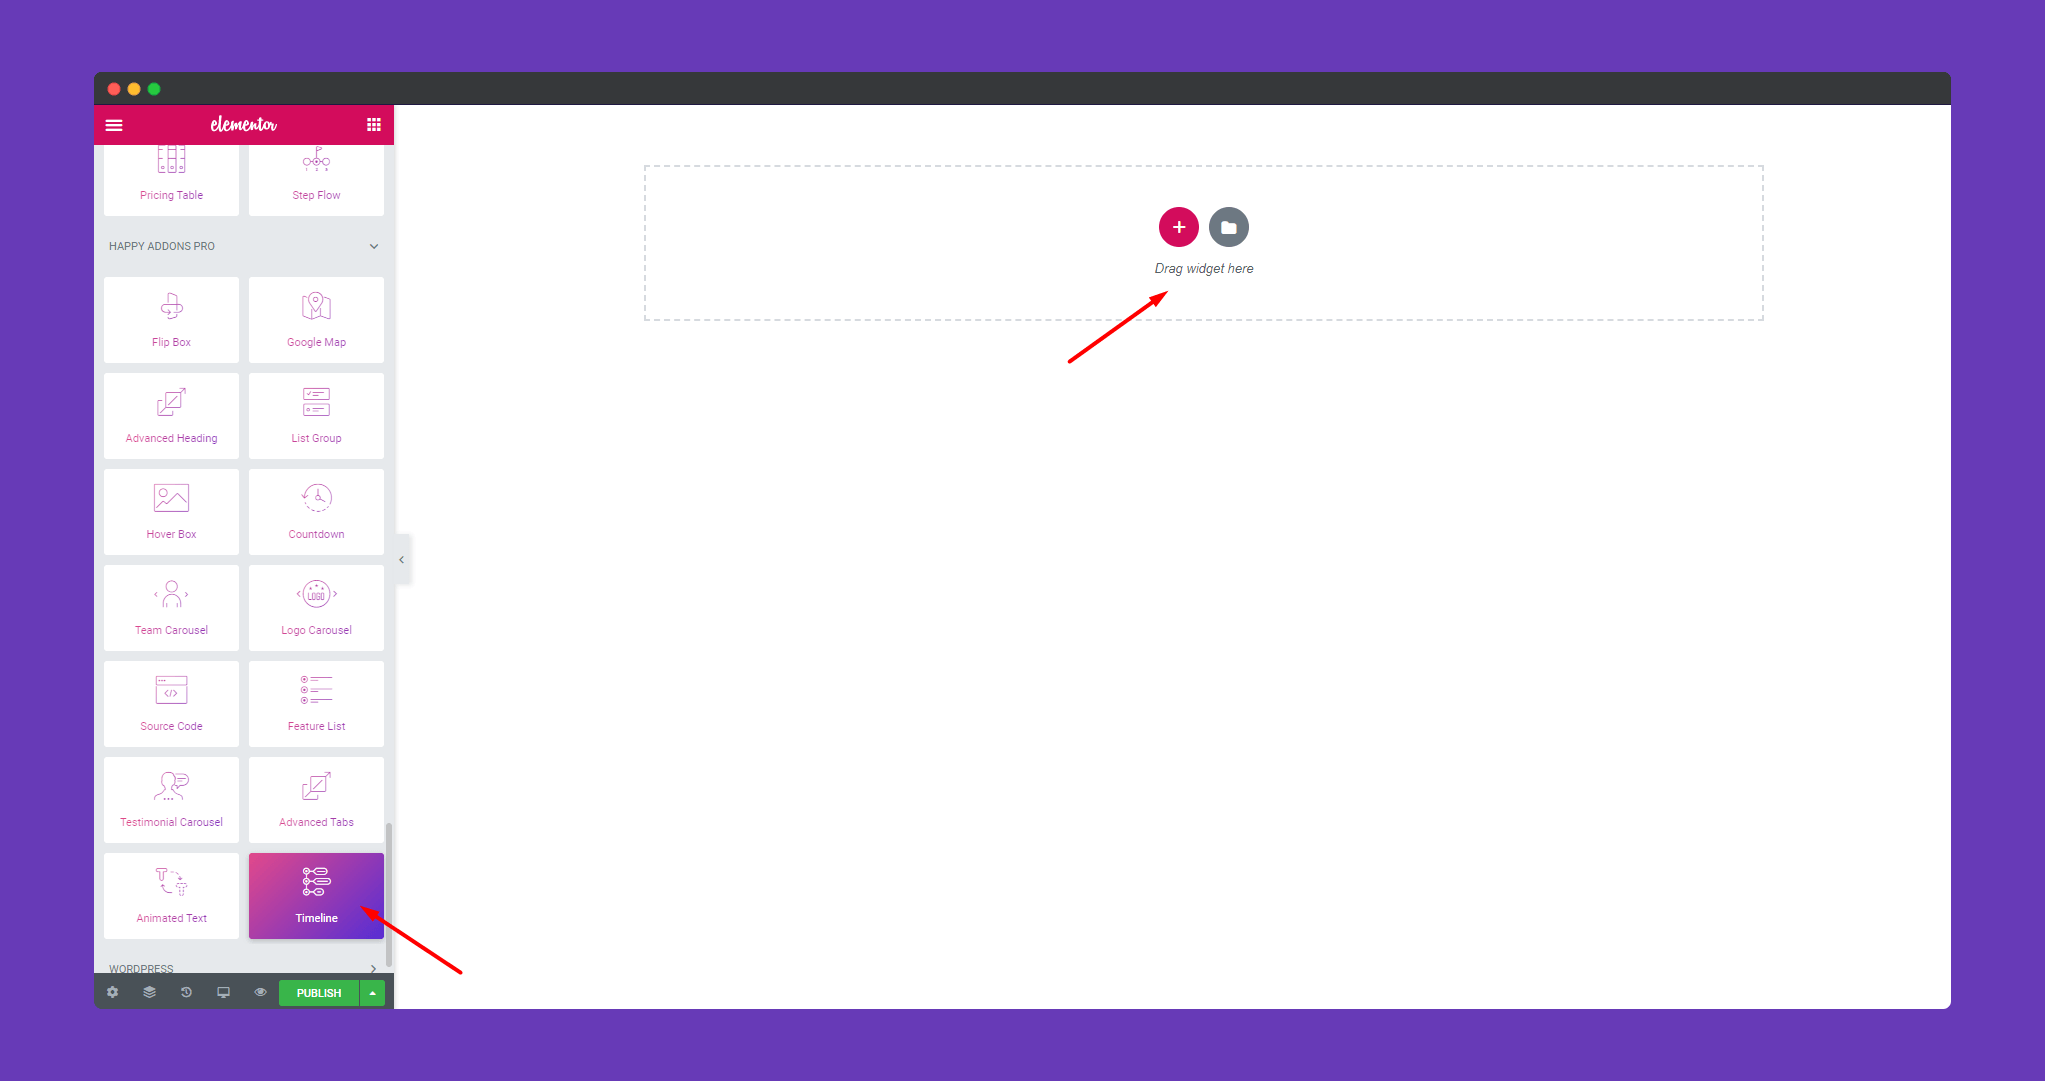
Select the timeline widget from the menu bar from the left-hand side on the screen then drag and drop it in the selected area.
Step 2:
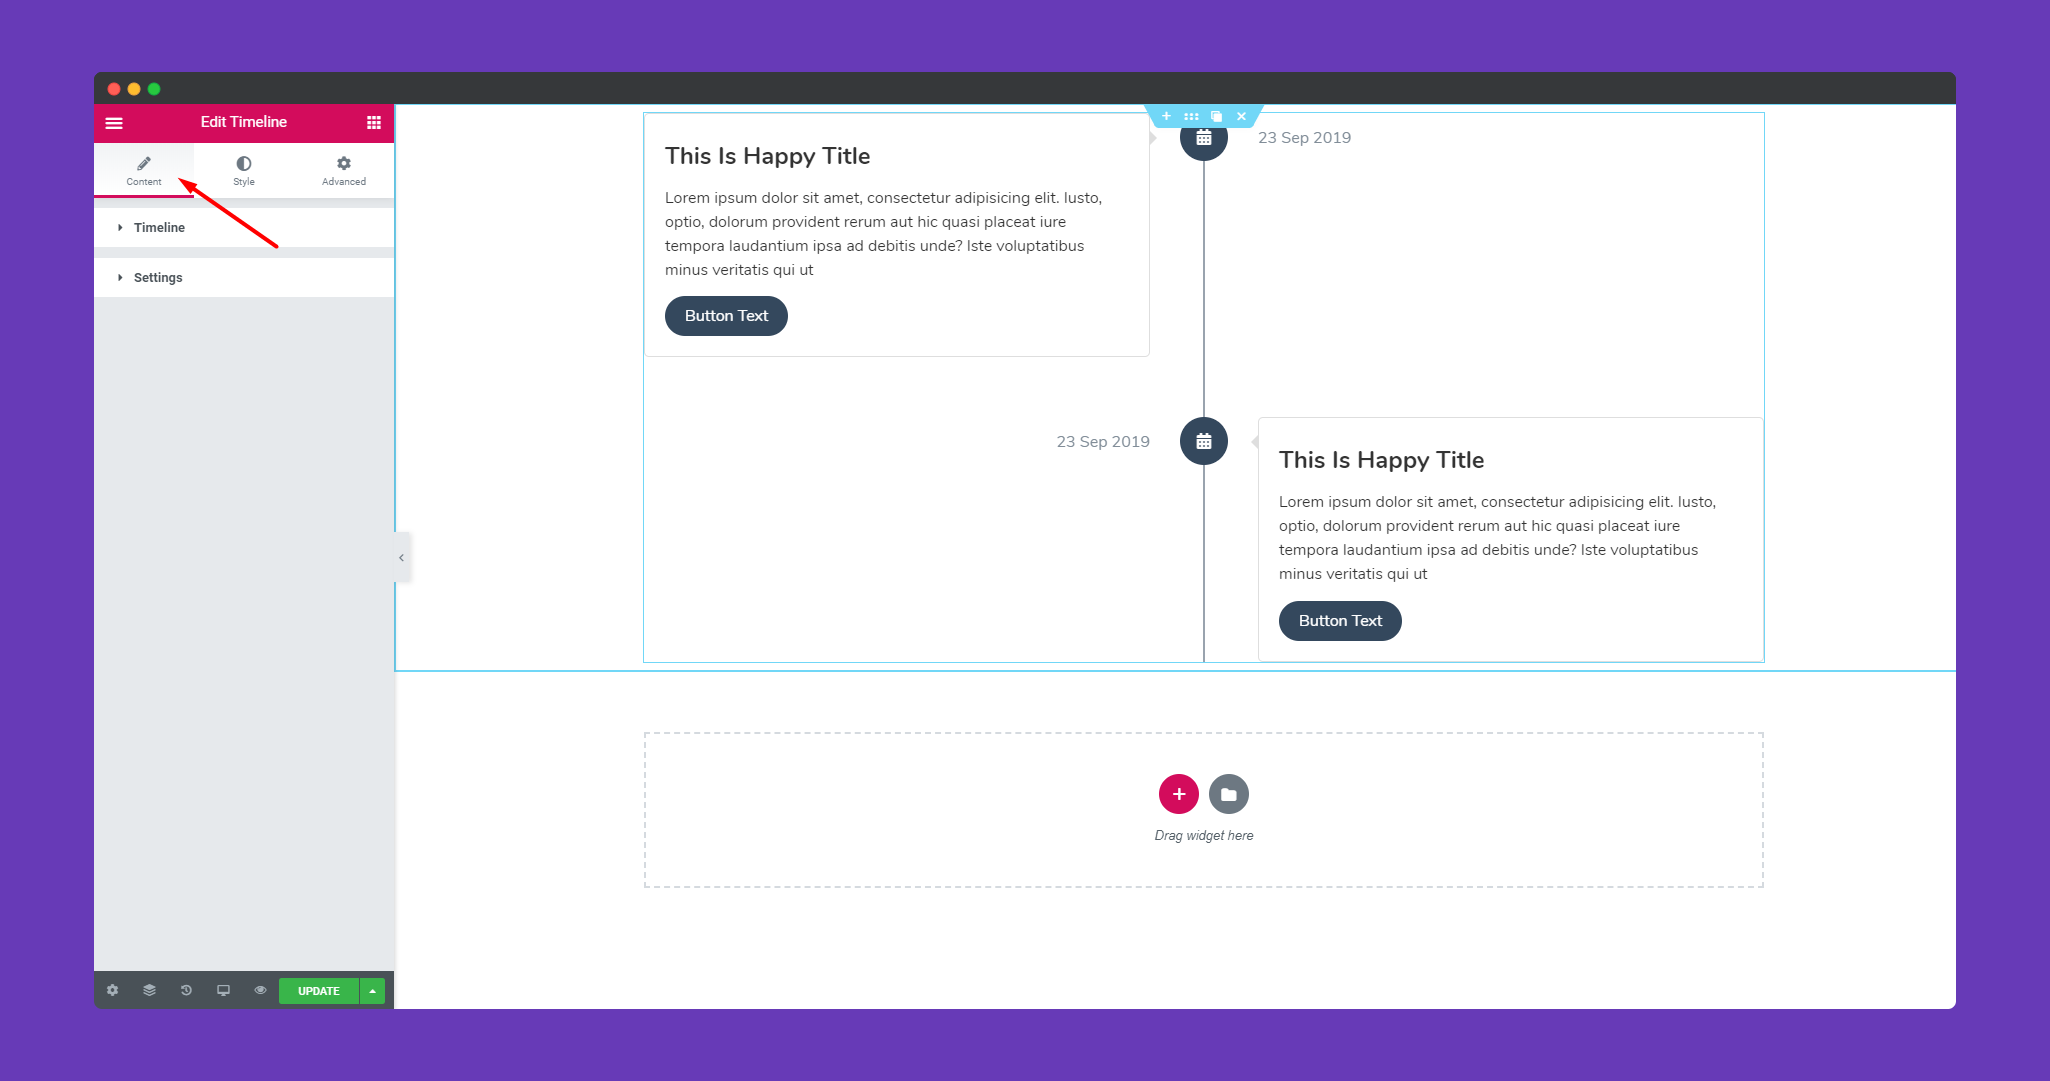
In the ‘Content‘ section, you will find options to edit ‘Timeline‘, ‘Settings‘.
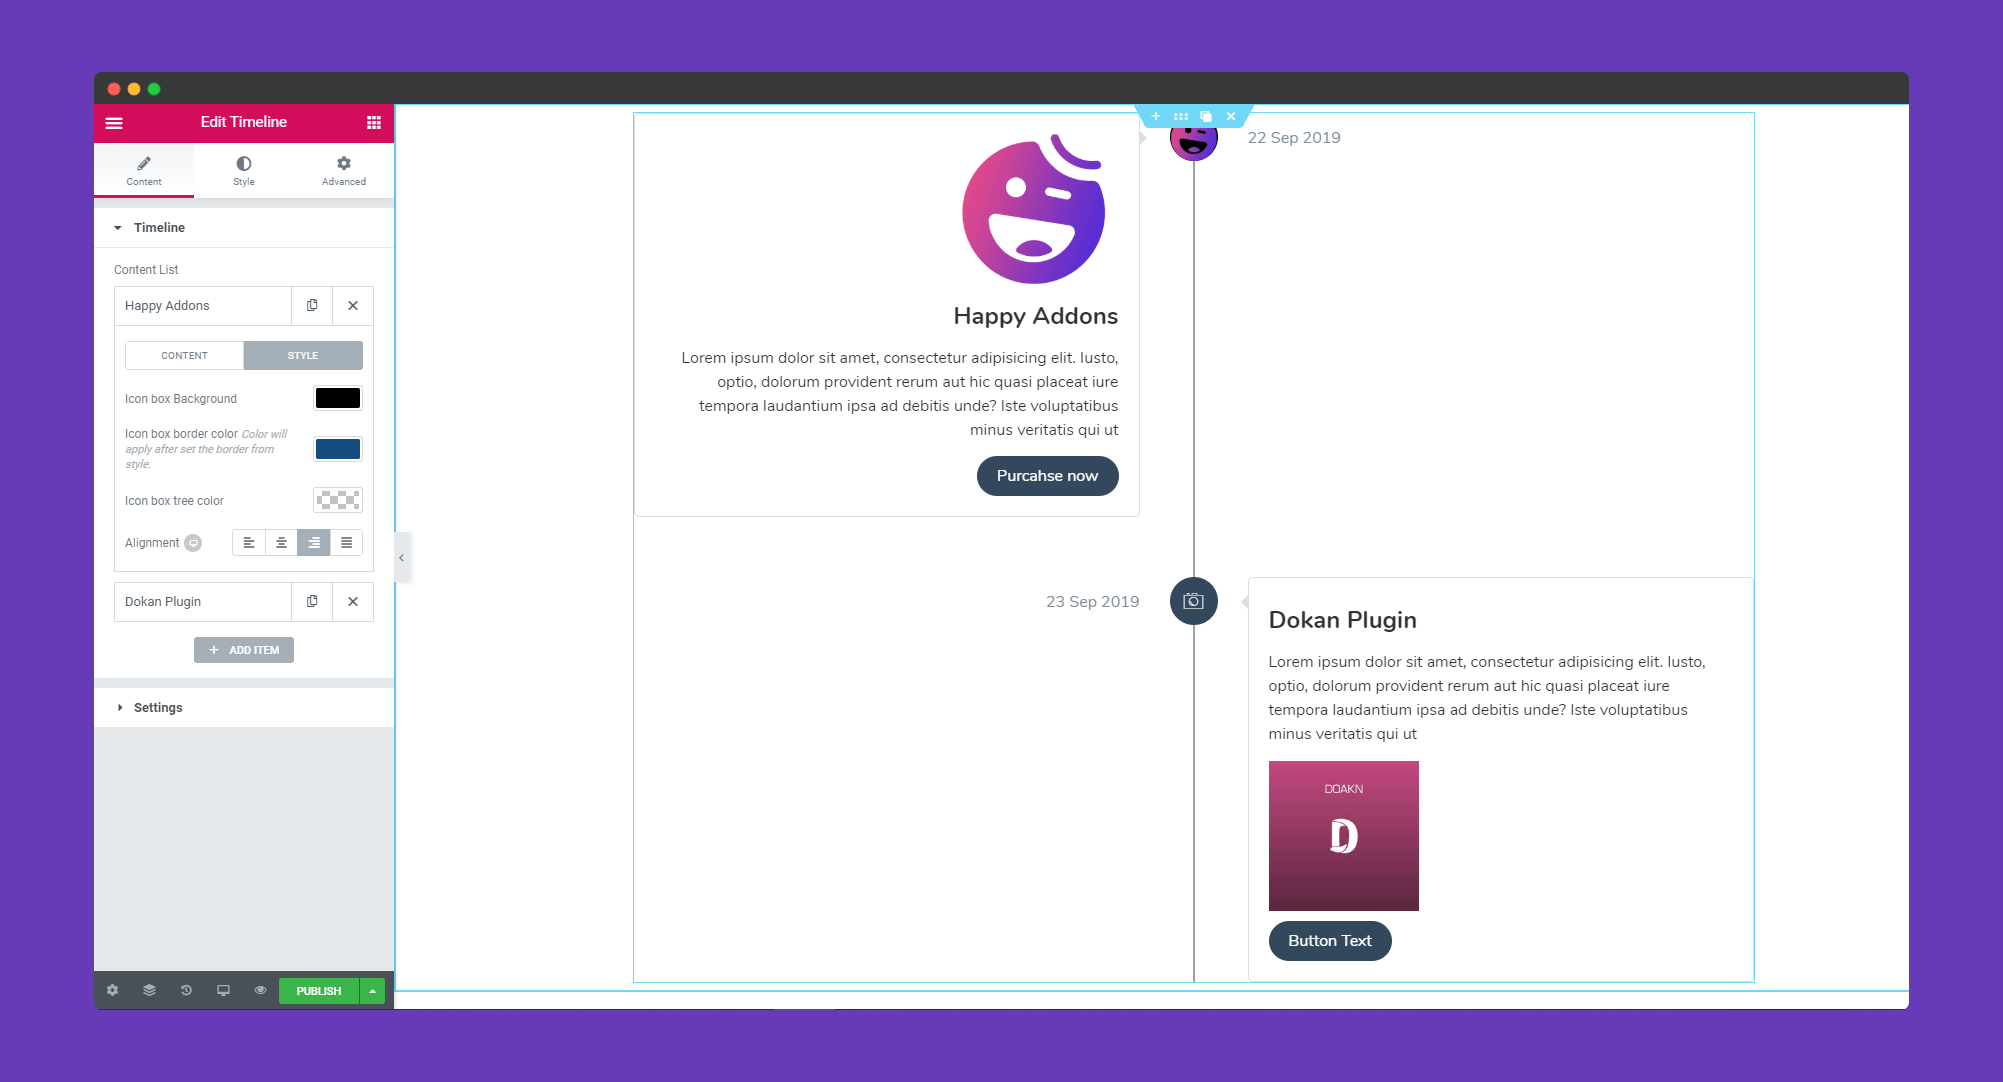
In ‘Timeline‘, you can add an image or an icon as an icon, you can add multiple images before the text, add button text and link. Add title, image size and position also.

In Style, you can set icon box background, icon box border, align the icon left, right, center or justify. You can add more items using the “ADD ITEM‘ button. Remove an item using the ‘X’ button.
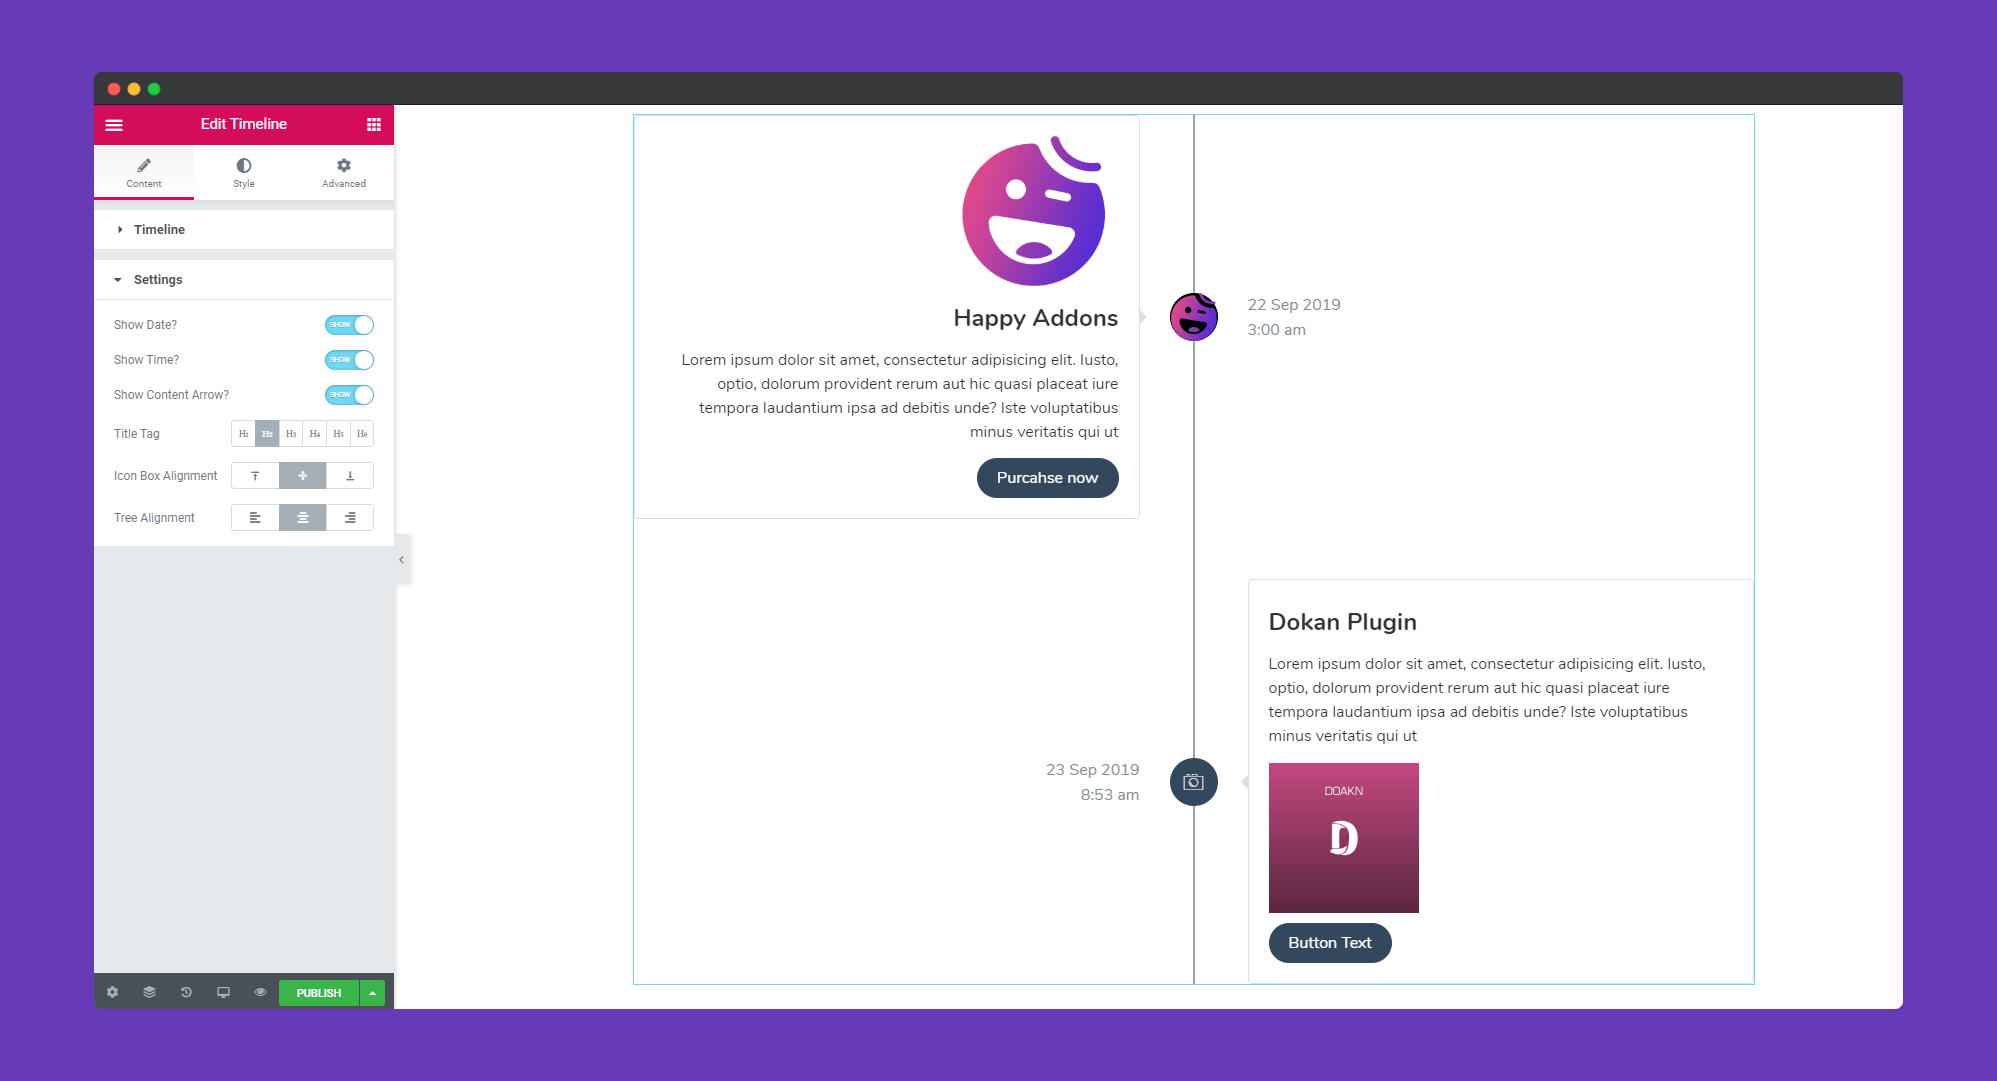
In ‘Settings‘, there are options show date, time, arrow. You can align the icon box and tree. You can also set the title tag from H1, H2, H3, H4, H5, H6.
Step 3:
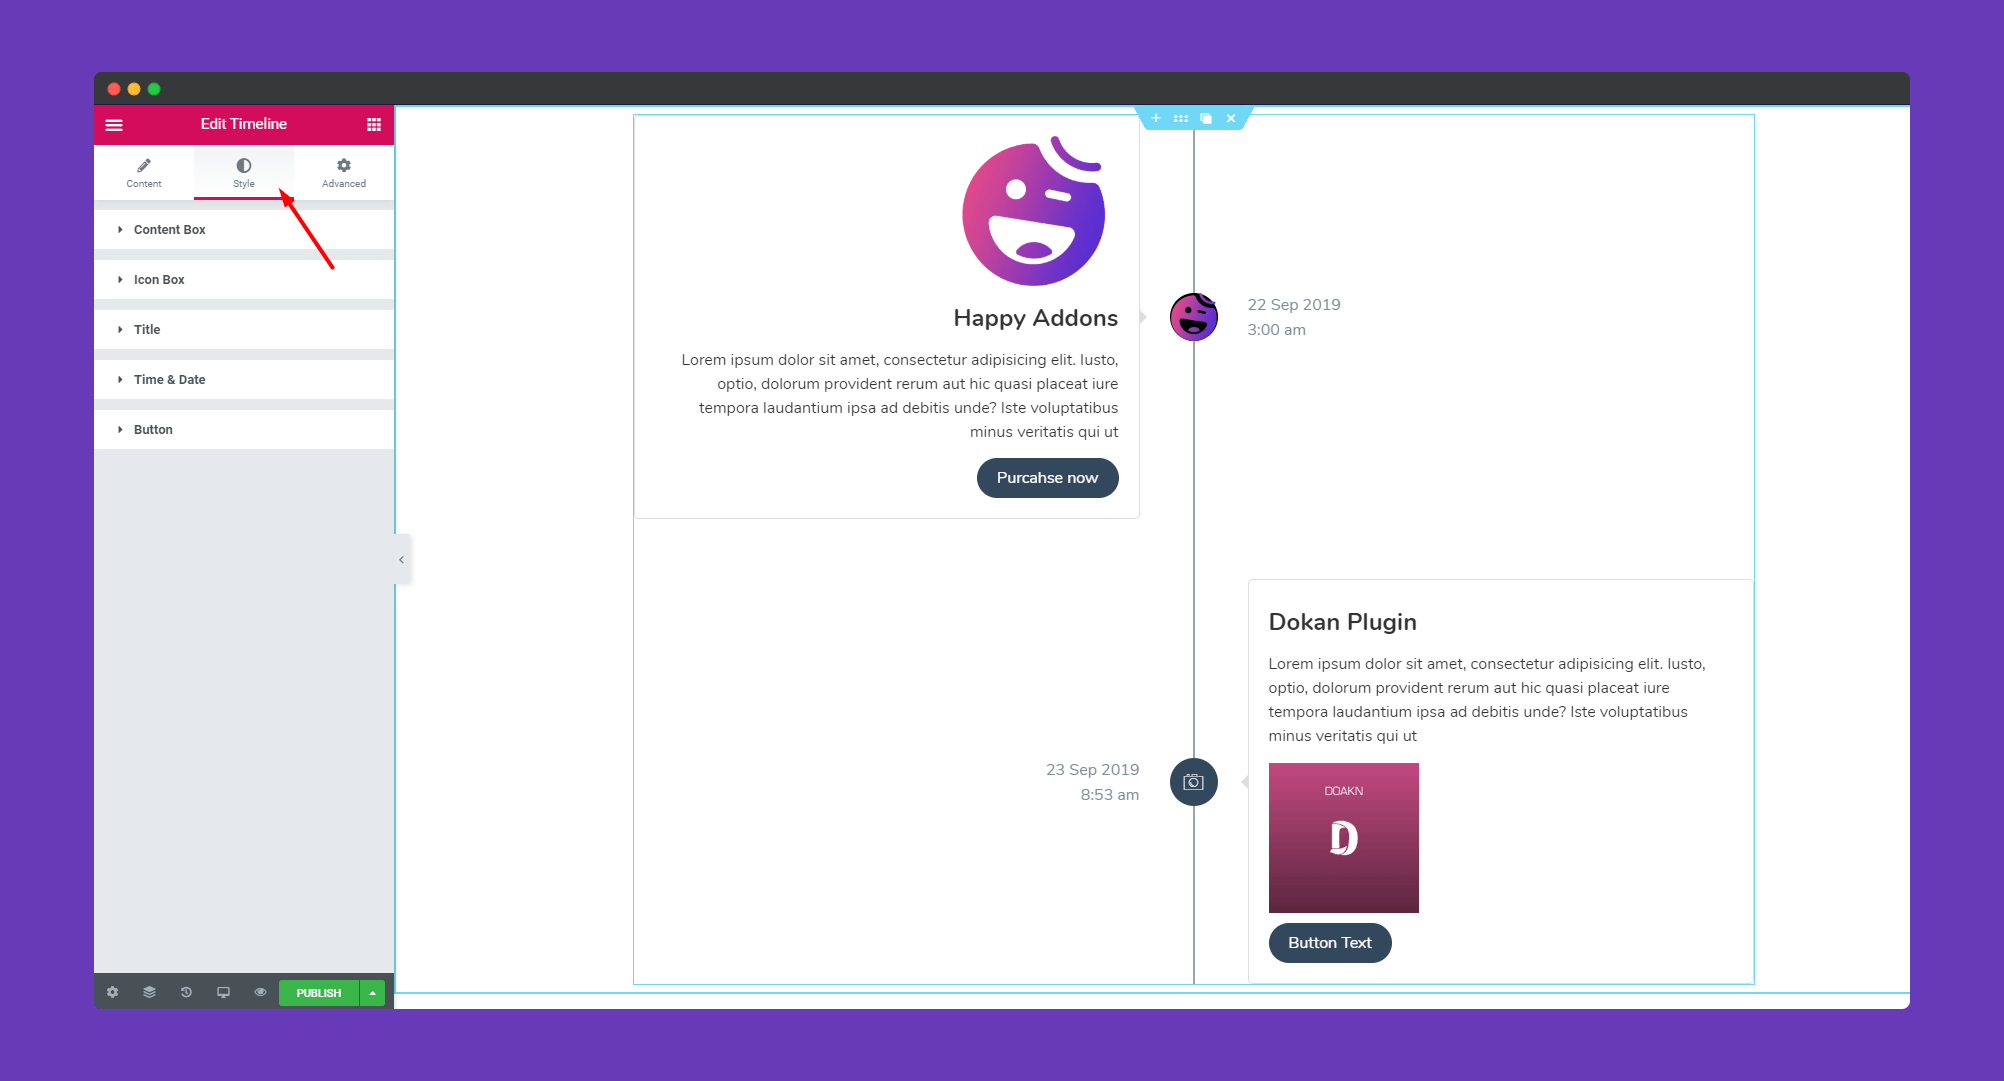
In the ‘Style‘ section, you will get options to design ‘Content box’, ‘Icon Box’, ‘Title’, ‘Time & Date’,’Button’.
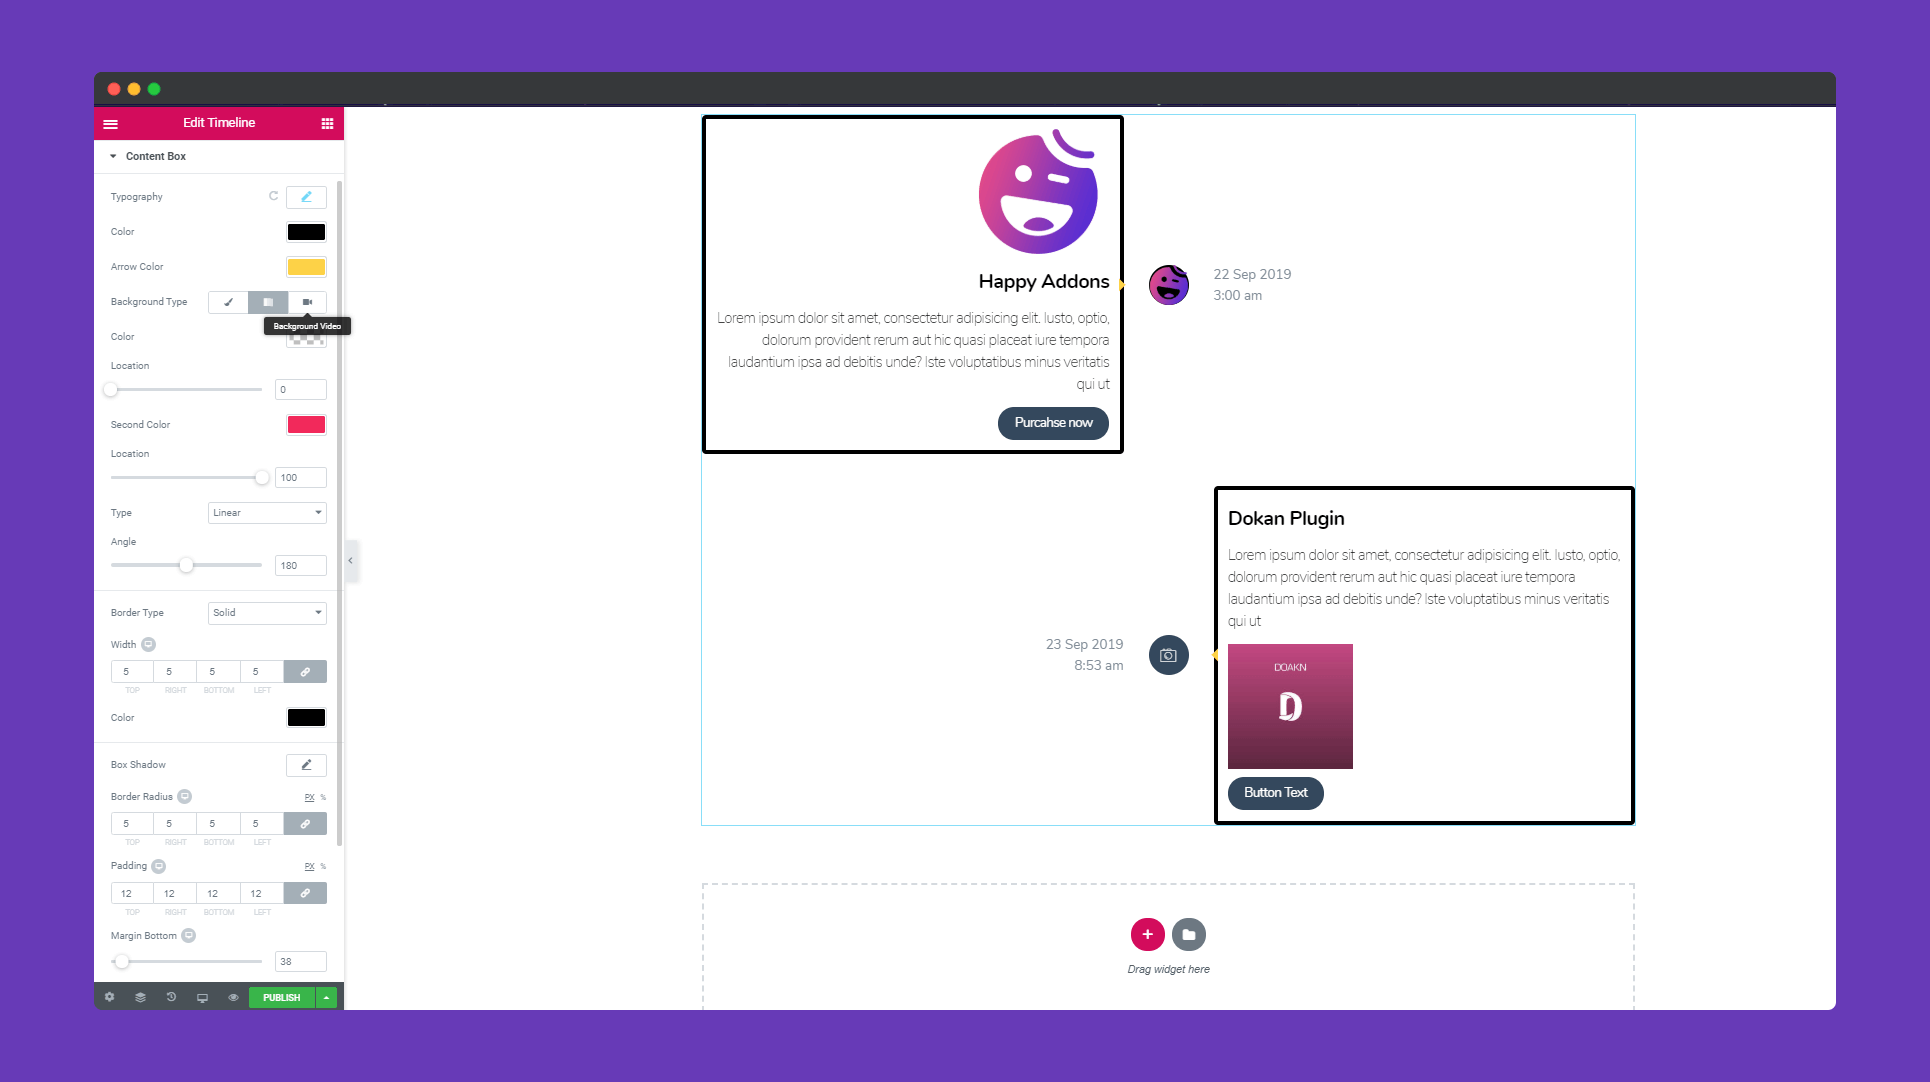
In ‘Content‘, you can add color, there is an option to add background video for your timeline as well. You can add a border, border-radius, box-shadow, margin and many more.
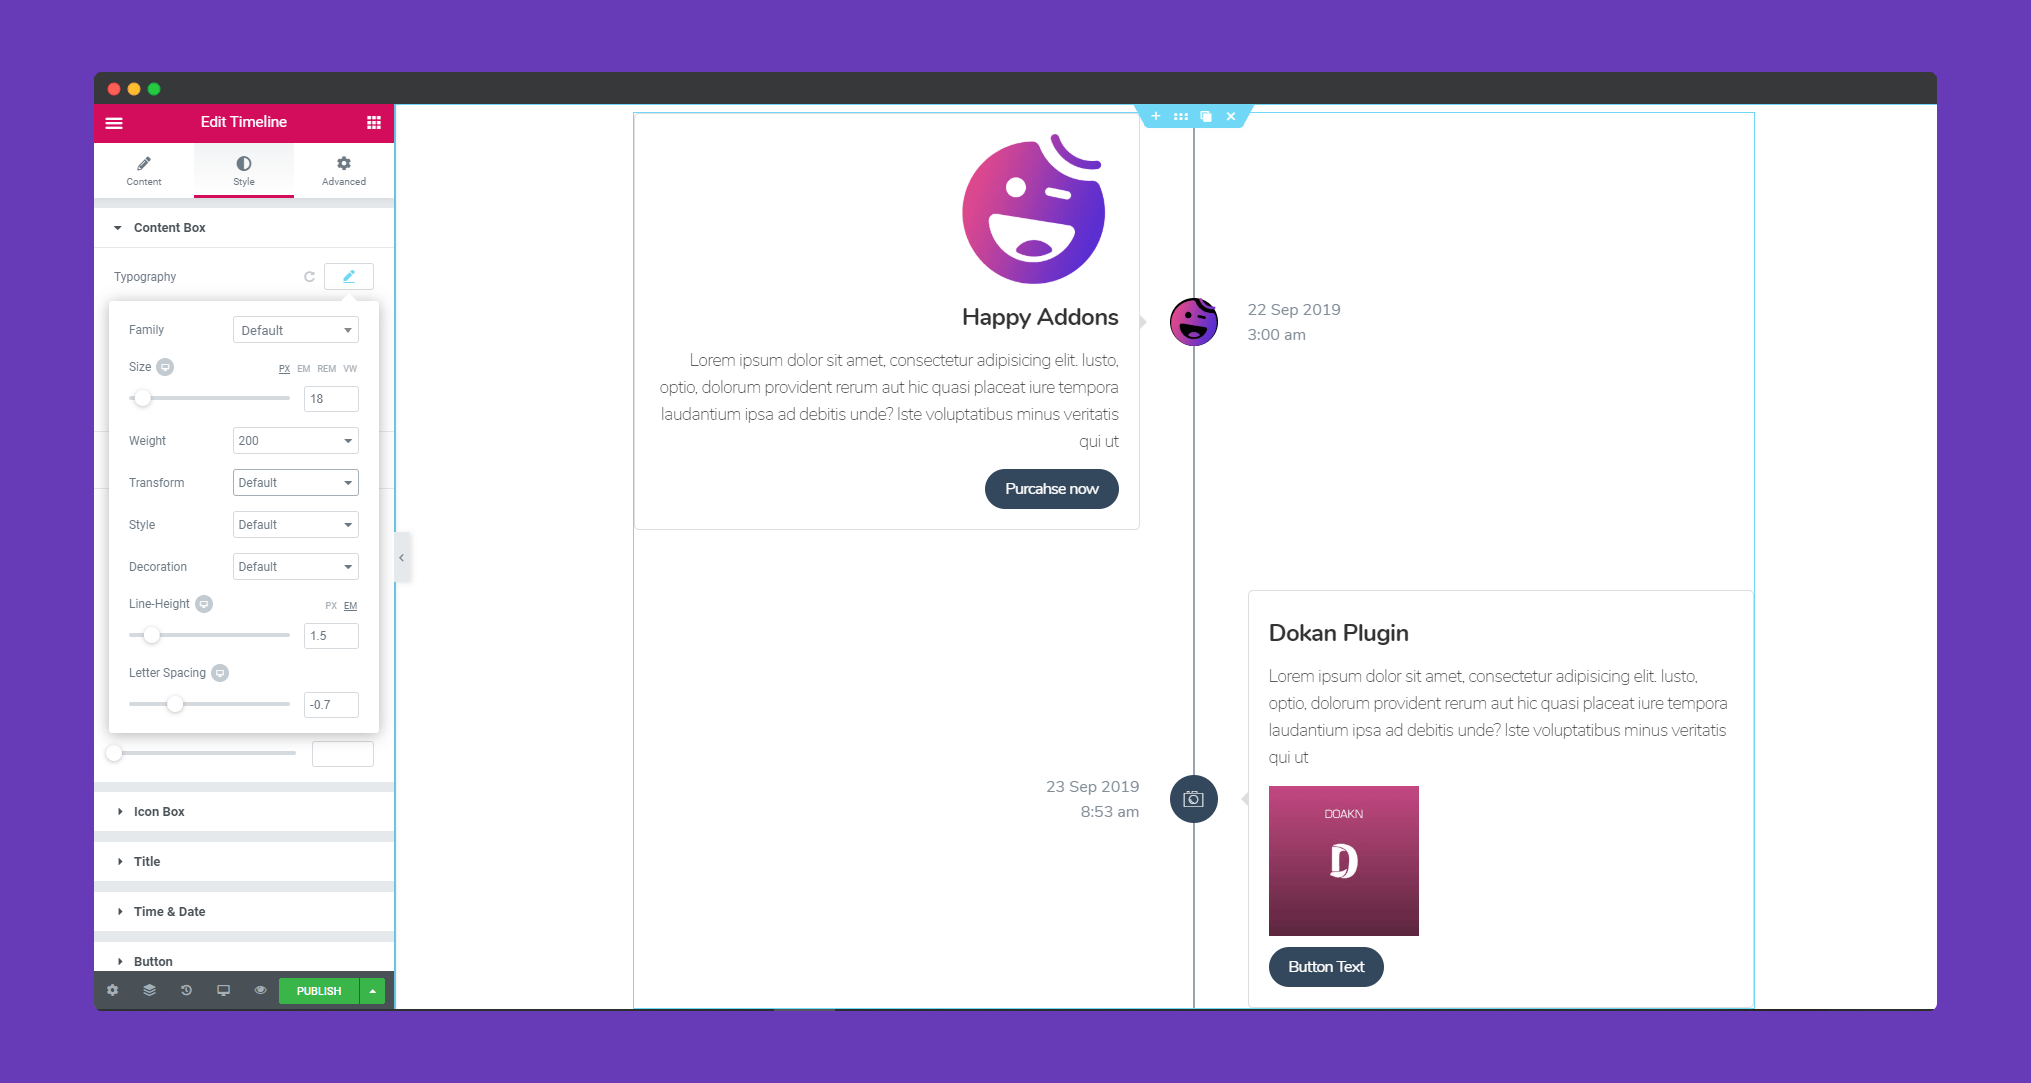
Using the typography option, you can choose a font, set text size, weight, style, letter spacing.
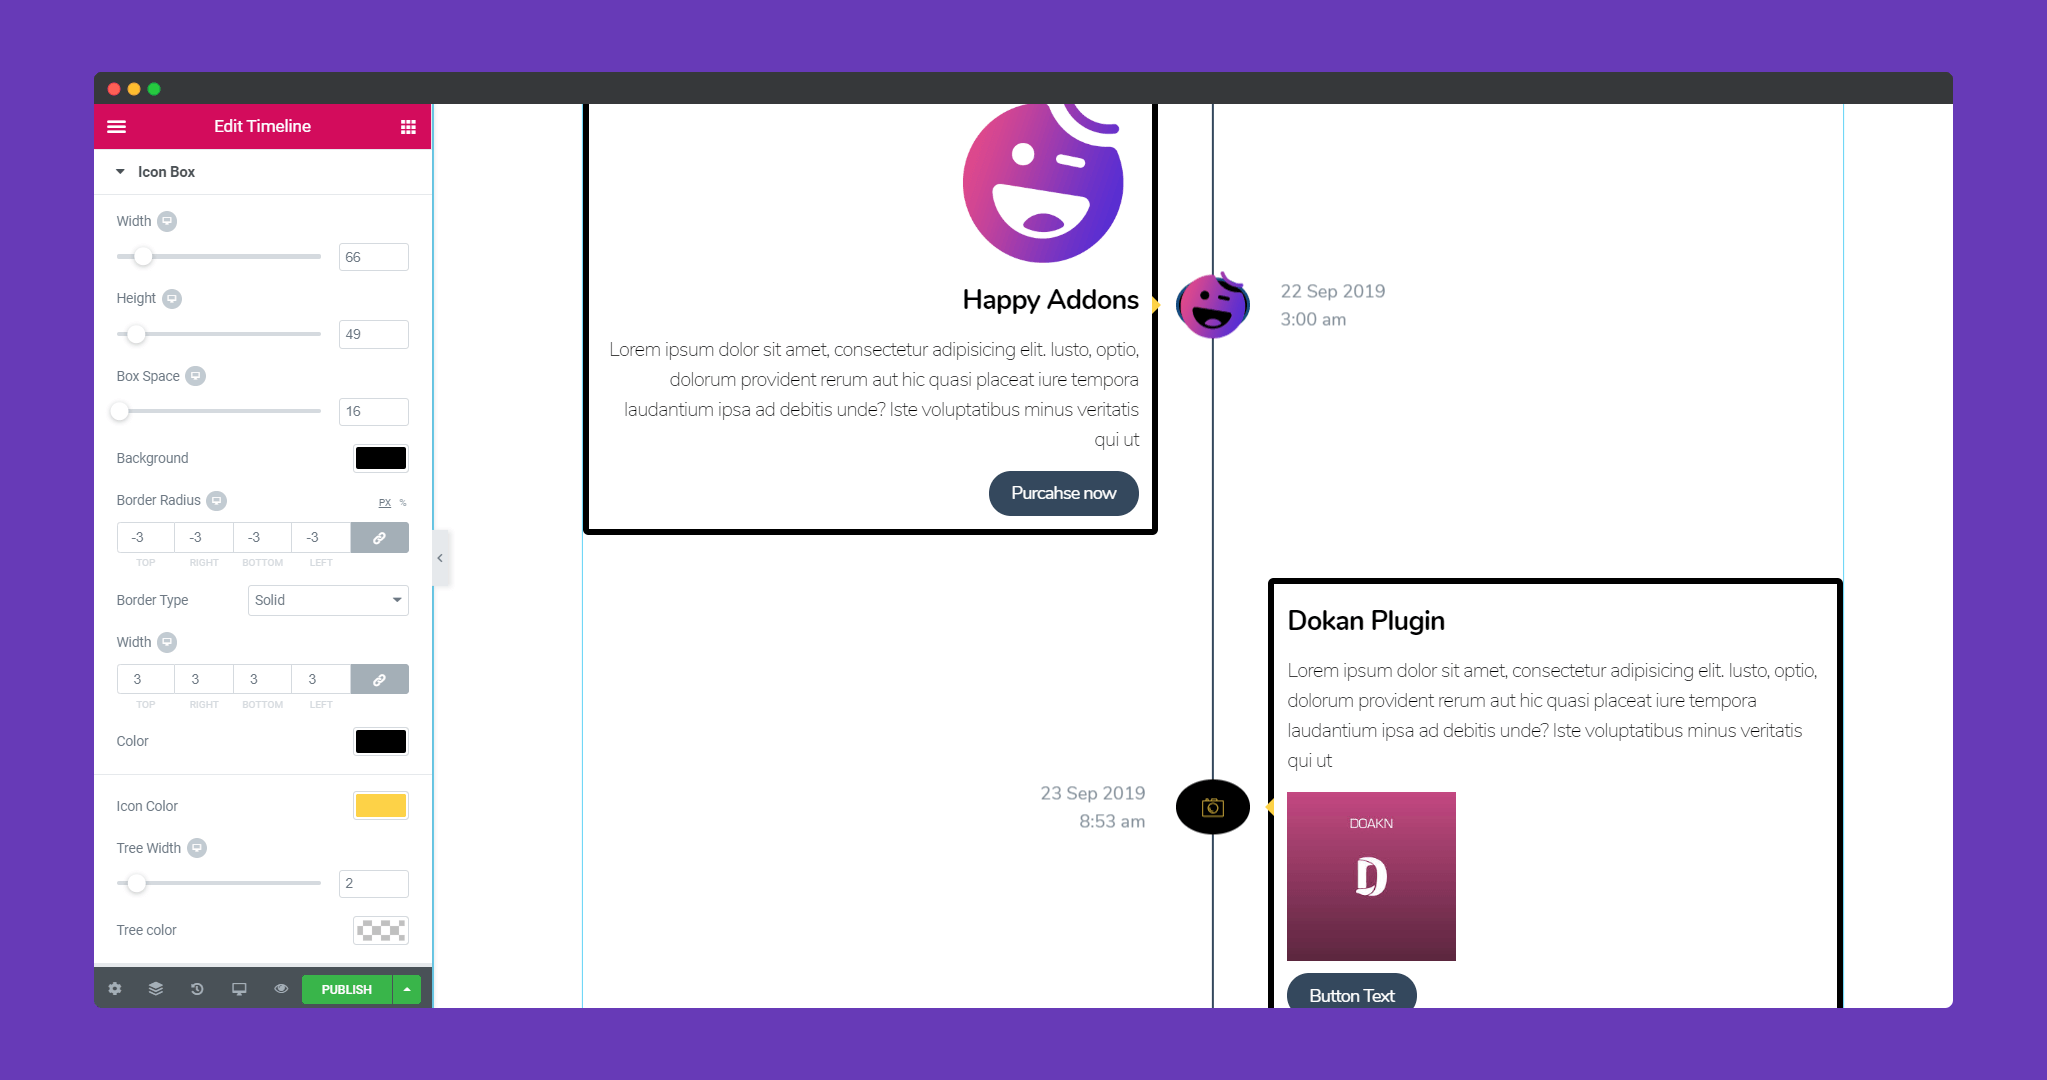
In ‘Icon Box‘, you can set width, height, box space, background color, border-radius, icon color, treewidth, tree color.
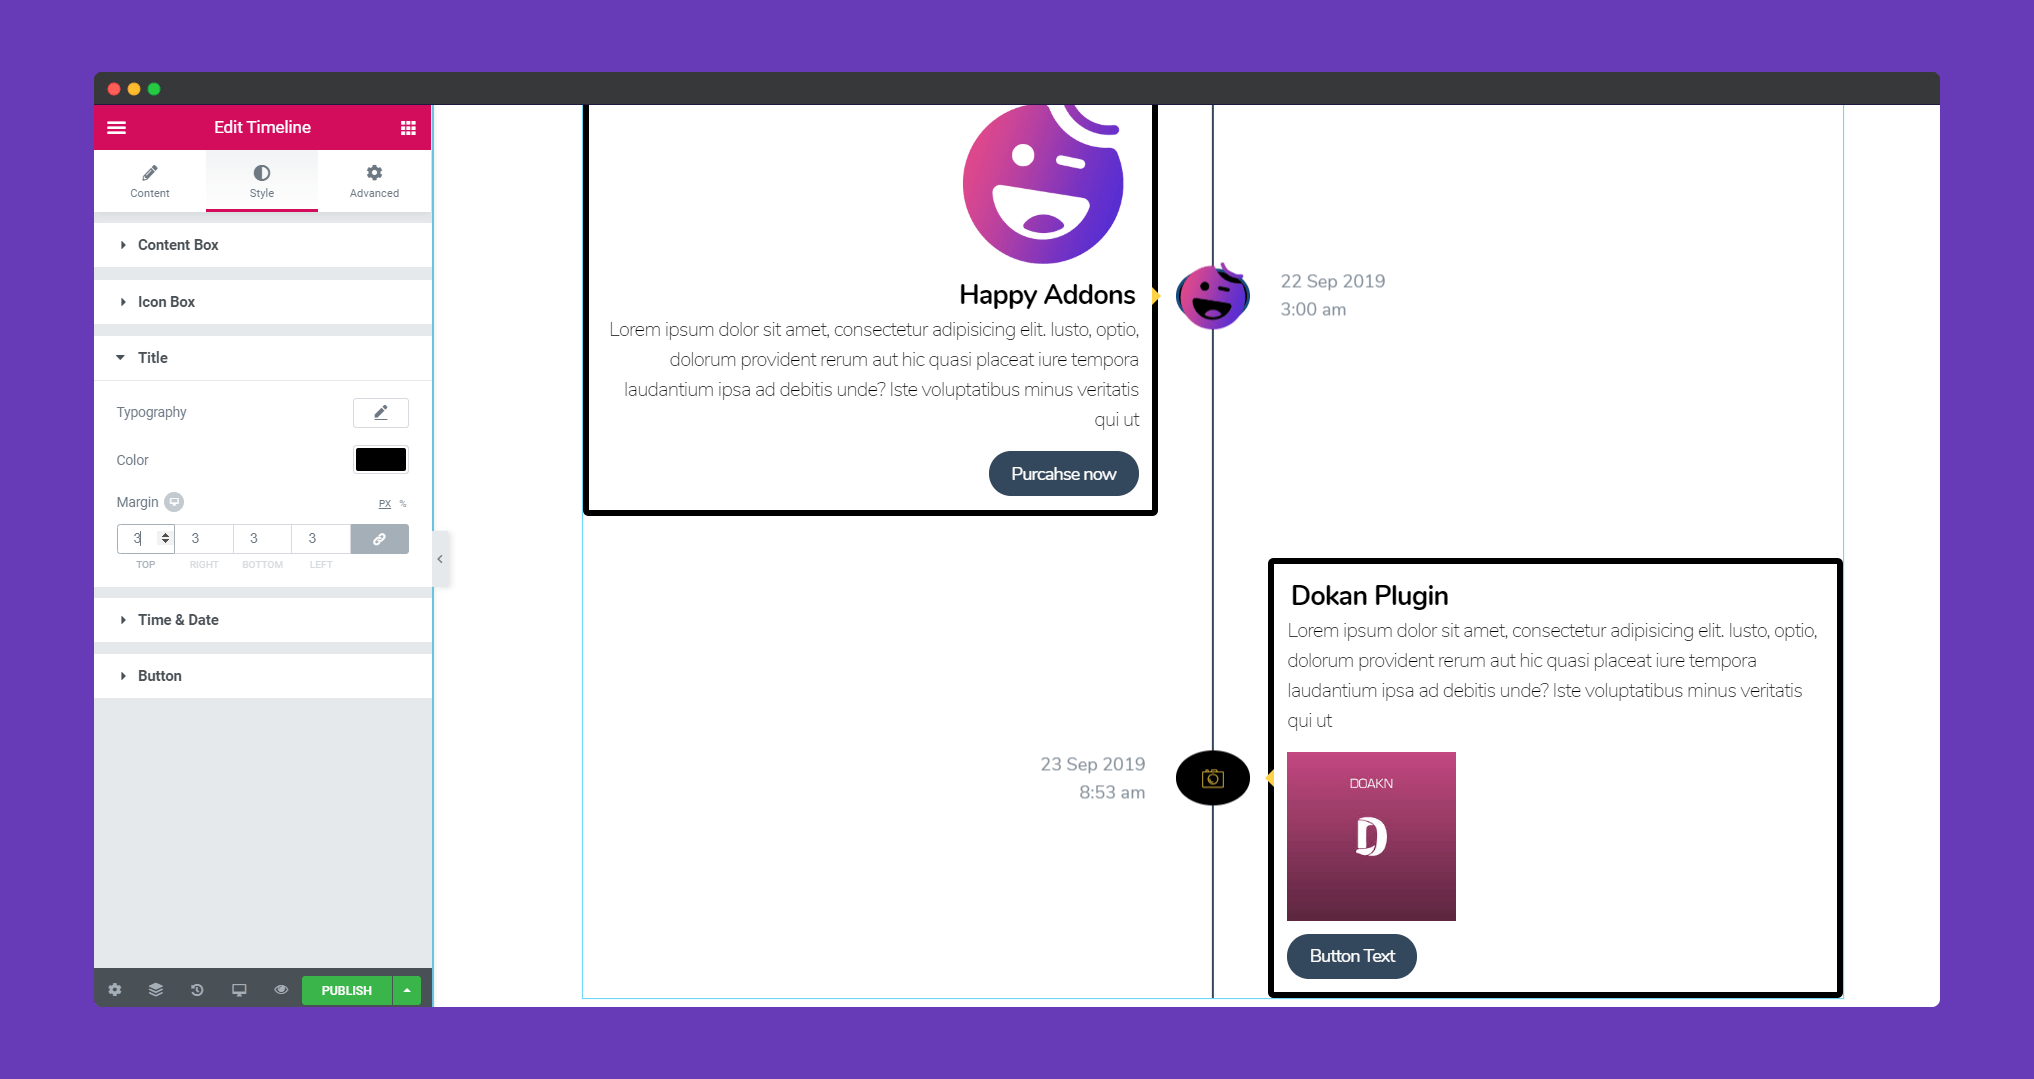
In ‘Title‘, you have typography, you can add color, margin.
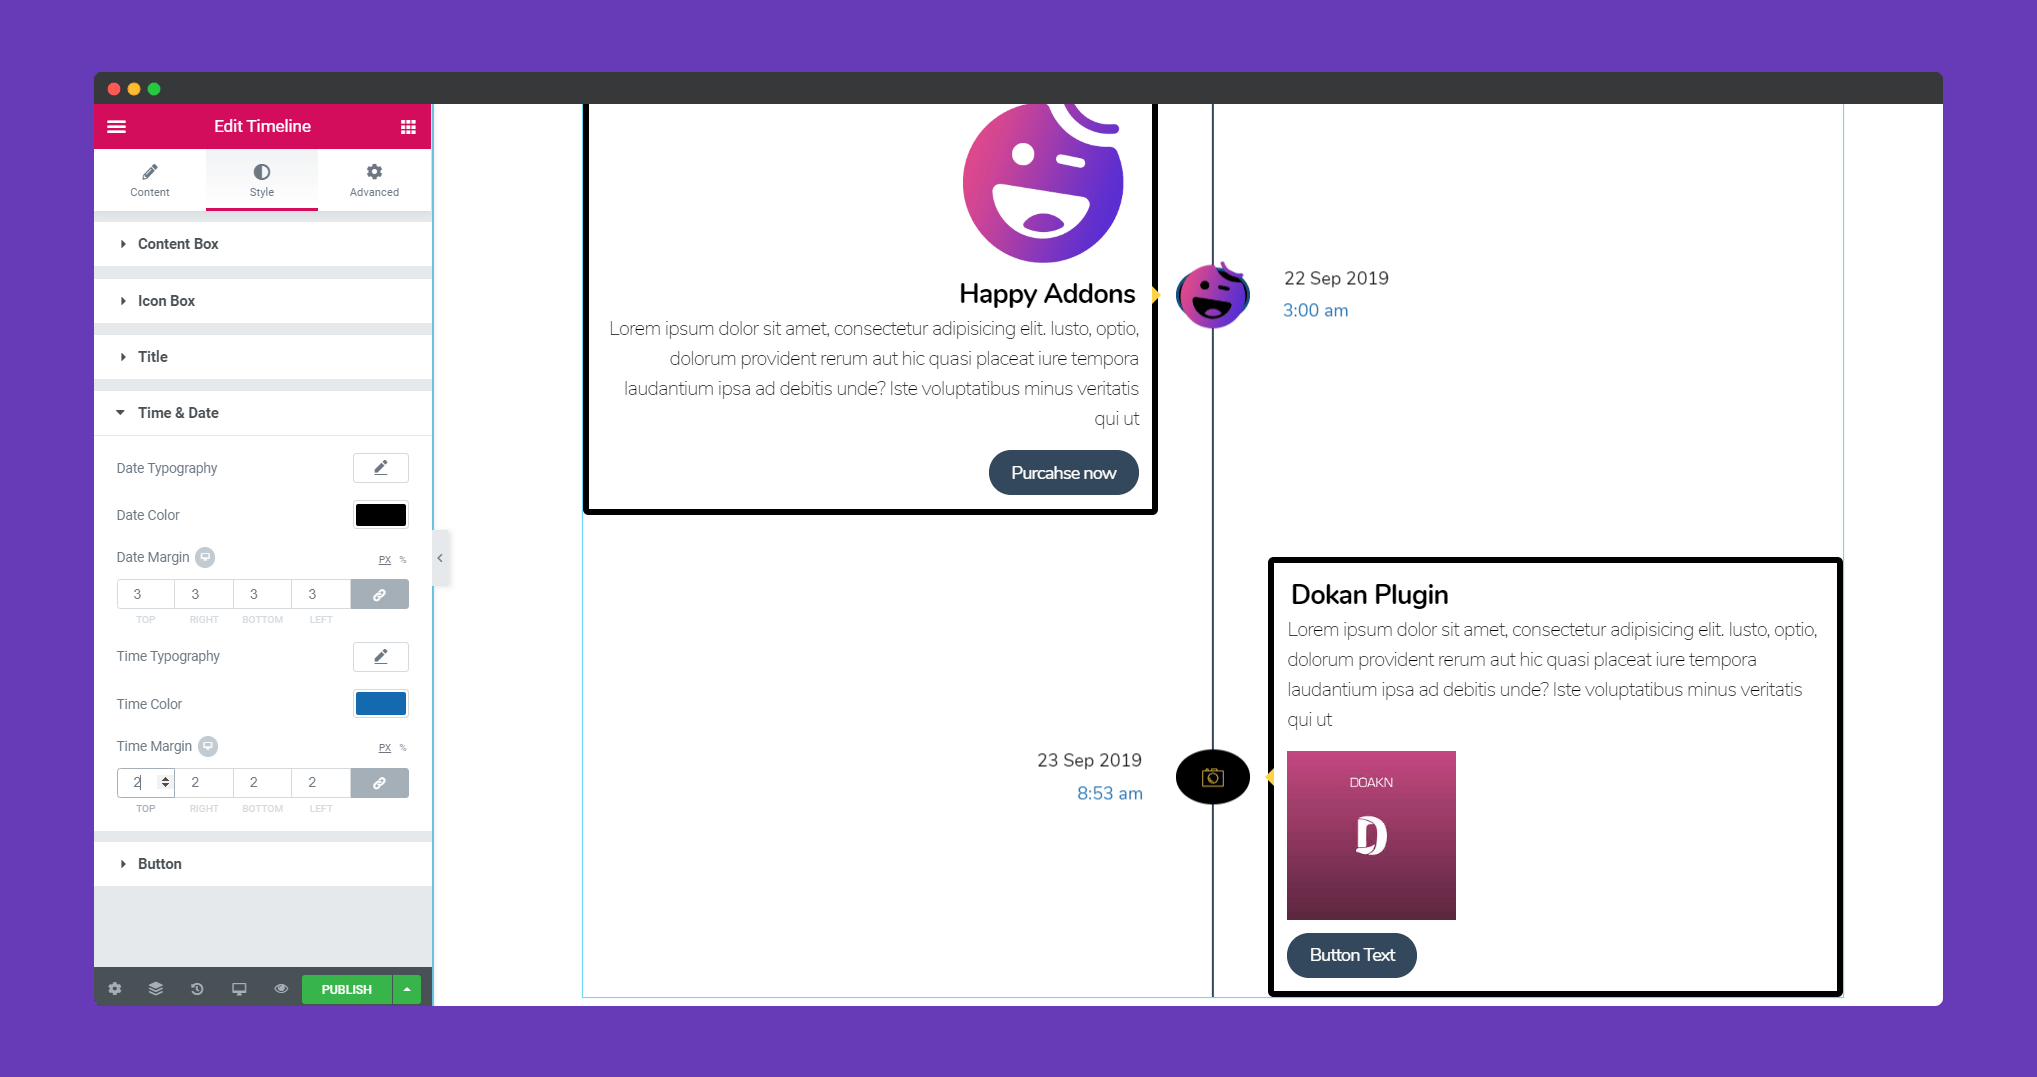
In ‘Time & Date‘, you have options for typography, color, margin for both date and time.
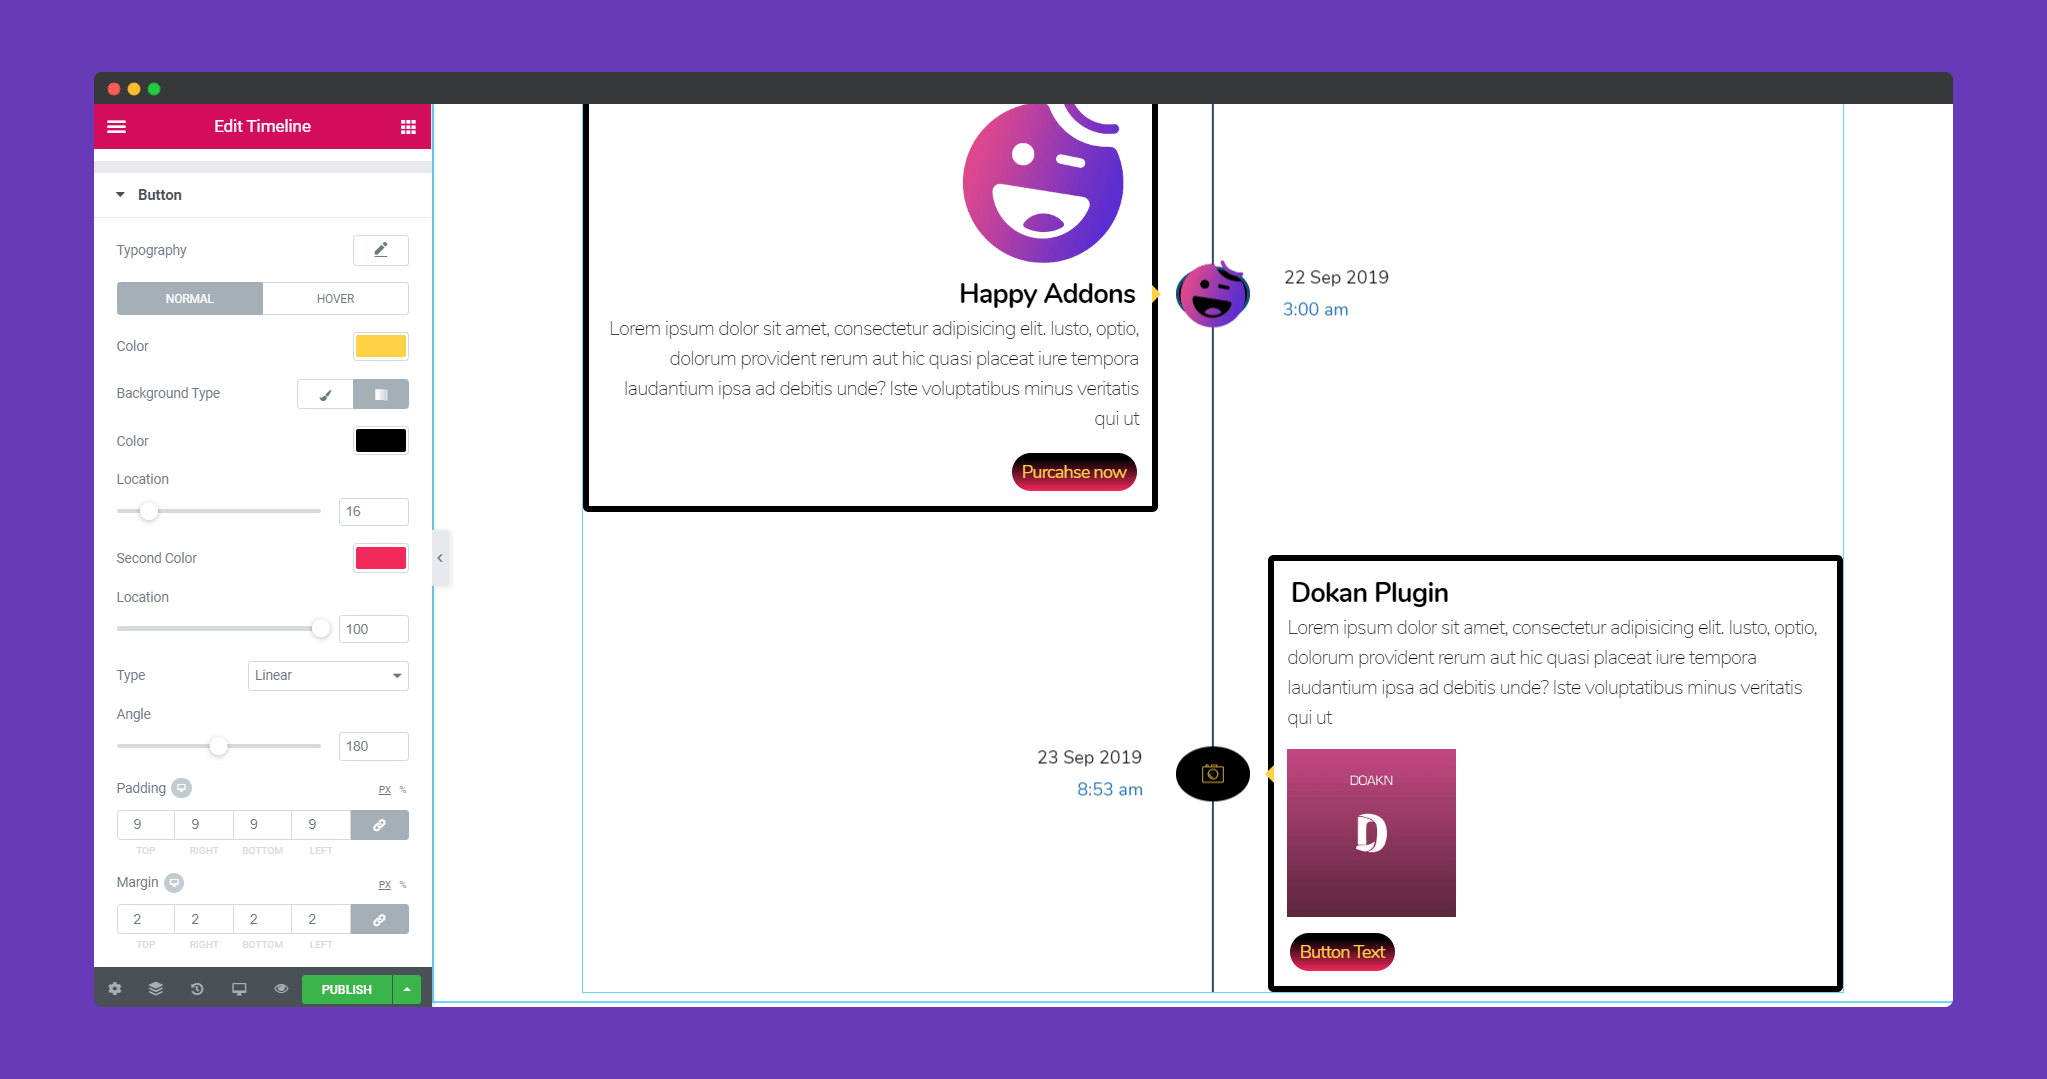
In ‘Button‘, you can add a hover effect if you want. You can add color, location, angle, padding, margin. You can choose a background type.
Step 4:
If you want to add motion effects, Happy Effects, background or make it responsive and more intriguing, click on ‘Advanced‘ to explore those options. The ‘Advanced‘ is a default feature of Elementor. Give a read to this Document to know more about Advanced features and its uses.
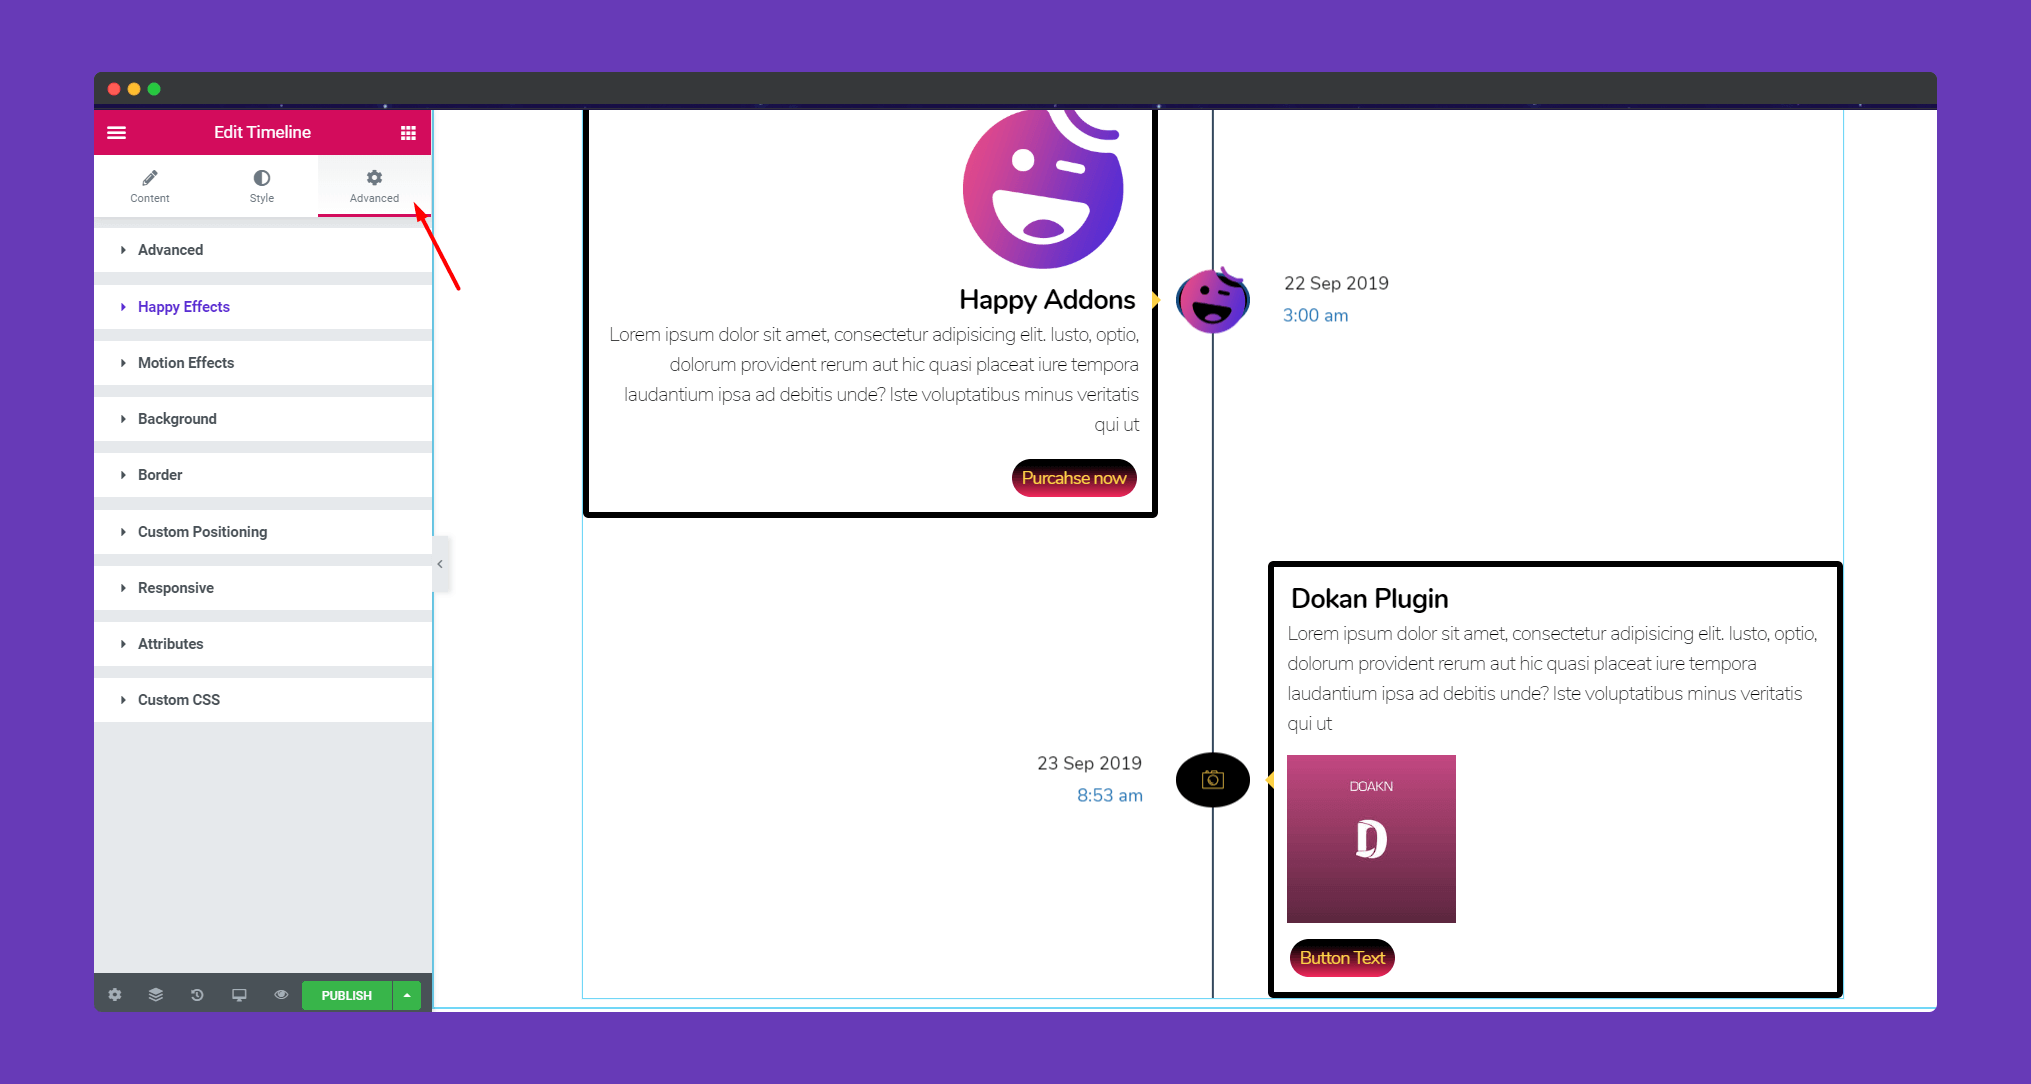
Finally, after clicking the publish button you will see the beautiful timeline widget on your webpage.
That’s it!
