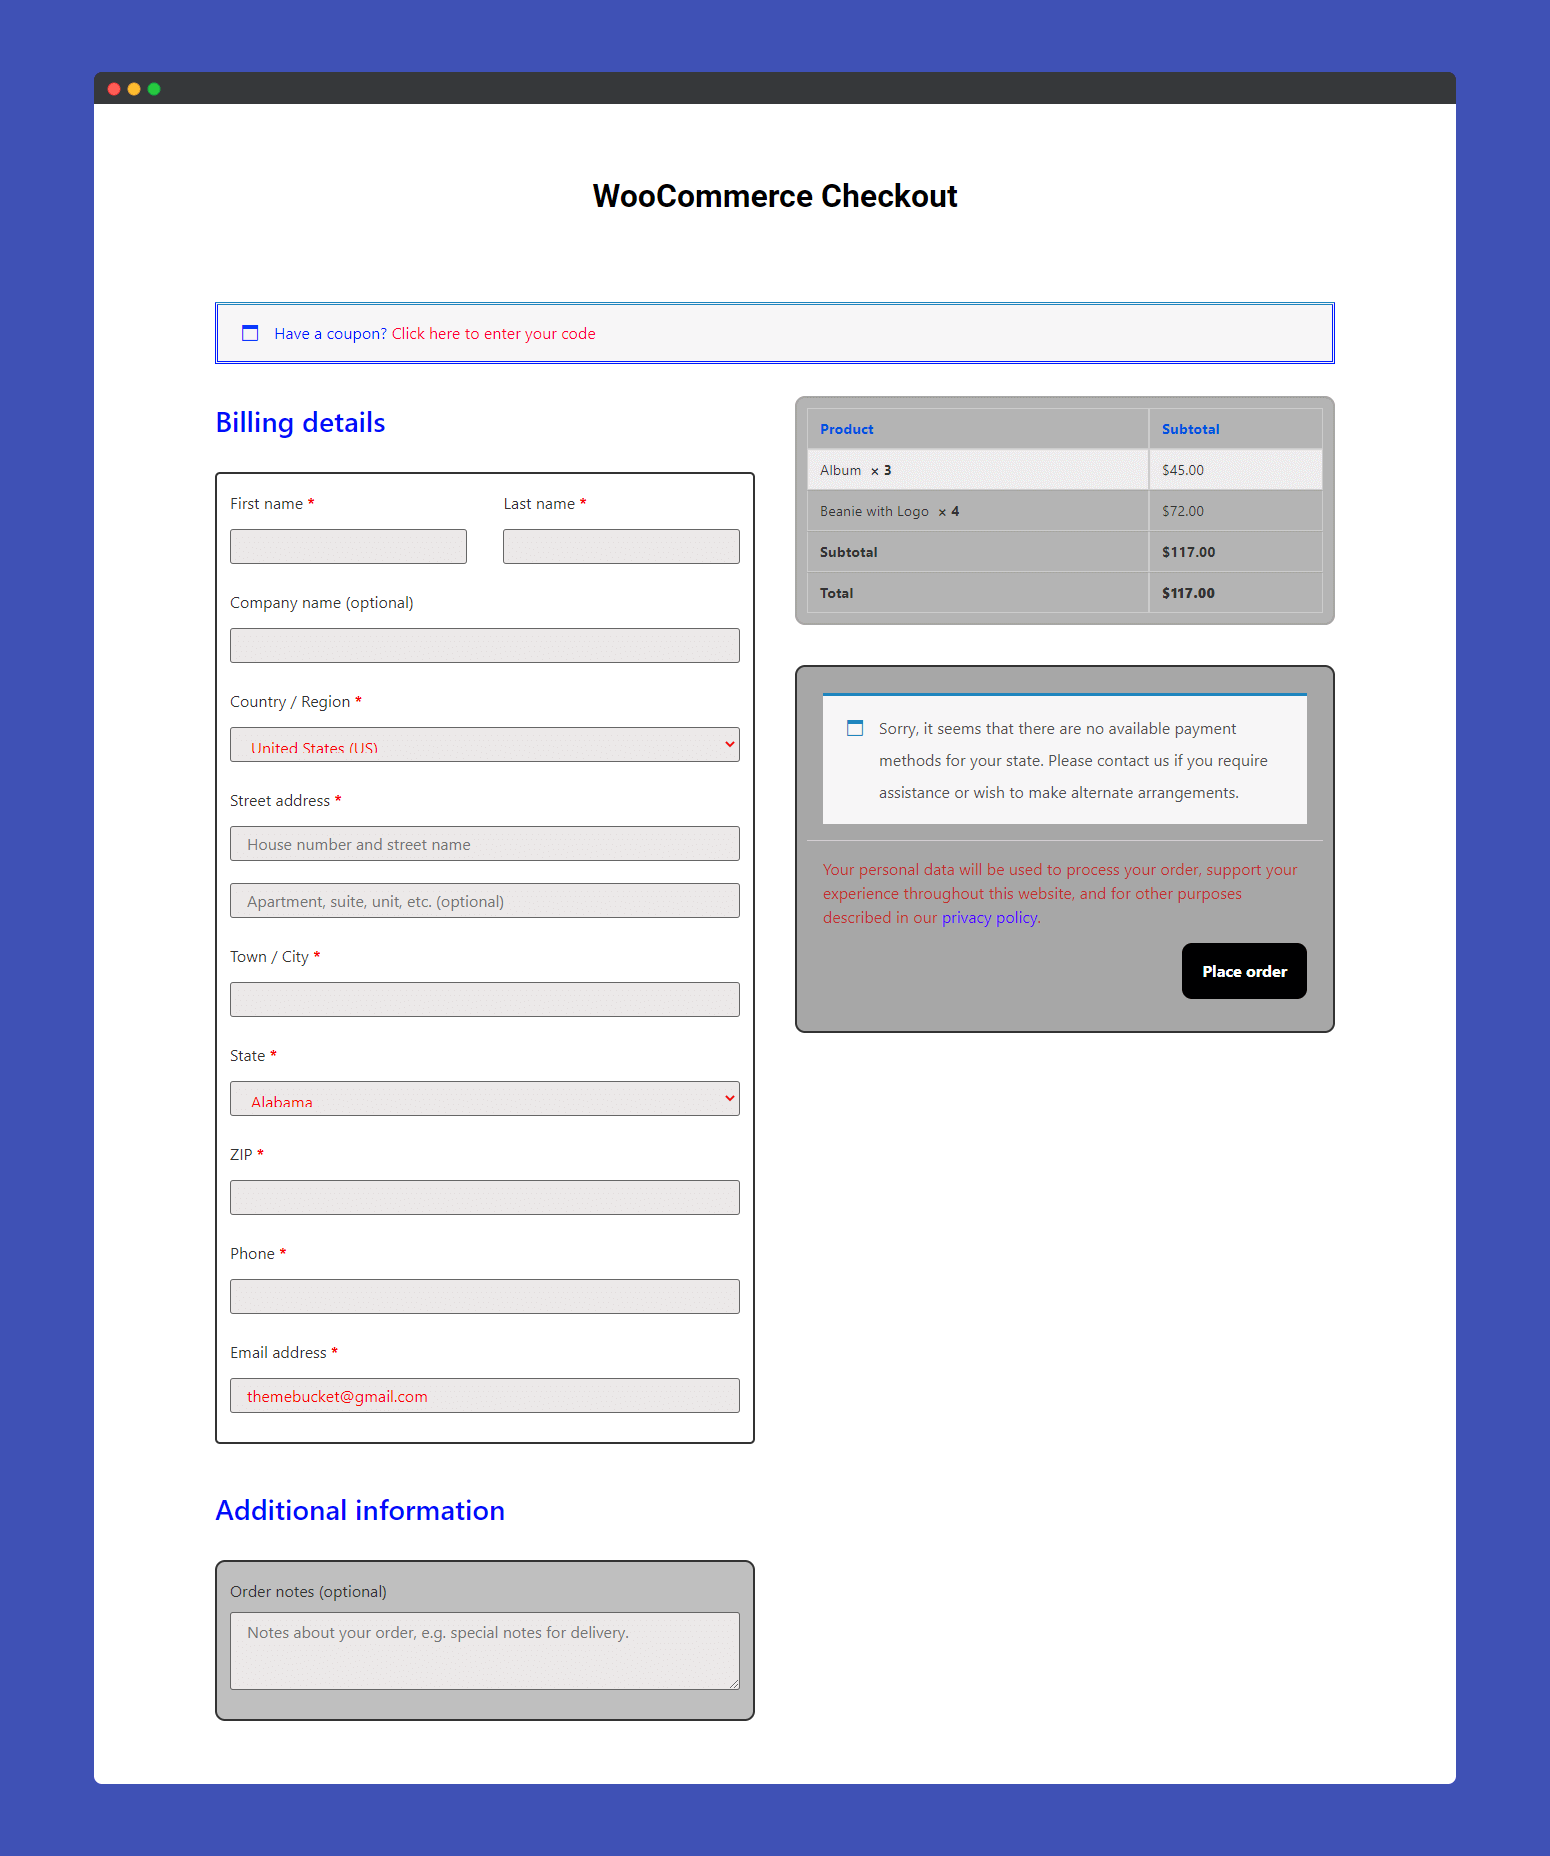
Using the ‘WooCommerce Checkout‘ widgets of Happy Addons Pro, you can easily design and customize the default checkout page WooCommerce and make your checkout page more exclusive and engaging for your customers.
Pre-requisites
To use that cool WooCommerce Checkout Widget, you need the following things:
- WooCommerce
- Elementor
- Happy Addons
- Happy Addons Pro.
How To Use WooCommerce Checkout Widget
Let’s check out how to efficiently use the WooCommerce Checkout widget and customize it step-by-step:-
Step: 1
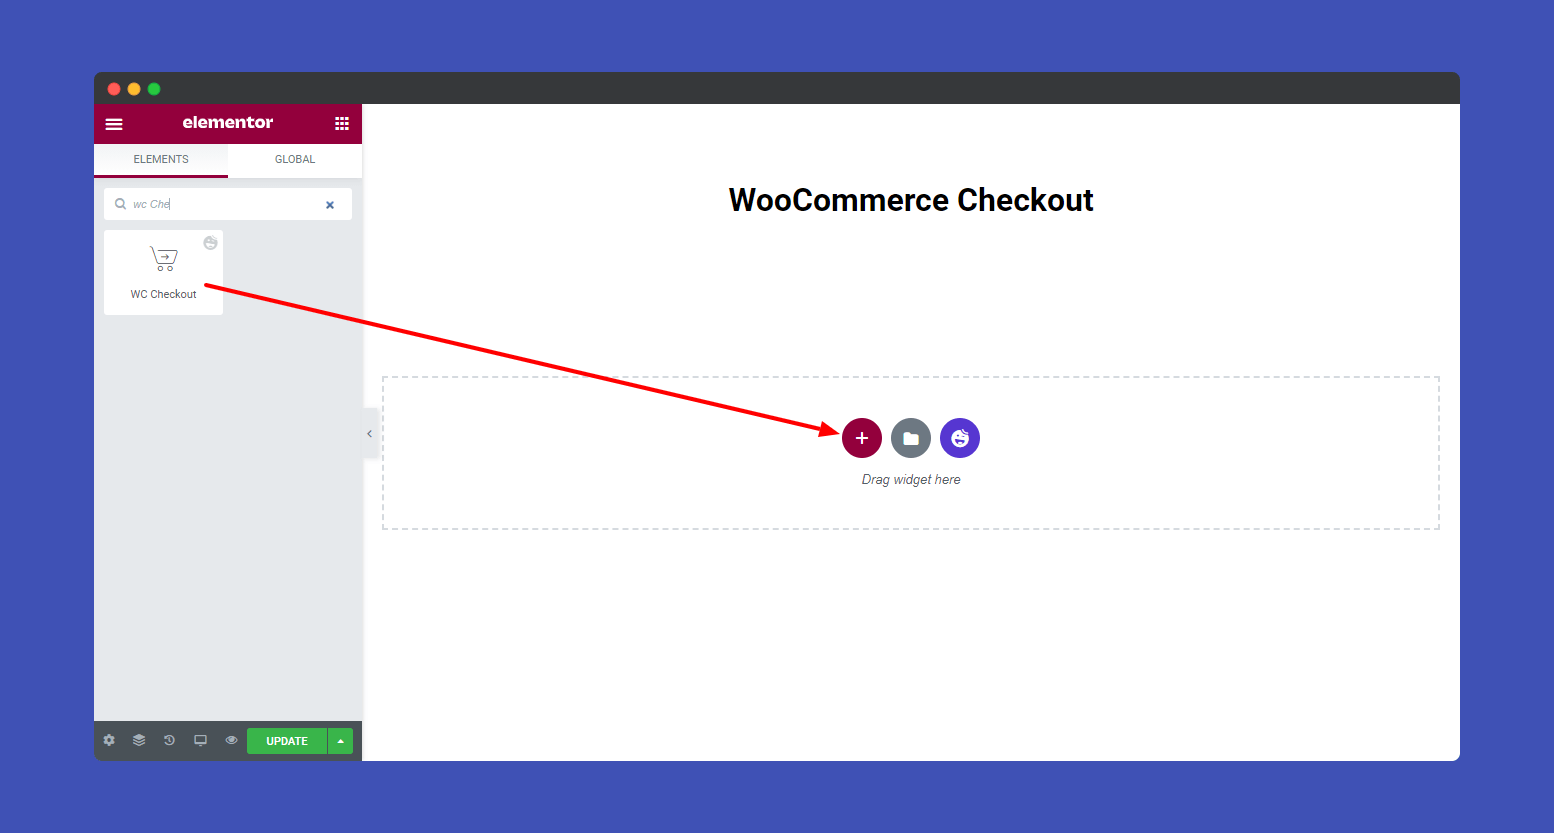
First of all, you need to find the widget from the left screen. Then drag and drop it onto the selected area.
Step: 2
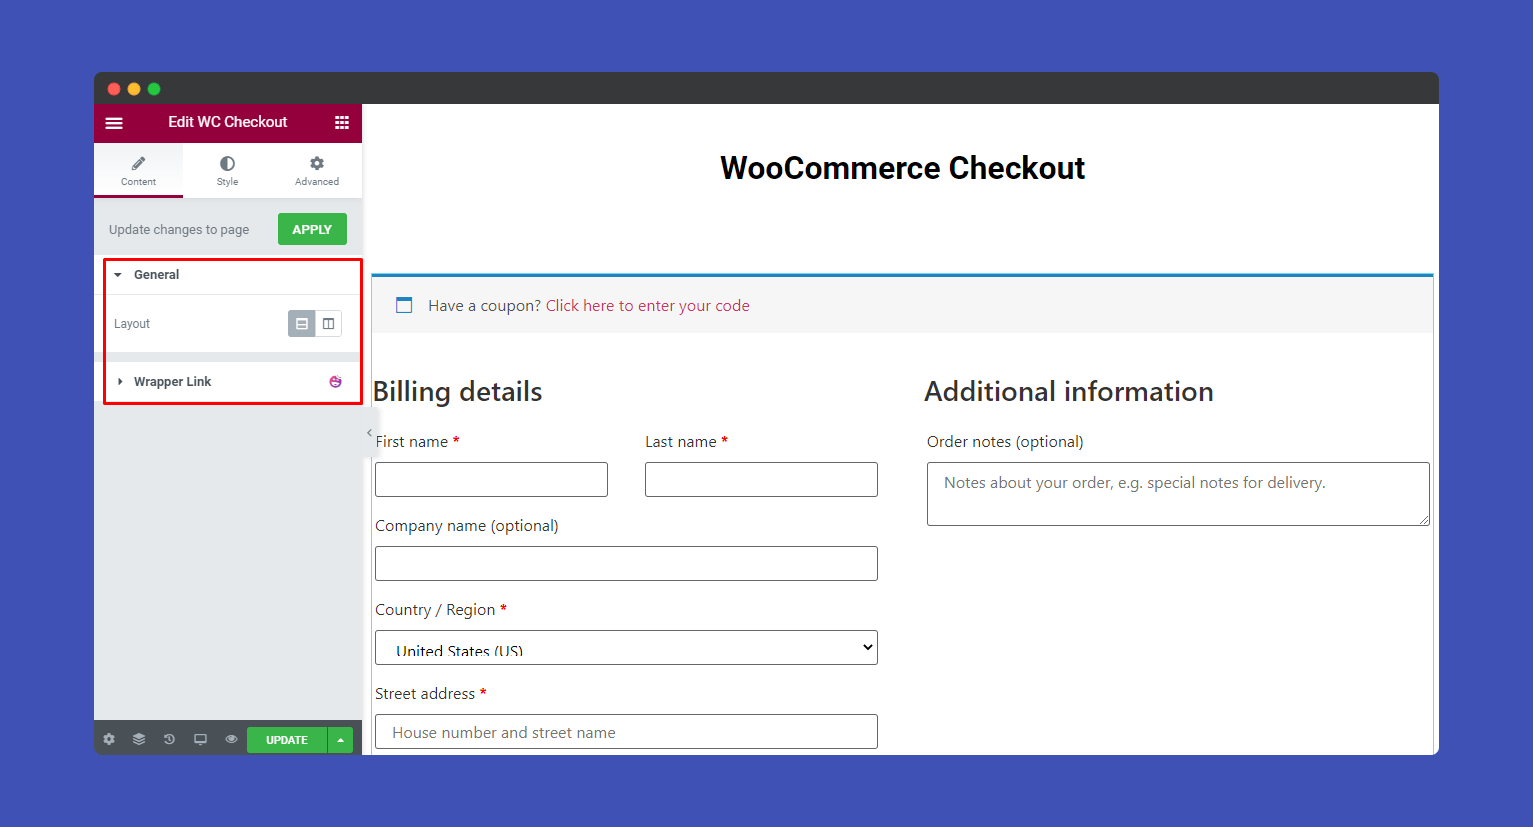
In the Content–>General, you can edit general settings like Layout, Stack On, Columns Gap, and First Column Width of the checkout page.
Let’s see how General setting works.
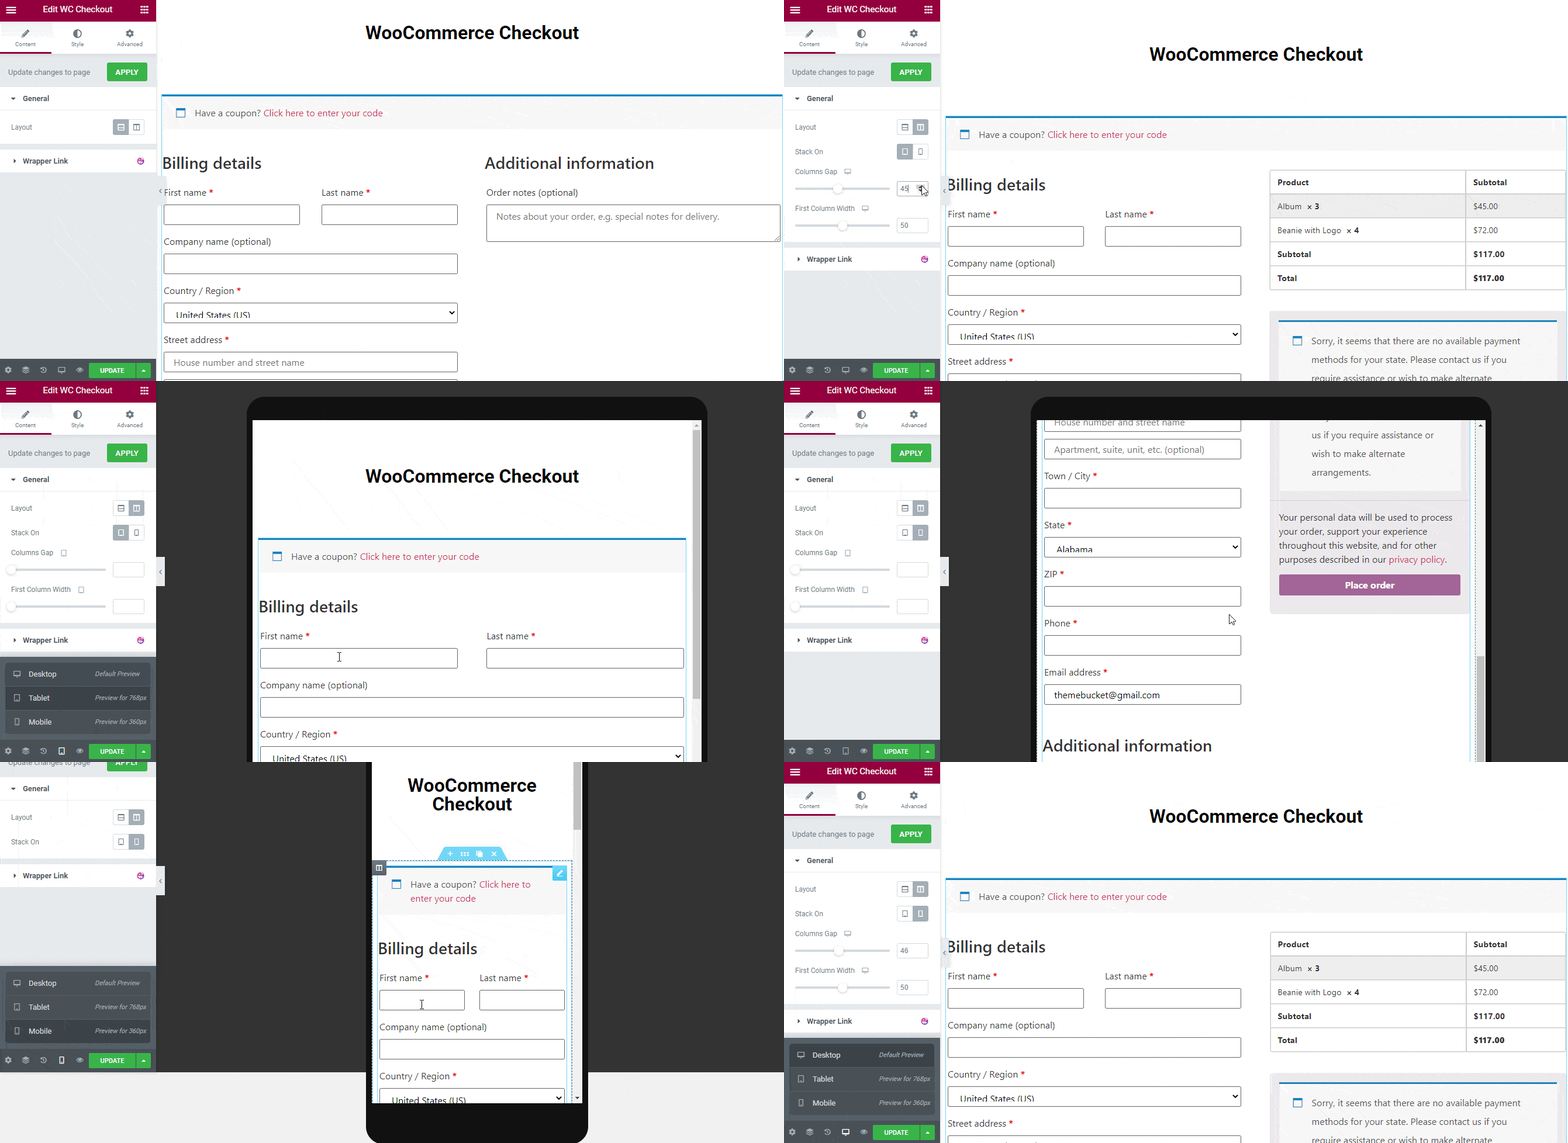
Note: There are two options in the Stack On, Tablet and Mobile. If you select the Tablet mood, that means all the checkout page content will show in a single row when you use a tablet. On the other hand, if you select the Mobile mood option, the content will show in a single row when you open the page with a mobile.
Step: 3
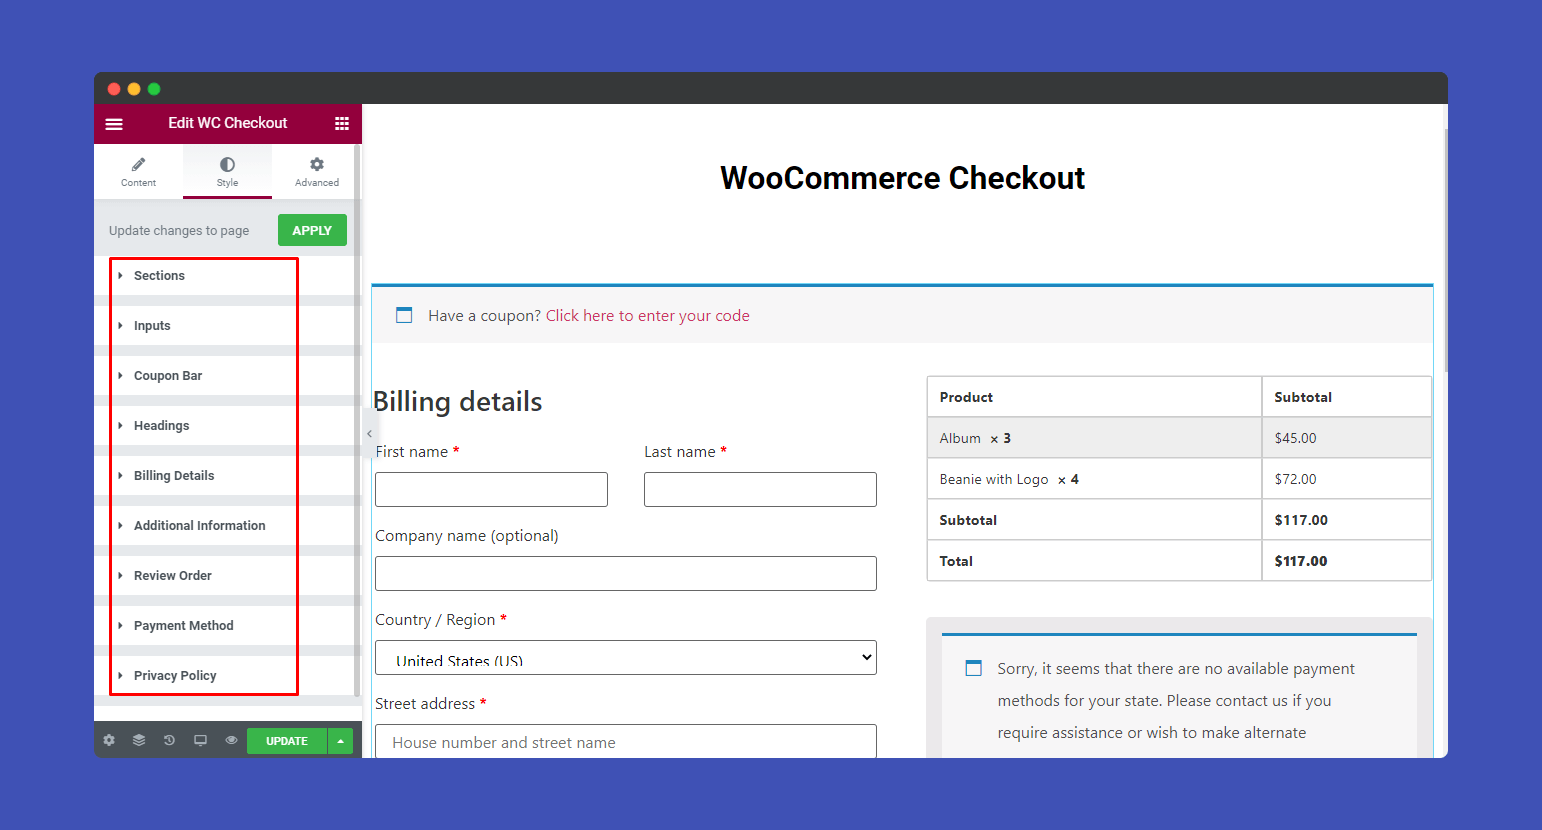
In the “Style” section, you will find ten options to design your checkout. Here are the lists.
- Sections
- Inputs
- Coupon Bar
- Headings
- Billing Details
- Additional Information
- Review Order
- Payment Method
- Privacy Policy
- Button
Sections
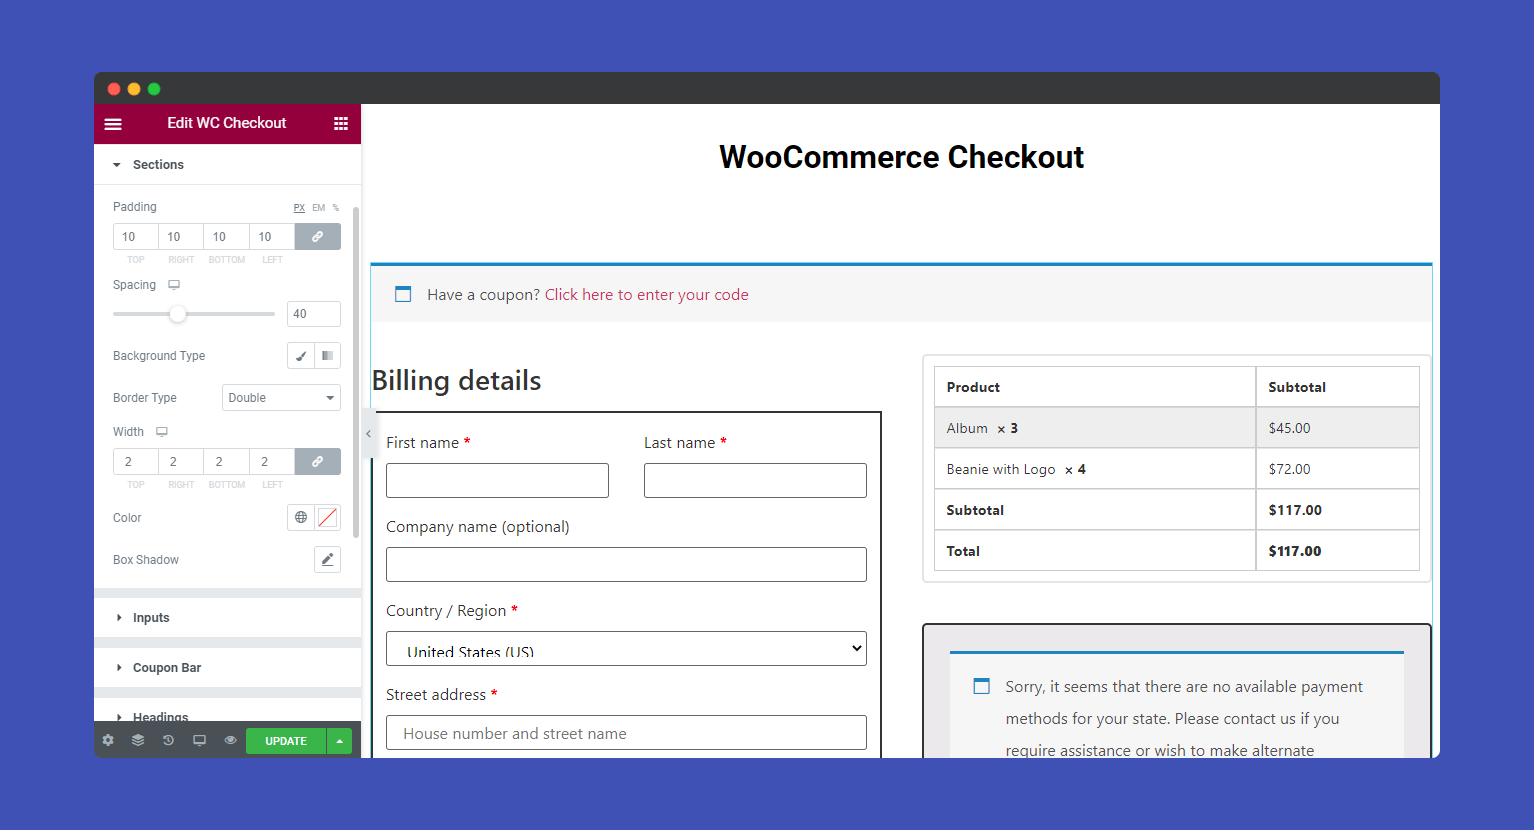
In the Style–>Section, you define the section’s Padding, Spacing, Background Type, Border Type, Color, and Box Shadow.
Inputs
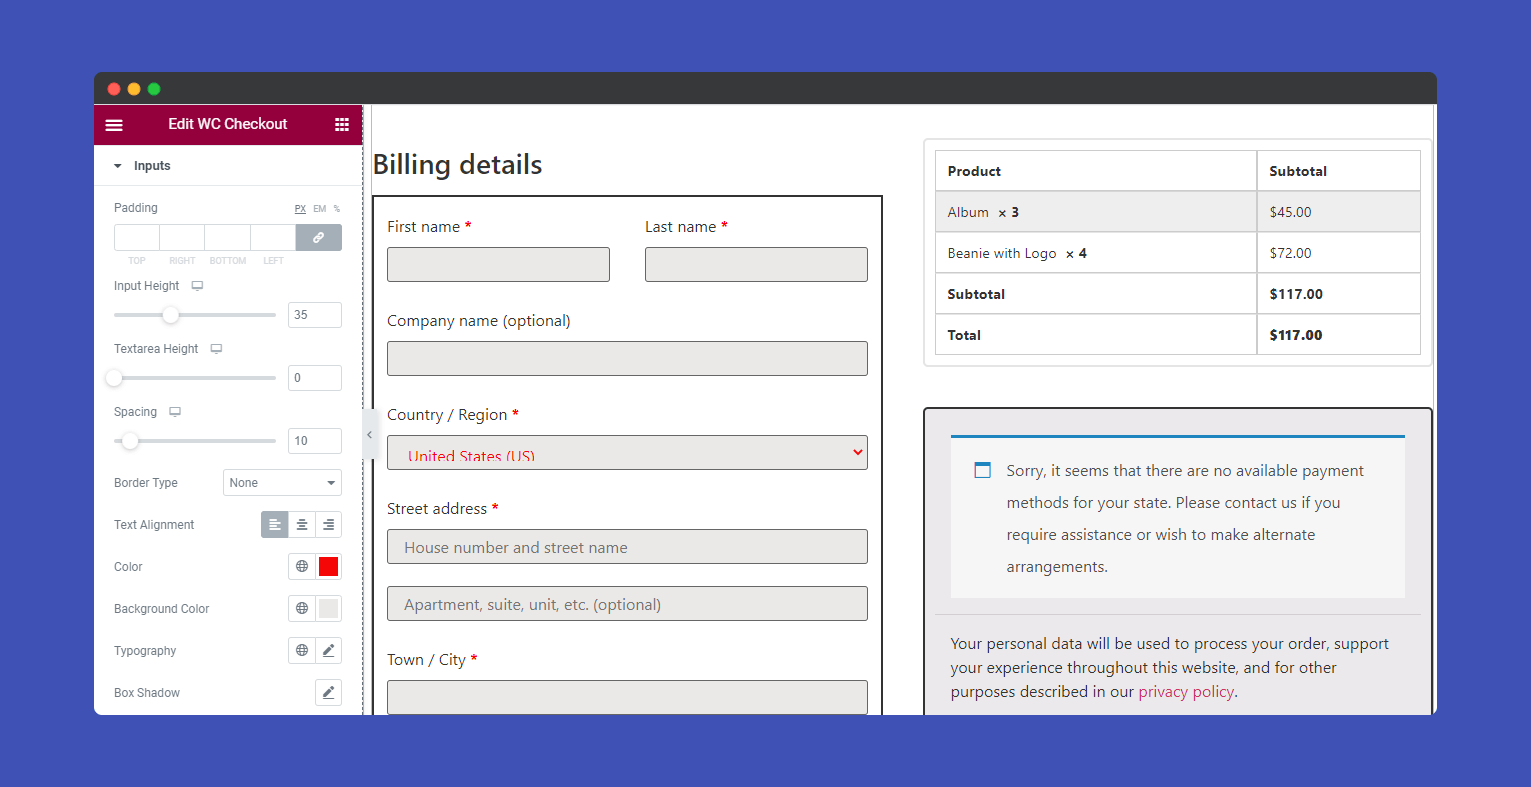
In the Style–>Input, you can easily customize the default input design using the Padding, Input Height, Textarea Height, Spacing, Border Type, Text Alignment, Background Color, Typography, and Box Shadow.
Coupon Bar
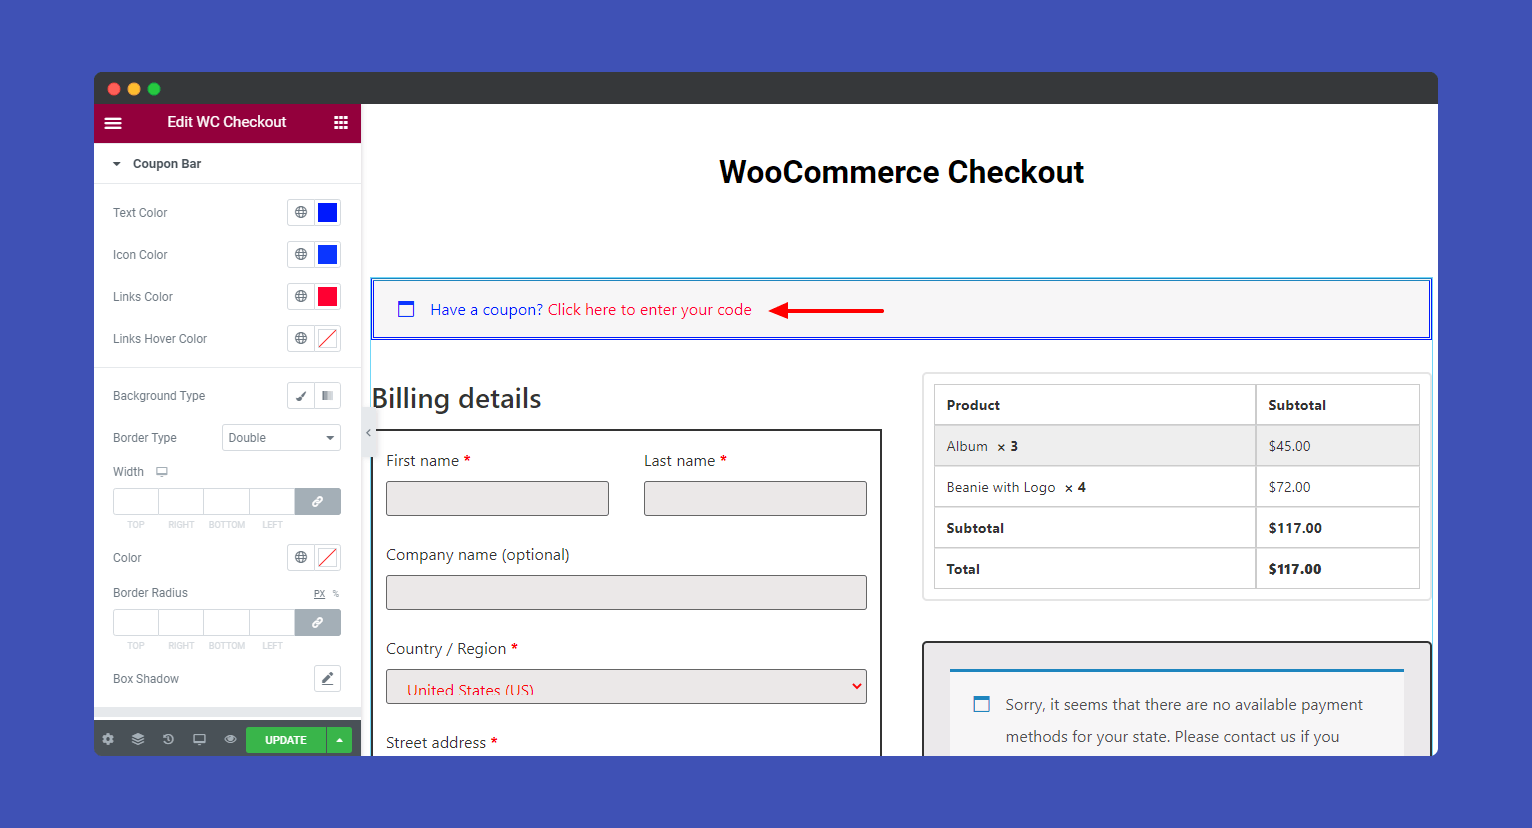
According to your requirement, you can also edit the Coupon Bar style. Here are options Text Color, Icon Color, Links Color, Links Hover Color, Background Type, Border Type, Width, Color, Border Radius, and Box Shadow for customizing the Coupon Bar.
Headings
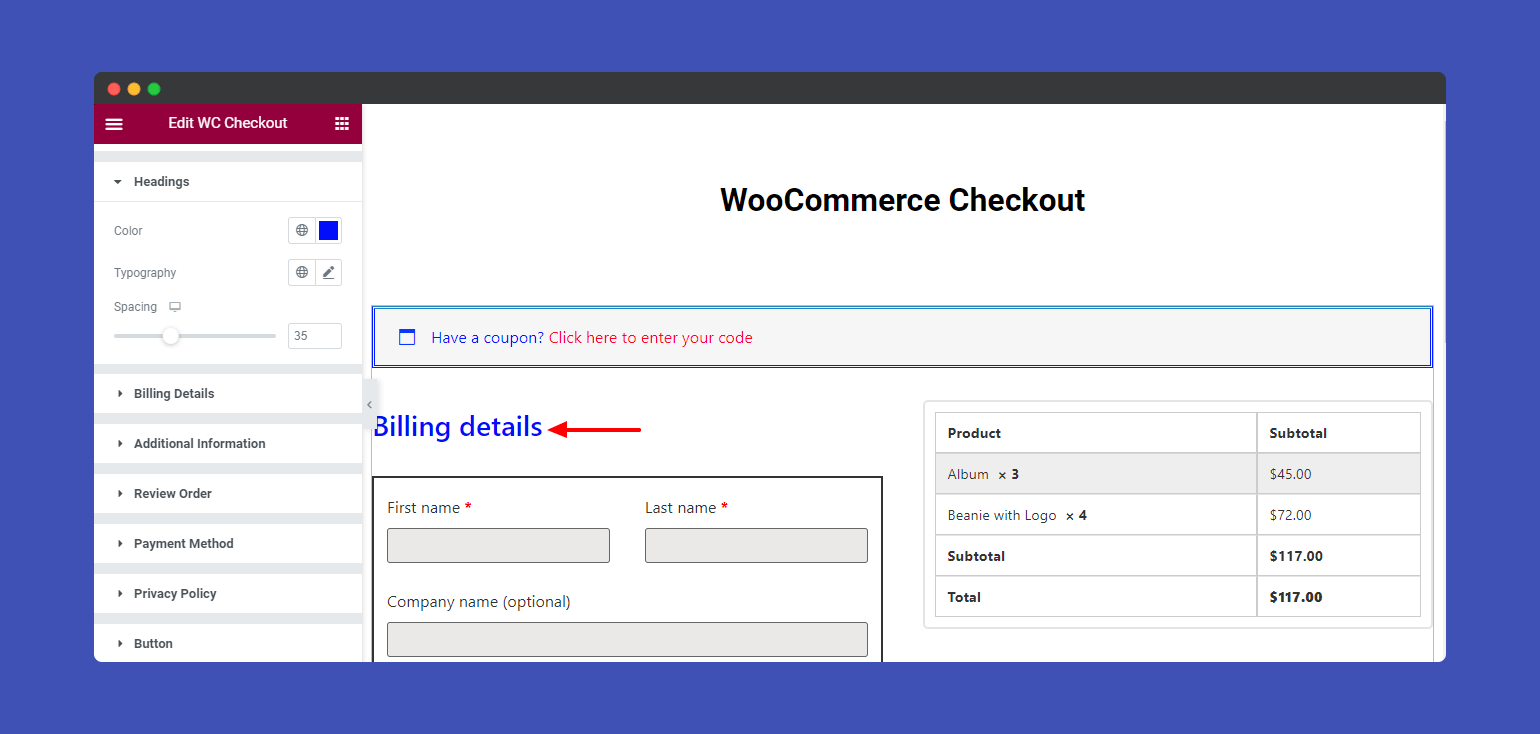
You can also change checkout page Heading style like Color, Typography, and Spacing.
Billing Details
You’re able to redesign your Billing Details content such as Section, Inputs, and Input Label. Add color, border, typography, height, and more.
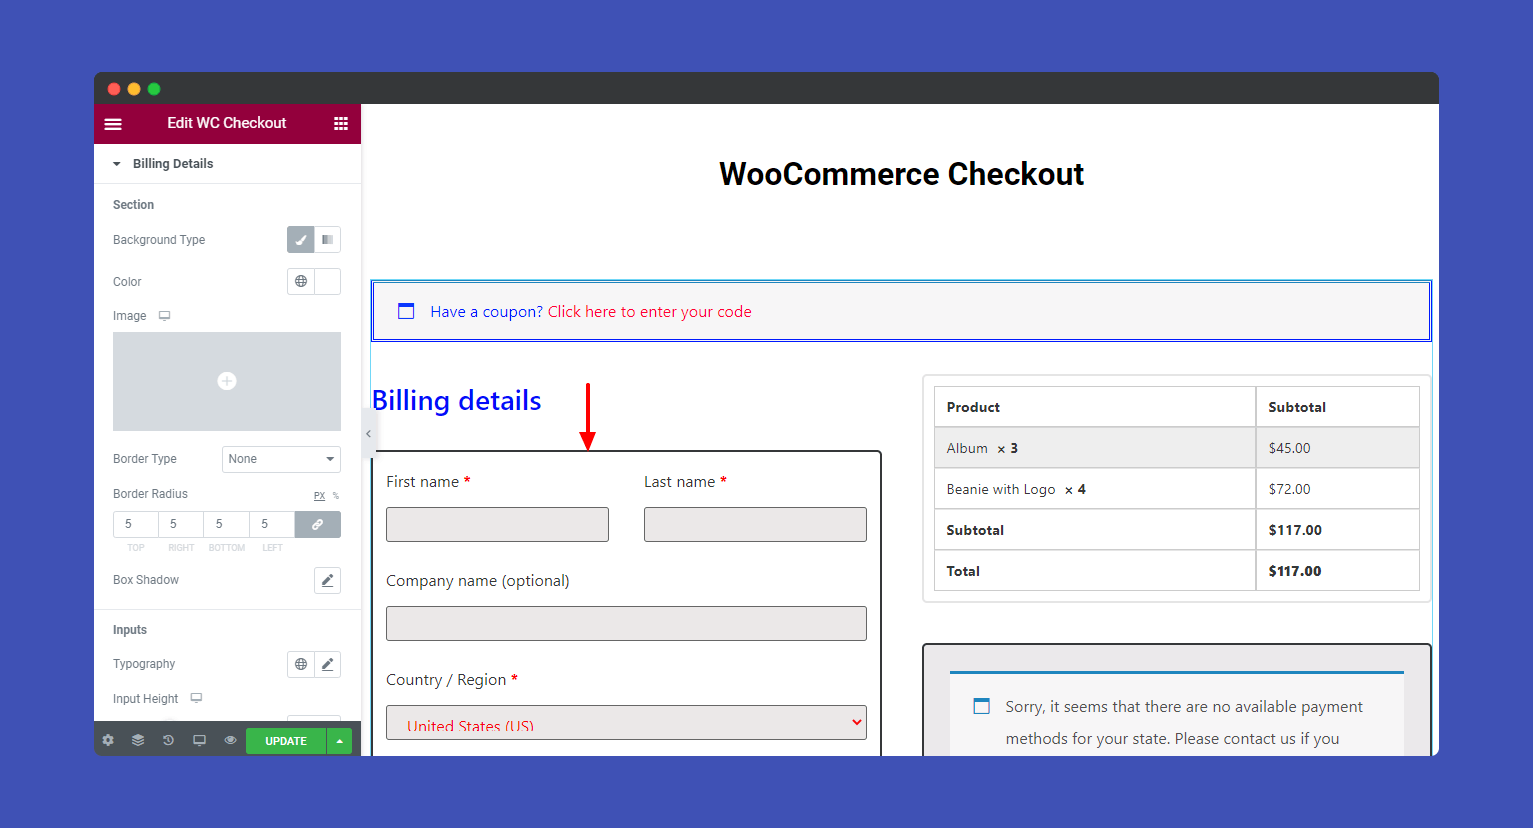
Note: If you edit individual Input Height, the Global Input Height will work no more. Instead, it will overwrite the current input height.
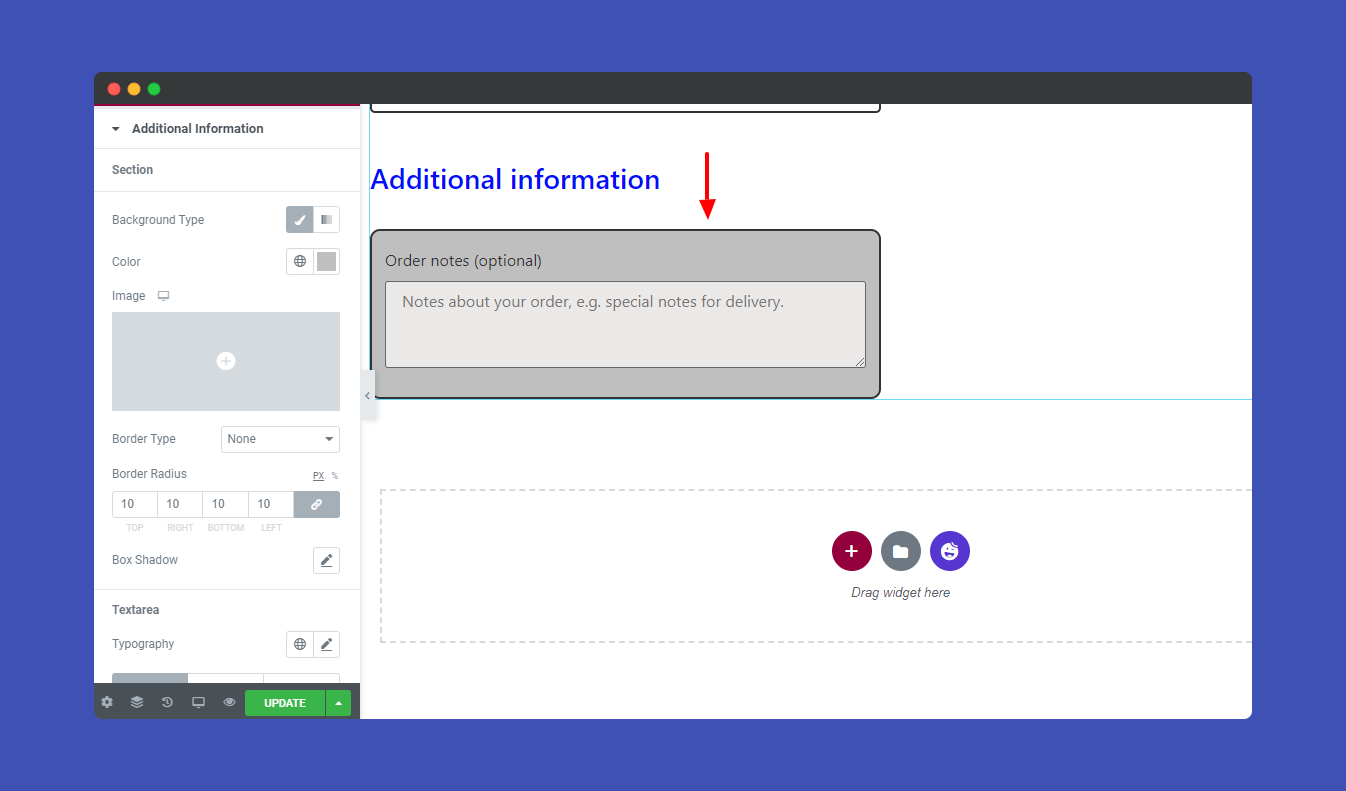
Additional Information
Well, you also change your AdditionaL Information details like Section, Textarea, and Textarea Label.
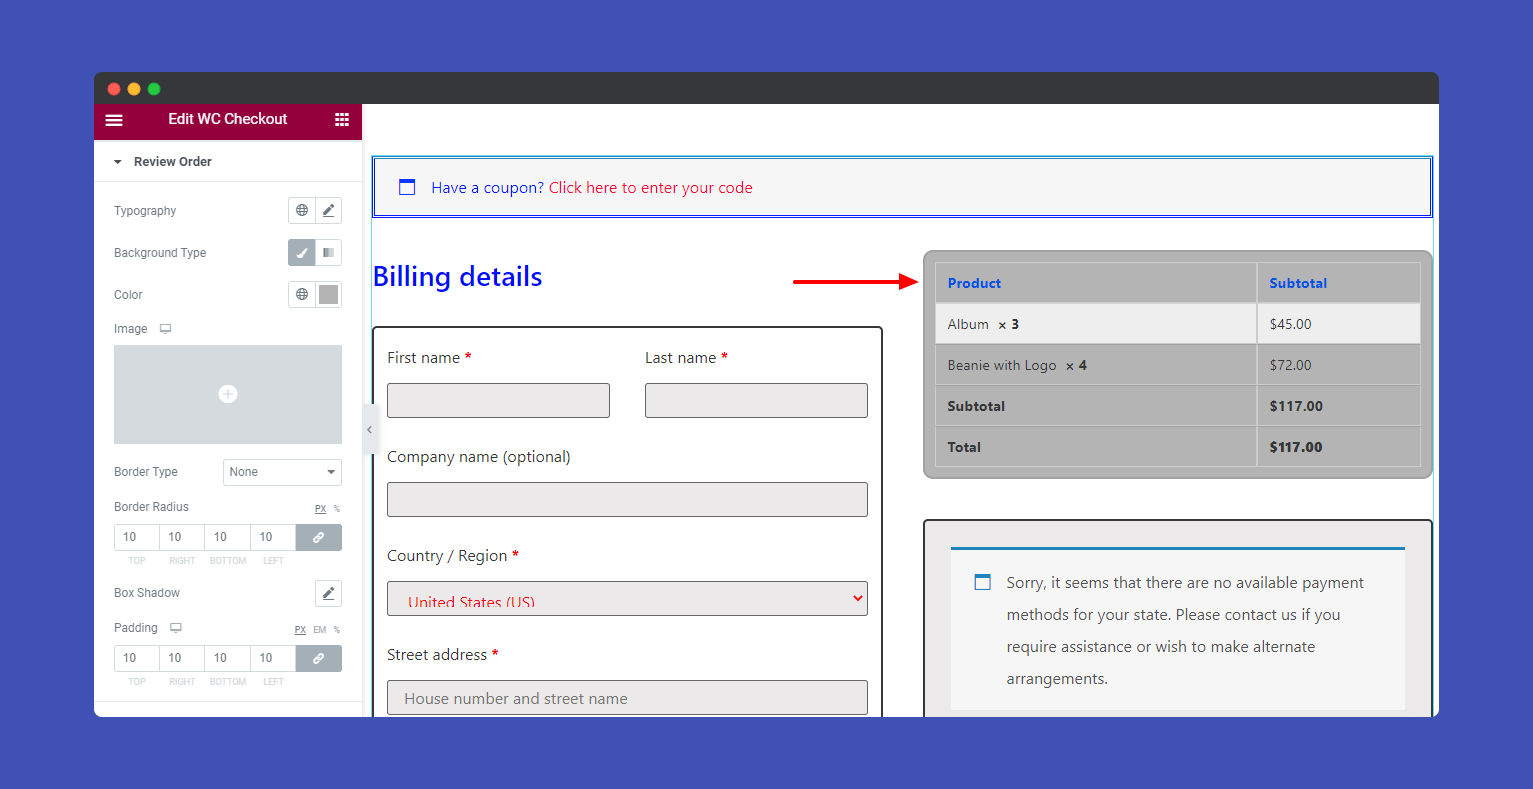
Review Order
Here, we style the Review Order table content like Table Head, Table Body, Table Footer, and Table Border.
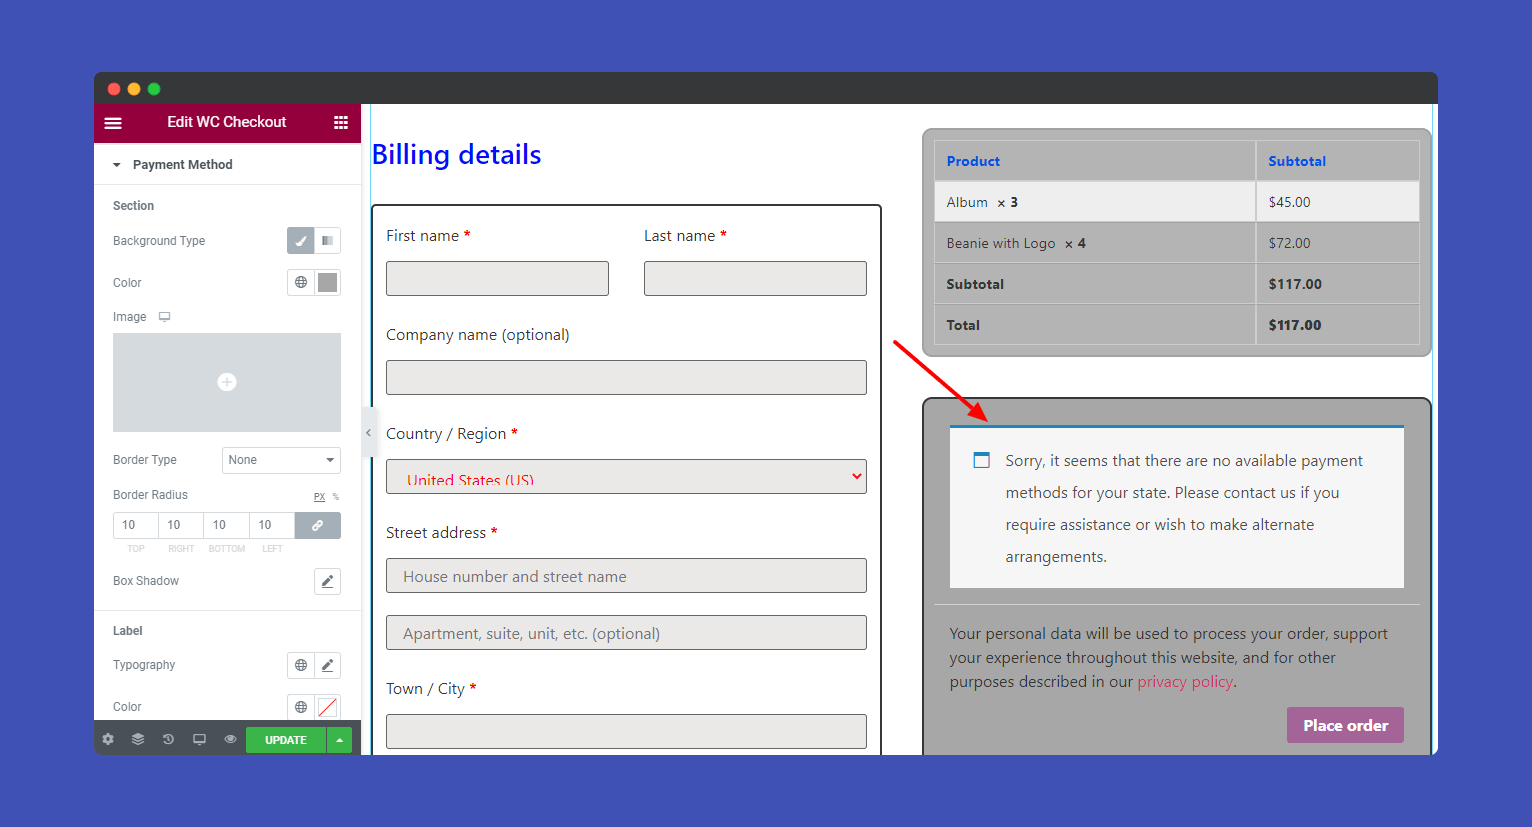
Payment Method
In the Style–>Payment Method, you can style the payment details by changing the Section, Label, and Message.
Privacy Policy
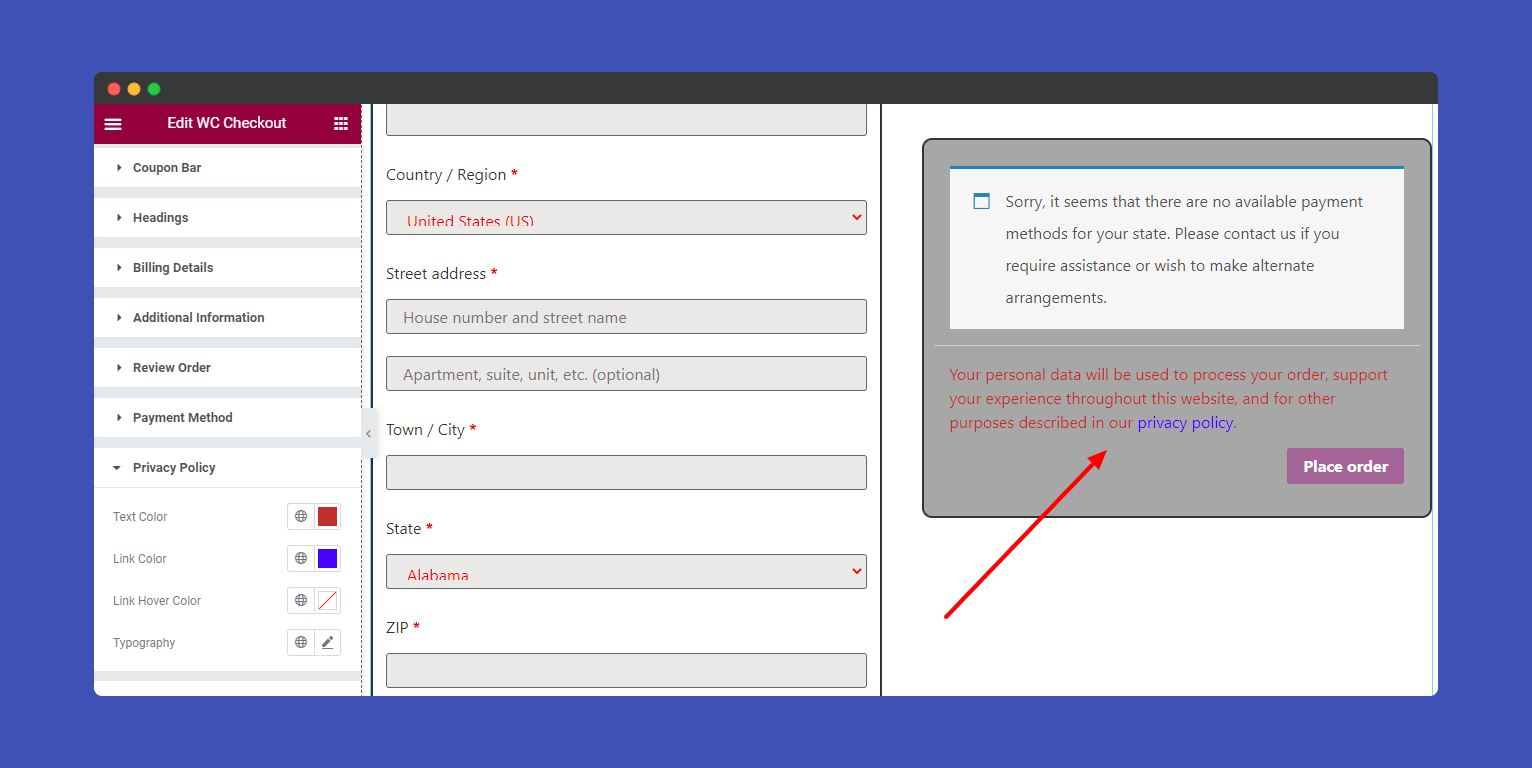
Let’s edit the Text, Color, Link Color, Link Hover Color, and Typography of the Privacy Policy.
Button
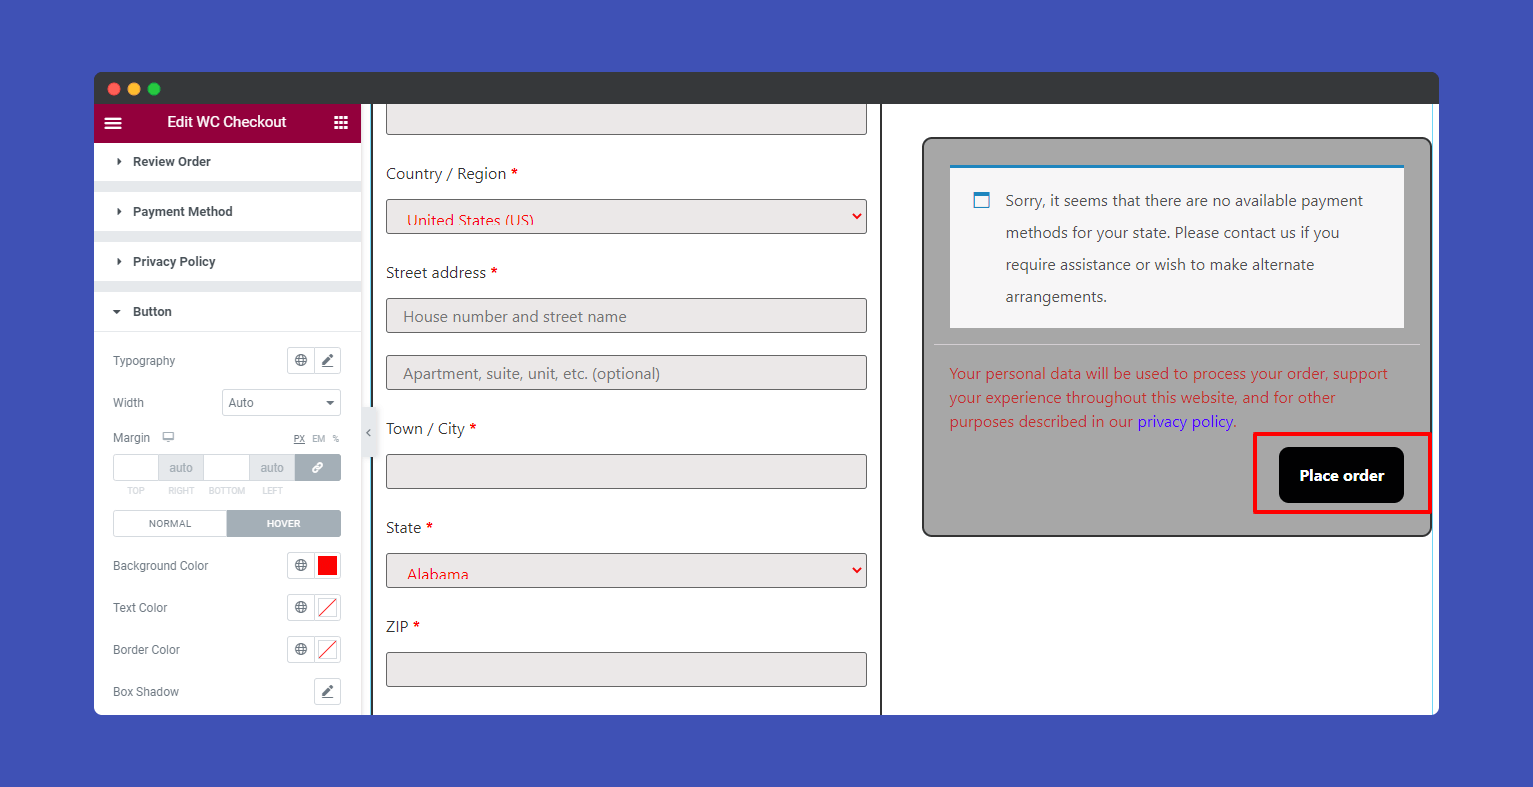
There are lots of styling option to design the Button style.
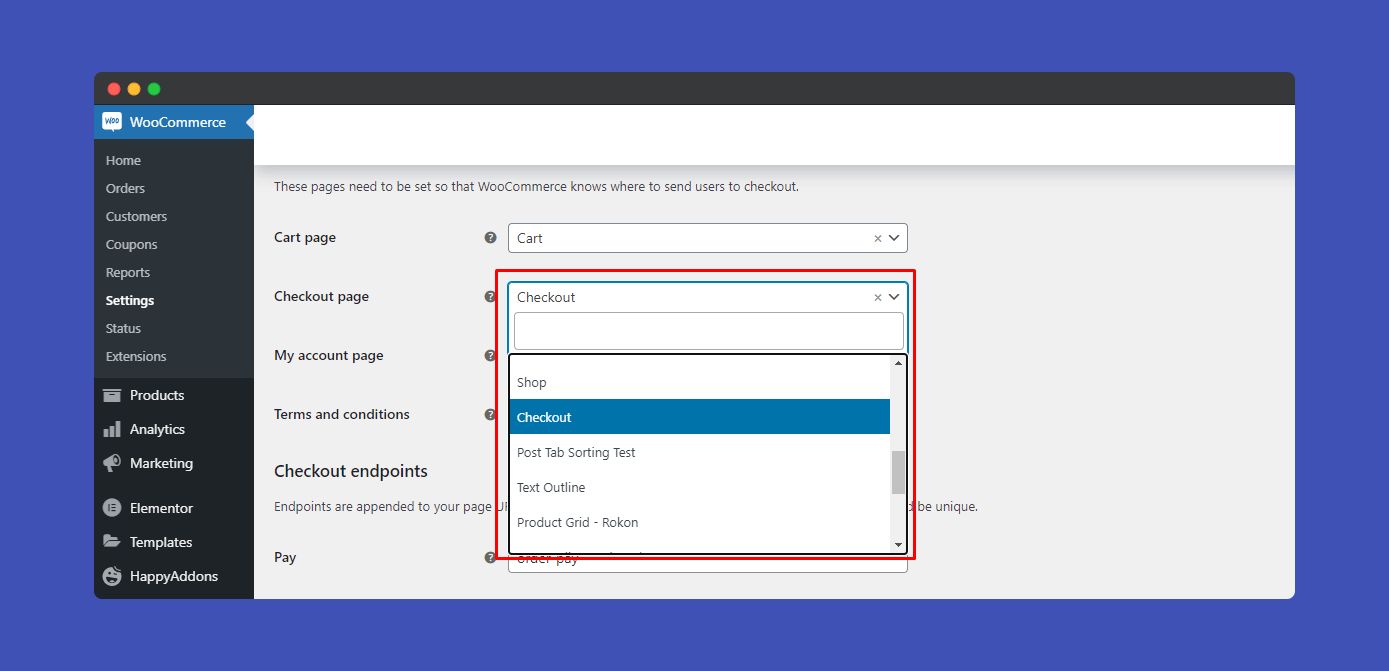
Note: If you think that you will not use the default WooCommerce checkout page, instead you want to create a new checkout page and design it using the Elementor, you can do it. To do this, you have to go to the WooCommerce–>Setting. Then click the Advanced tab. Here you’ll see the option to define the newly created page as your checkout page.
Note: If you find something will not work properly, you should click the Update changes to page ‘Apply‘ button.
Step: 4
If you want to add motion effects, happy effects, background, or make it responsive and more intriguing, click on ‘Advanced‘ to explore those options. the ‘Advanced‘ is a default feature of Elementor.
Give a read to this Document to know more about advanced features & functions.
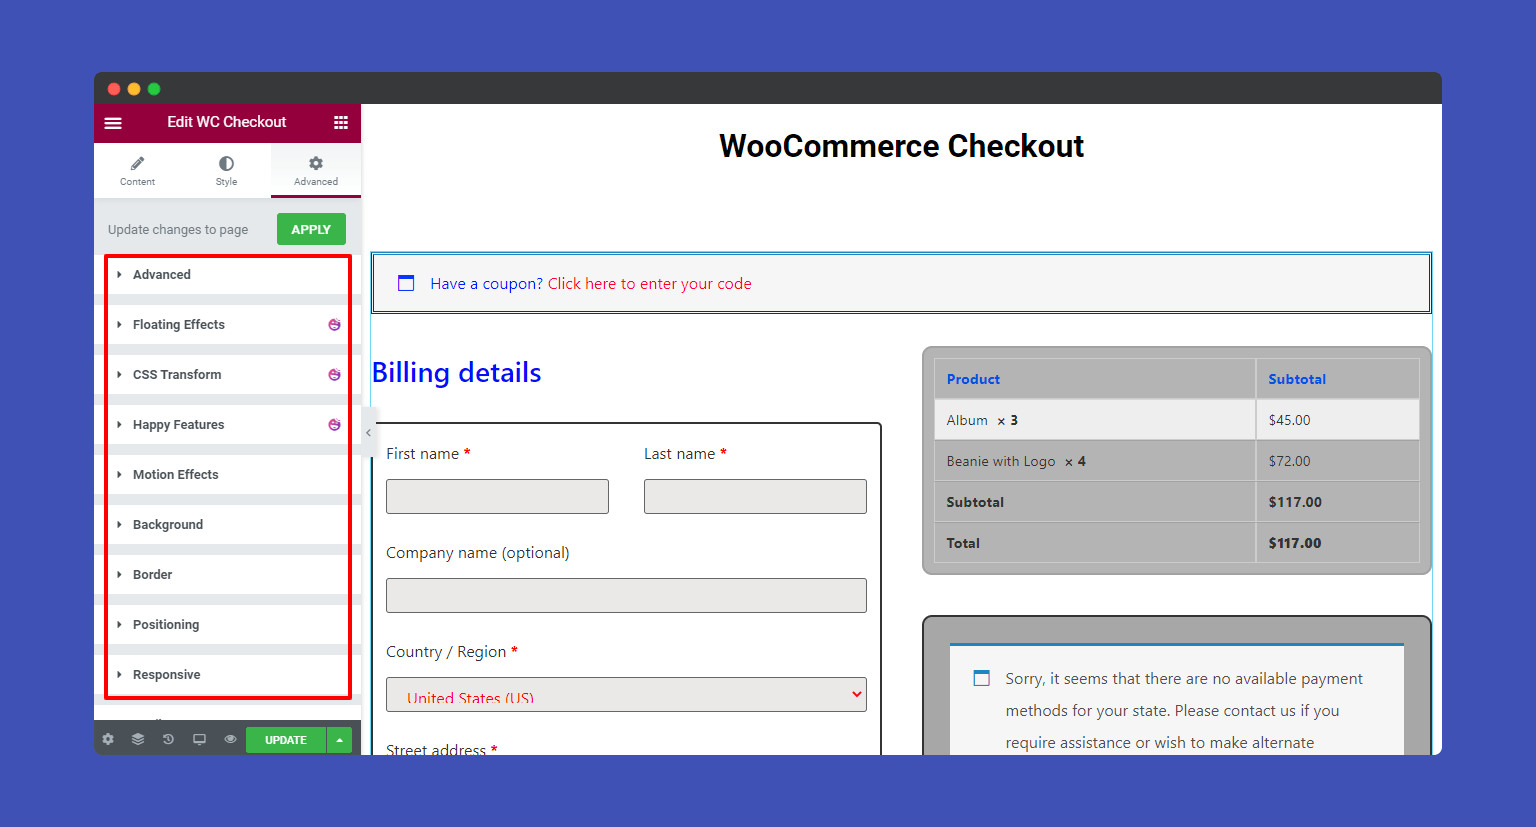
Here is the final preview of WooCommerce Checkout widget.
That’s it.
