How to Use WooCommerce Free Shipping Progress Bar
WooCommerce Free Shipping Bar is a new widget from HappyAddons Pro that works with the WooCommerce shipping cart. It is a progress bar that displays the amount of money a customer needs to spend to reach the minimum purchase requirement for free shipping. It shows the progress toward the free shipping threshold, determined based on the current cart amount.
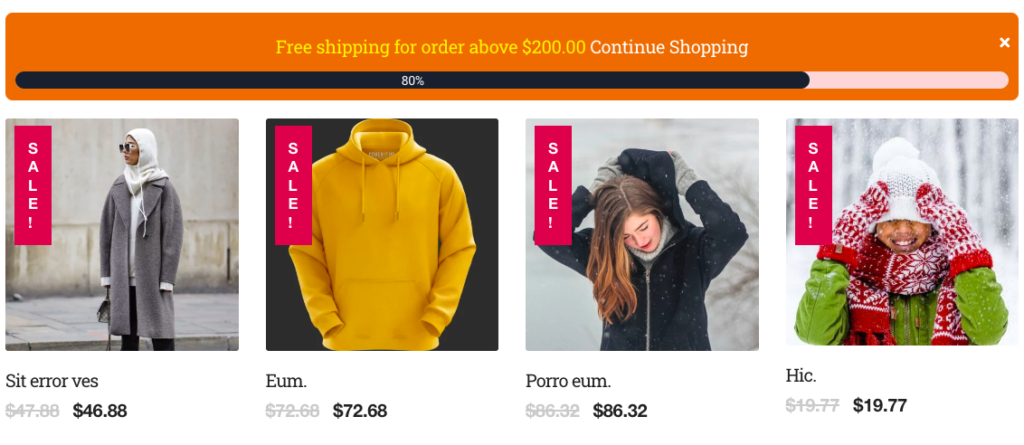
Pre-requisites
- WooCommerce
- Happy Addons
- Happy Addons Pro.
Step 1: WooCommerce set up
As this widget is directly connected to WooCommerce Shipping, you must set up your WooCommerce Shipping Zone and Shipping Method. Please follow the below steps:
- Goto Admin dashboard > WooCommerce > Settings > Shipping Tab and hit the Add Shipping Zone button. A page will be displayed regarding the shipping zone information fields. Add your Shipping Zone Name and regions. If you want to add state-wise shipping, you can add a specific POSTAL CODE. For more information, visit their official documentation.
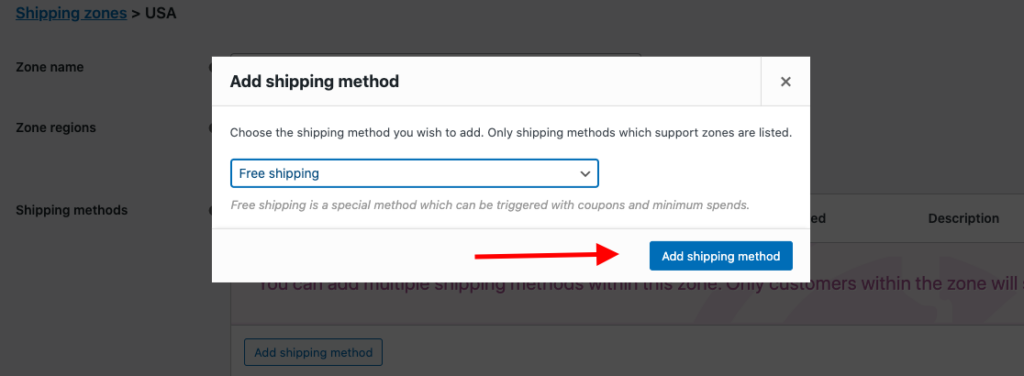
- Click on Add Shipping Method button. A popup window will appear. You need to select the shipping method here. Select Free Shipping from the drop-down and click on Add shipping method button.
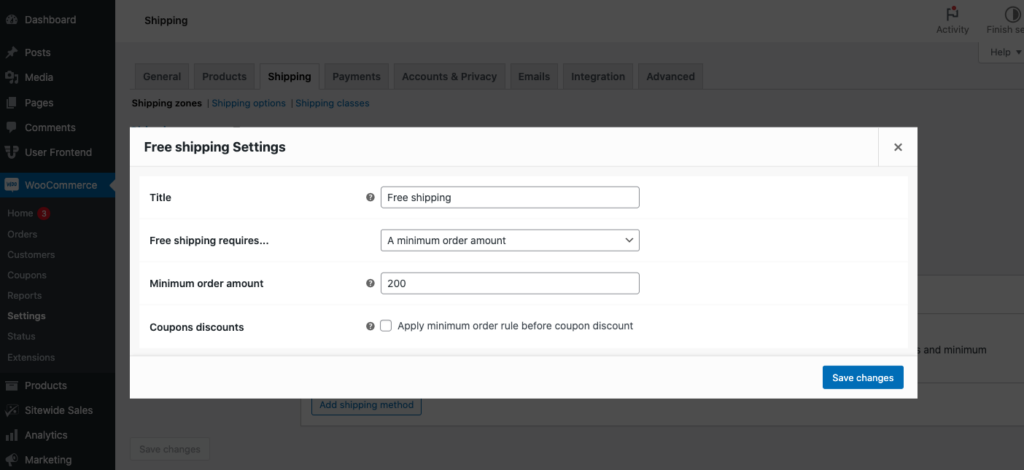
- Edit the newly created shipping method. A new popup window will appear on your screen. You will be asked for the Free Shipping requirements. Select “A minimum order amount” as a requirement. Now, you will need to add the minimum order amount. In our case, I will provide free shipping if any user spends more than $200. Hit the Save Changes button.
Now you are done with the WooCommerce shipping setup. The shipping video goes here.
Step 2: Shipping Bar
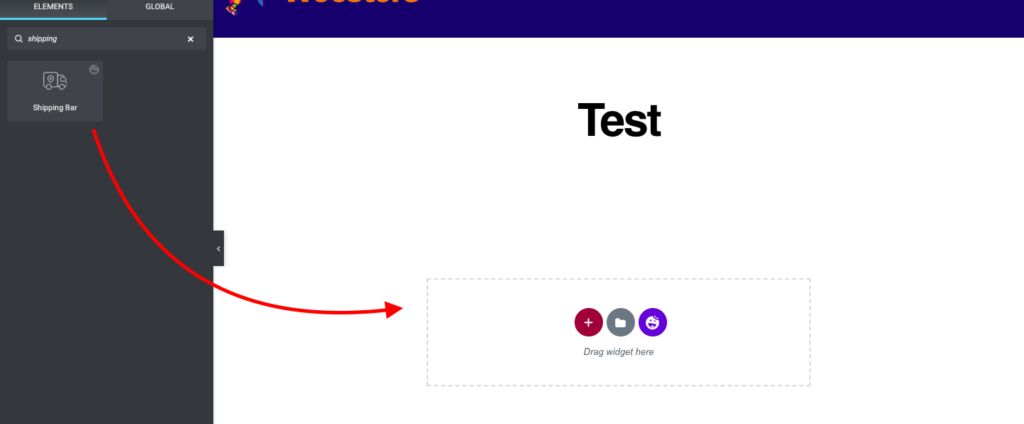
Goto Elementor editing panel. Search for “Shipping Bar,” and Drag and Drop to your Elementor editing panel.
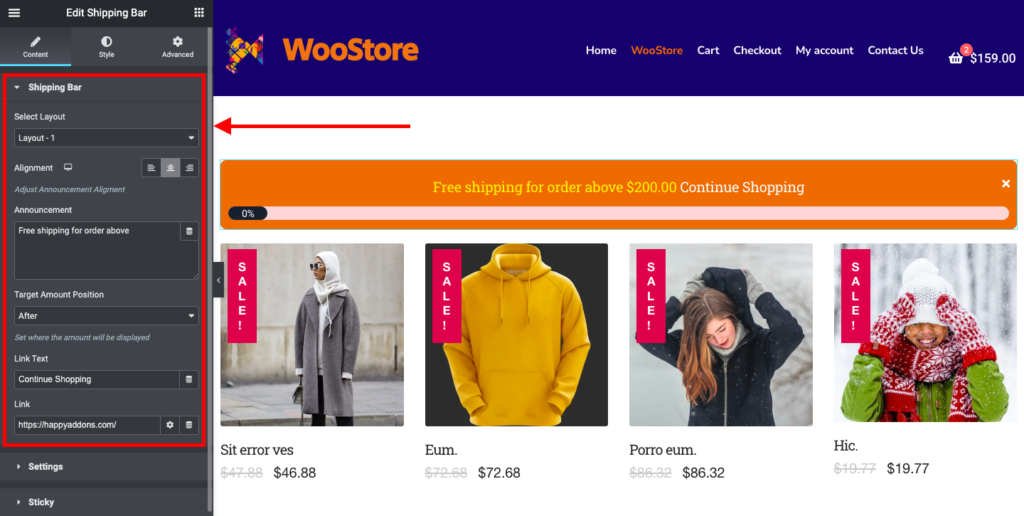
You can change between three built-in preset designs from the Content > Shipping Bar tab. You can add an announcement and its alignment as well.
You can set the Target Amount Position as before or after the announcement. Along with that, you can add Links and modify its text.
Step 3: Settings
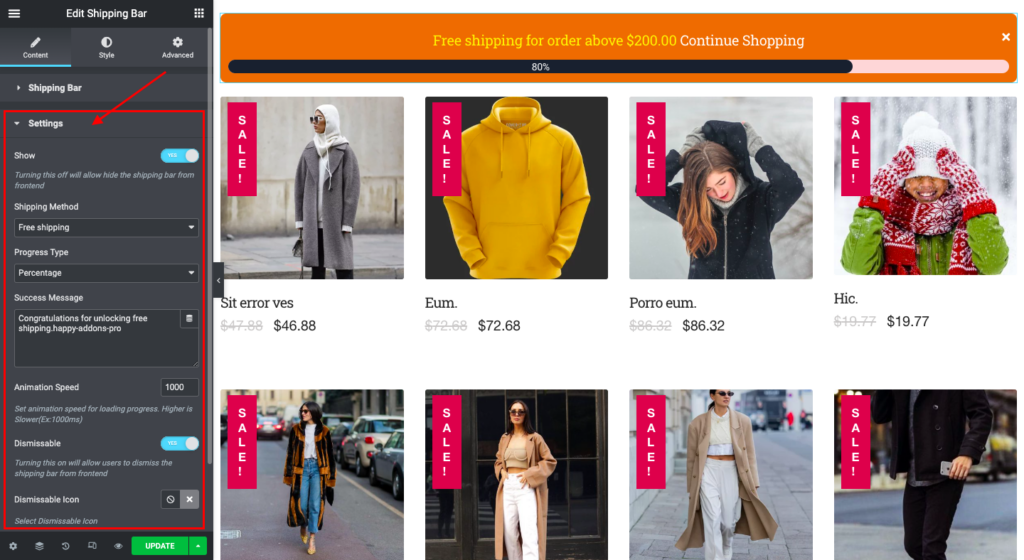
- You can hide or show the shipping bar by toggling the Show button in the Settings tab. Turning this off will hide the shipping bar from the front end.
- After that, select a shipping method(Free Shipping) from the dropdown. You can also choose the Progress bar type as Figure amount or Percentage.
- Add the success message you want to display when the target amount fills up.
- Set the Progress bar animation speed. Note that a Higher value will make the progress bar Slower (Ex:1000ms).
- You can let your users close the Free Shipping bar from the front. Turning the dismissable option on will allow users to dismiss the shipping bar from the front end. You can set the closing icon as well.
Step 4: Sticky Option
The progress bar can be placed anywhere on your page. To enable the sticky mode, simply toggle the “Sticky” option. There are two options for sticky type: “Sticky in Place” and “Custom Position.” “Sticky in Place” will maintain the progress bar’s original location, while “Custom Position” allows you to place it anywhere within the visible area by adjusting the horizontal and vertical positions. You can also set the Z-Index value to prevent overflow. Sticky Video goes here
Step 4: Styling
Shipping Bar:
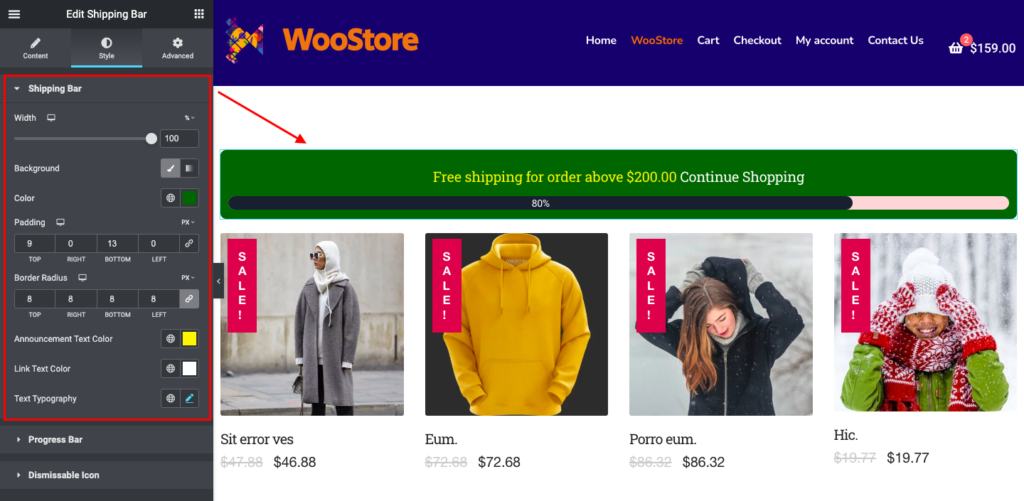
You can adjust the Shipping bar width for your desktop, tablet, and mobile devices individually. You can choose the background, announcement text, and link text color. You can also adjust the padding and border radius for devices like desktops, tablets, and mobile.
Progress Bar:
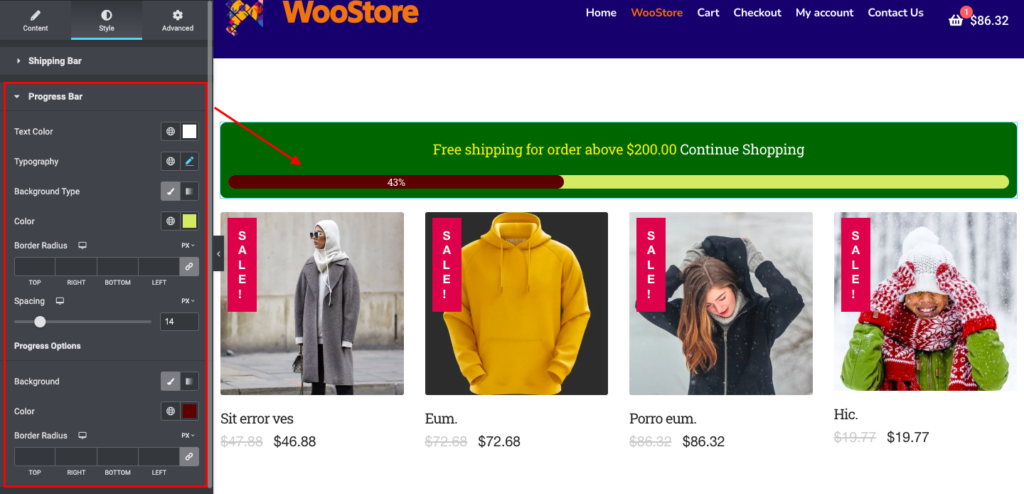
You can choose the Progress bar background color and text color. You can adjust the spacing and border radius for devices like desktops, tablets, and mobiles.
You can also change the progress options’ background color and border radius.
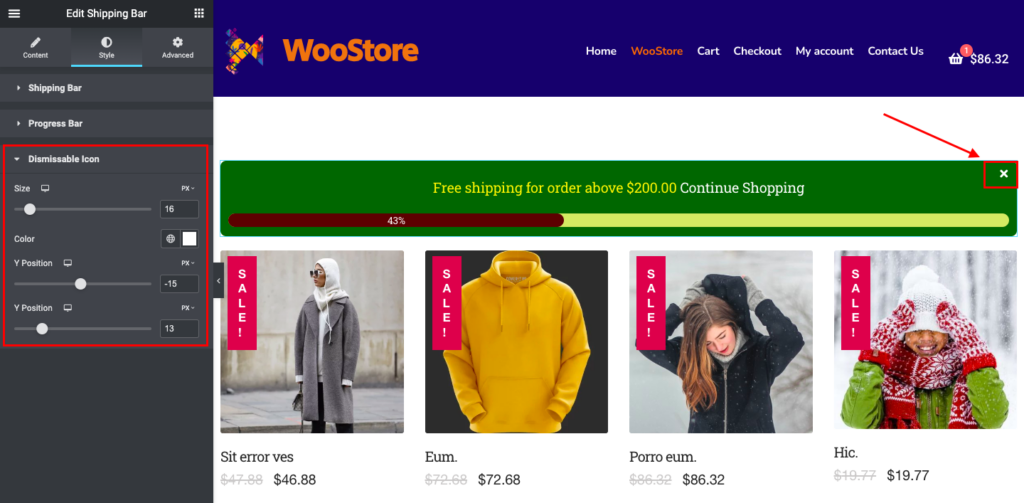
Dismissable Icon:
You can adjust the dismissable icon of the Free Shipping Bar. You can also choose the icon color and adjust the icon’s position for desktop, tablet, and mobile devices.
That’s it. You are ready to use the Free Shipping Bar widget. Cheers!
